Removal Procedure
Tools Required
J 43146
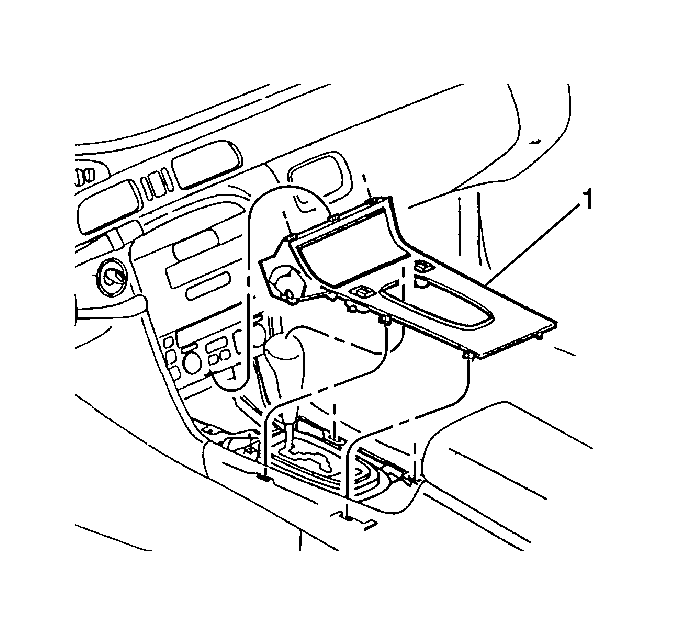
- Remove the console trim plate. Refer to Console Trim Plate Replacement in Instrument Panel, Gauges and Console.
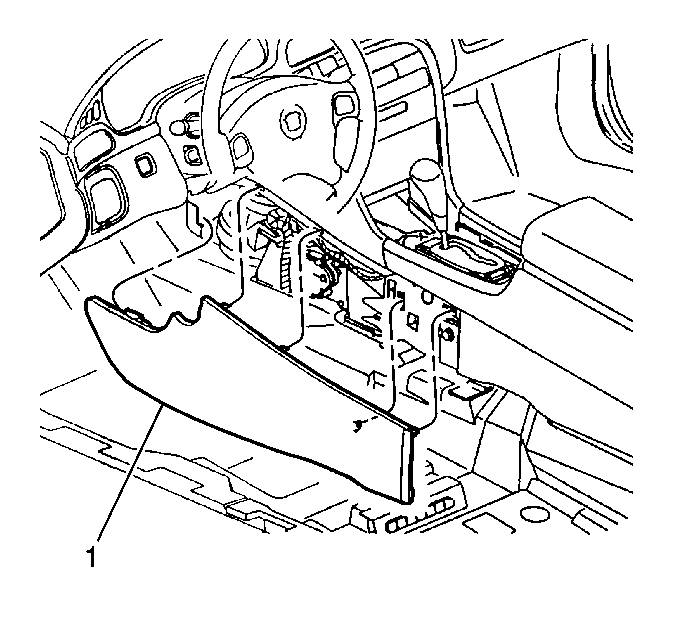
- Remove the left side console trim plate. Refer to Front Floor Console Side Trim Panel Replacement - Left Side in Instrument Panel, Gauges and Console.
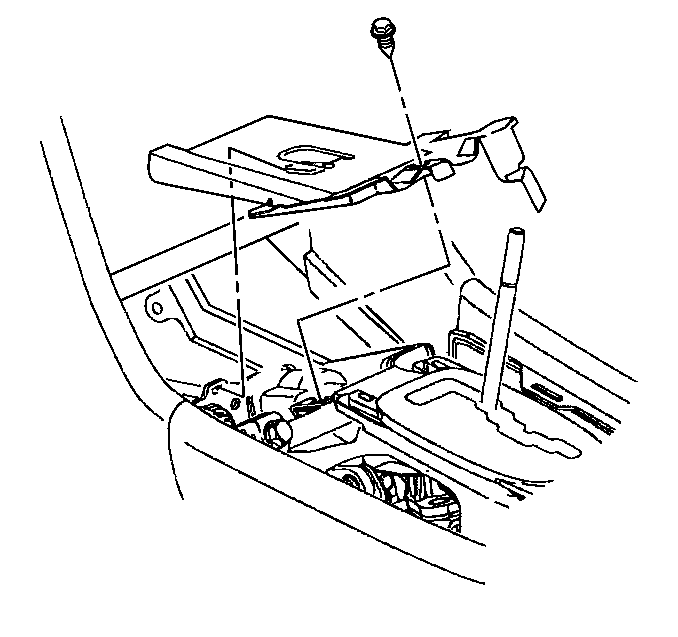
- If equipped with RPO Code (T1A), remove the anti-theft plate and tamper proof fastener from the shifter using the J-43146 tamper proof bit.
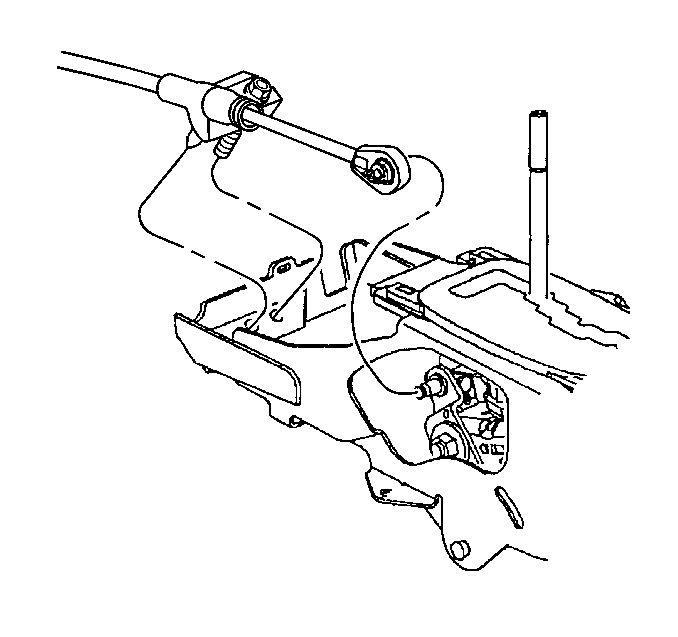
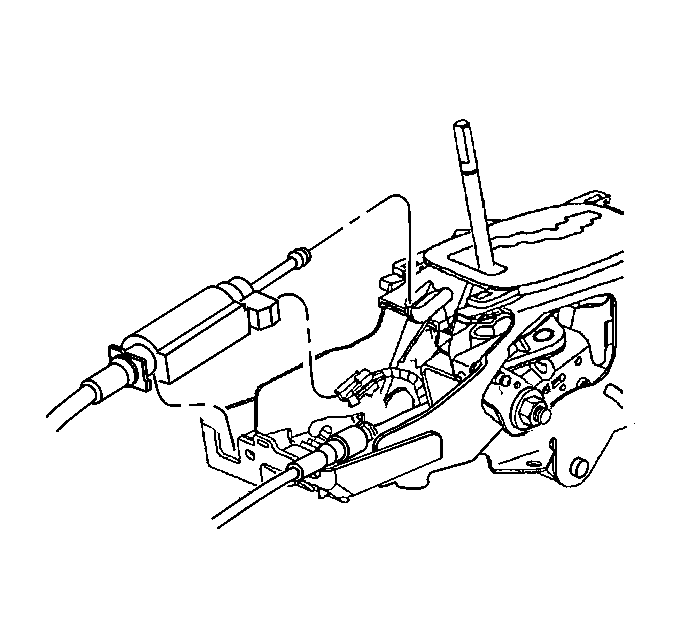
- Unsnap the shift cable terminal from the shifter pin.
- Remove the shift cable bolt and cable from the shifter.
- Disconnect the BTSI wire harness connector from the BTSI solenoid.
- Disengage the locking tab on the park lock cable and lift the cable out of the slot in the shifter.
- Unhook the park lock cable from the park lock cam on the shifter.
- Disconnect the shifter backlight wire harness connector.
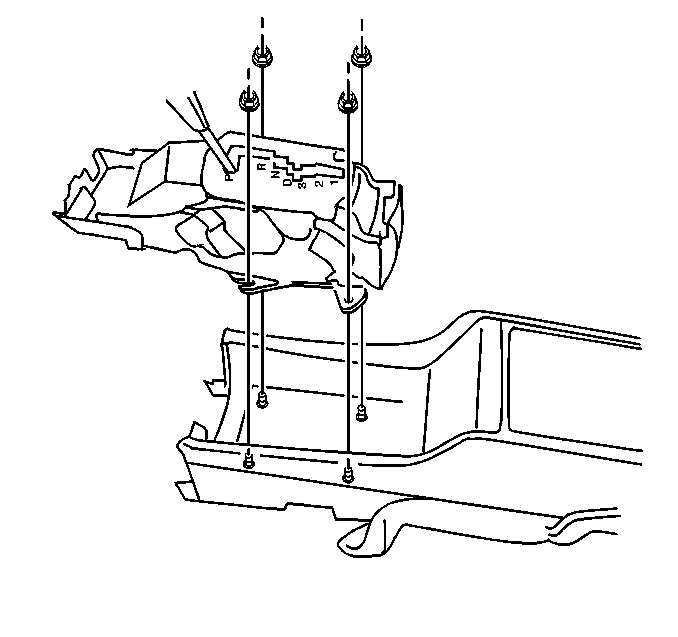
- Remove the shifter fasteners.
- Spread the console side panels apart and remove the shifter assembly.
Installation Procedure
- Spread the console side panels apart and install the shifter assembly.
- Install the shifter fasteners.
- Connect the shifter backlight wire harness connector.
- Insert the park lock cable into the park lock cam on the shifter.
- Slide the park lock cable into the shifter and assure that the cable locking tab is fully engaged.
- Connect the BTSI solenoid wire harness connector.
- Snap the shift cable terminal onto the shifter pin.
- Fasten the shift cable to the shifter.
- Adjust the shift cable as follows.
- If equipped with RPO Code (T1A), install the anti-theft plate and tamper proof fastener onto the shifter using the J-43146 tamper proof bit.
- Install the left side console trim plate. Refer to Front Floor Console Side Trim Panel Replacement - Left Side in Instrument Panel, Gauges and Console.
- Install the console trim plate. Refer to Console Trim Plate Replacement in Instrument Panel, Gauges and Console.

Notice: Use the correct fastener in the correct location. Replacement fasteners must be the correct part number for that application. Fasteners requiring replacement or fasteners requiring the use of thread locking compound or sealant are identified in the service procedure. Do not use paints, lubricants, or corrosion inhibitors on fasteners or fastener joint surfaces unless specified. These coatings affect fastener torque and joint clamping force and may damage the fastener. Use the correct tightening sequence and specifications when installing fasteners in order to avoid damage to parts and systems.
Tighten
Tighten the shifter fasteners to 9 N·m (79 lb in).


Tighten
Tighten the shift cable fastener to 25 N·m (18 lb ft).
| 9.1. | Place the shifter into the N (neutral) position. |
| 9.2. | Loosen the shifter adjuster nut. |
| 9.3. | Tighten the adjuster nut. |
Tighten
Tighten the adjuster nut to 25 N·m (18 lb ft).


