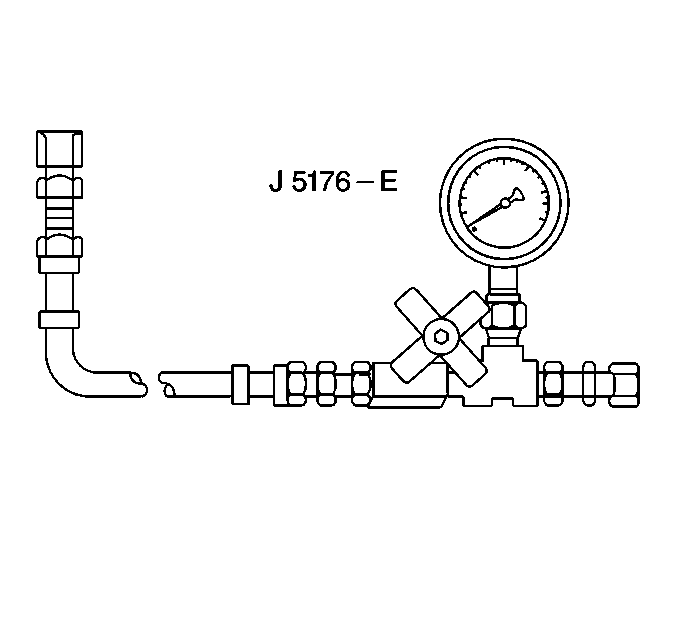
Pressure Test with J 5176-E

Tools Required
| • | J 5176-E Power Steering Pressure Tester |
| • | J 38391-1 Pressure Gauge Adapter |
| • | J 38391-2 Pressure Gauge Adapter |
- Remove the pressure fitting for the gear.
- Connect pressure fitting into female gauge adaptor.
- Thread the male adapter of the gauge into the gear.
- Connect the tester to the adapters.
- Add power steering fluid to pump reservoir if required.
- Open the valve on the gauge.
- Start the engine.
- Allow the system to reach operating temperature.
- Stop the engine.
- Check the fluid level.
- Add fluid if required.
- When the engine is at normal operating temperature, the pressure reading on the gauge (valve open) should be under 1034 kPa (150 psi). STOP ENGINE IF THE PRESSURE is above 1034 kPa (150 psi) and check the hoses for restrictions.
- Start the engine and let it idle.
- Close the valve fully 3 times to shut off flow.
- Record the highest pressure attained each time.
- DO NOT leave the valve fully CLOSED for more than 5 seconds.
- Shut engine OFF.
- Remove the analyzer.
- Remove spare hose.
- Reconnect pressure hose.
- Check fluid level or make needed repairs.
Notice: Use the correct fastener in the correct location. Replacement fasteners must be the correct part number for that application. Fasteners requiring replacement or fasteners requiring the use of thread locking compound or sealant are identified in the service procedure. Do not use paints, lubricants, or corrosion inhibitors on fasteners or fastener joint surfaces unless specified. These coatings affect fastener torque and joint clamping force and may damage the fastener. Use the correct tightening sequence and specifications when installing fasteners in order to avoid damage to parts and systems.
Tighten
Tighten both connections to 30 N·m (22 lb ft).
| • | If the pressures recorded are 11721 kPa (1700 psi) or above and within 345 kPa (50 psi) of each other the pump is functioning within specifications. |
| • | If the pressures recorded are not within 345 kPa (50 psi) of each other, the control valve assembly in the pump is sticking. Replace the pump. |
| • | If the pressures recorded are below 11721 kPa (1700 psi) and within 345 kPa (50 psi) of each other, replace the pump. |
Tighten
Tighten fitting to 30 N·m (22 lb ft).
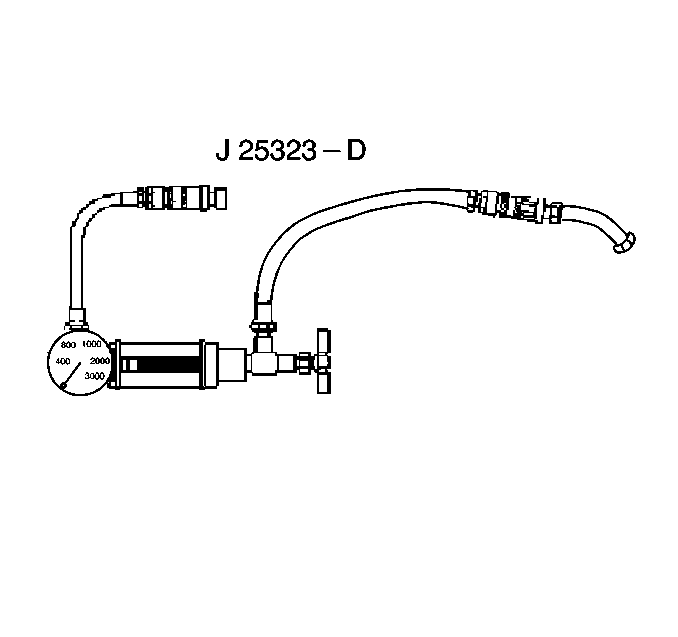
Flow Rate and Pressure Test with J 25323-D

Tools Required
J 25323-1 Power Steering System Analyzer
- Connect the analyzer J 25323-D into the steering system.
- Remove the pressure fitting from the gear.
- Connect the pressure fitting into the female analyzer adapter.
- Thread the male adapter of the analyzer into the gear.
- Connect the analyzer to the adapters.
- Add power steering fluid to the pump reservoir if required.
- Open the valve on the analyzer.
- Start the engine.
- Allow the system to reach operating temperature.
- Stop the engine.
- Check the fluid level.
- Add fluid if required.
- Allow the system to reach normal operating temperature.
- Record the pressure and flow reading (valve open).
- The pressure reading should be under 1034 kPa (150 psi).
- If the pressure is above 1034 kPa (150 psi) stop the engine and check the hoses for restrictions.
- Partially close the valve to build up 4827 kPa (700 psi) of pressure.
- Record the flow.
- Substract the flow from the flow reading taken in step 15.
- The flow should not drop more than 3.8 liters/min. (1 gallon/min.). If below specifications replace the pump.
- Close the valve fully and open 3 times.
- Record the highest pressure readings each time the valve is closed.
- DO NOT leave the valve fully closed for more than 5 seconds or damage to the pump may occur.
- All three readings must be within 345 kPa (50 psi), if not replace the pump.
- Check the flow control valve for free movement in the bore.
- Increase the engine speed to 1500 RPM.
- Read the flow.
- Subtract the flow reading from the reading in step 15.
- The flow should not vary more than 3.8 liters/min. (1 gallon/min.).
- Turn the steering wheel all the way left.
- Record the flow.
- Turn the steering wheel all the way right.
- Record the flow.
- The flow should drop below 3.8 liters/min. (1 gallon/min.) at each stop.
- If the flow is within specifications the problem is not the pump.
- Check the gear for leakage.
- Bleed the system of air after completing any repair and/or removal of the analyzer.
- Recheck the power steering fluid level.
- Add fluid if necessary.
Notice: Use the correct fastener in the correct location. Replacement fasteners must be the correct part number for that application. Fasteners requiring replacement or fasteners requiring the use of thread locking compound or sealant are identified in the service procedure. Do not use paints, lubricants, or corrosion inhibitors on fasteners or fastener joint surfaces unless specified. These coatings affect fastener torque and joint clamping force and may damage the fastener. Use the correct tightening sequence and specifications when installing fasteners in order to avoid damage to parts and systems.
Tighten
Tighten both connections to 30 N·m (22 lb ft).
Important: When adding fluid always use power steering fluid, GM P/N 12345866 or equivalent meeting GM Specifications 9985010. Failure to use the proper fluid will cause hose and seal damage and fluid leaks.
