For 1990-2009 cars only
Park Lock Cable Replacement LHD
Removal Procedure
Tools Required
J 43146
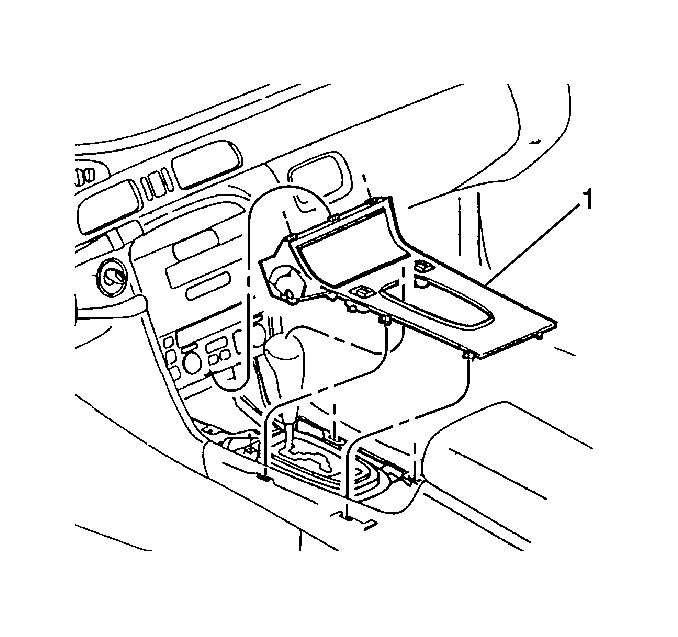
- Remove the console trim plate.
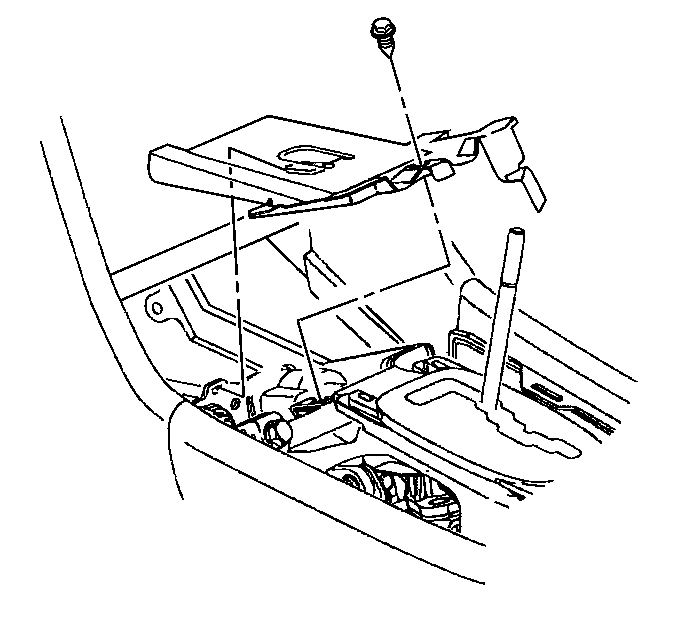
- If equipped with RPO Code (T1A), remove the anti-theft plate and tamper proof fastener from the shifter using the J-43146 tamper proof bit.
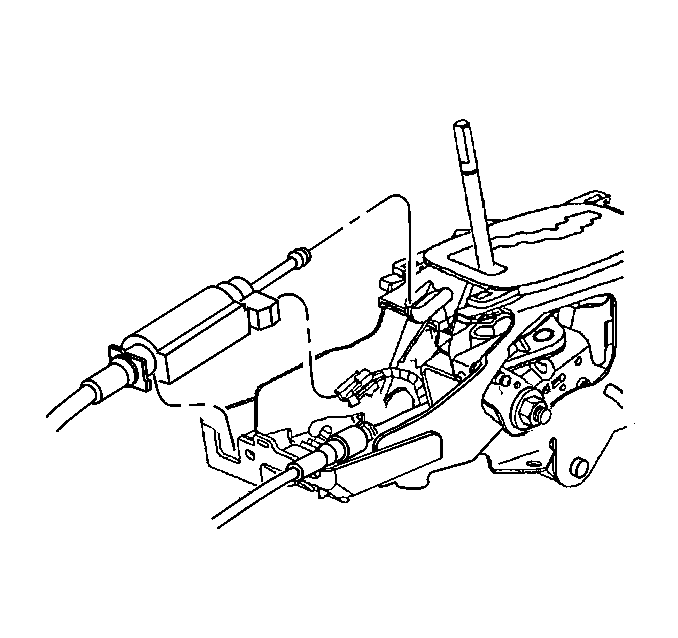
- Disconnect the BTSI wire harness connector from the BTSI solenoid.
- Disengage the locking tab on the park lock cable and lift the cable out of the slot in the shifter.
- Unhook the park lock cable from the park lock cam on the shifter.
- Remove the radio. Refer to Radio Replacement in Entertainment.
- Remove the left i/p closeout panel. Refer to i/p Closeout Panel Removal Instrument Panel Insulator Panel Replacement - Left Side in Instument Panel, Gauges and Console.
- Remove the left console side panel. Refer to Front Floor Console Side Trim Panel Replacement - Left Side in Instument Panel, Gauges and Console.
- If equipped with RPO Code (T1A) anti-theft option, the Instrument Panel must be removed in order to remove the anti-theft park lock cable which has a ridged housing and cannot be removed with the i/p in the vehicle. Refer to Instrument Panel Carrier Replacement in Instrument Panel, Gauges and Console.
- Turn the ignition switch to the run position.
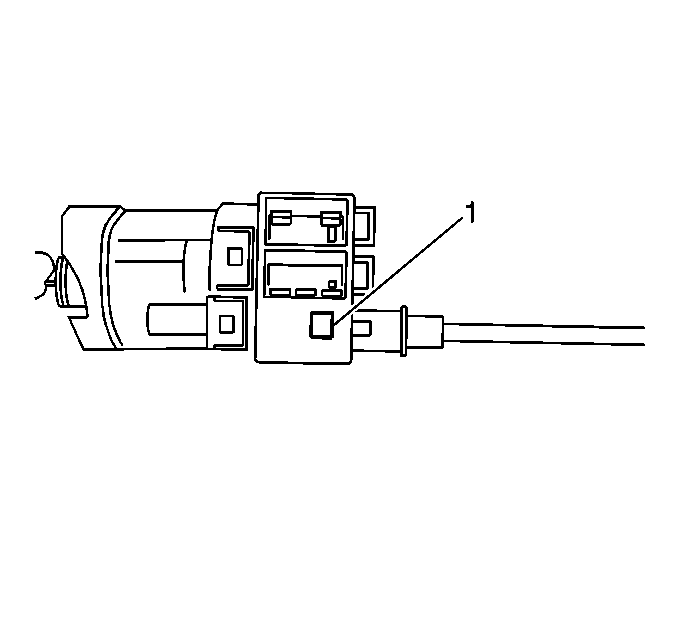
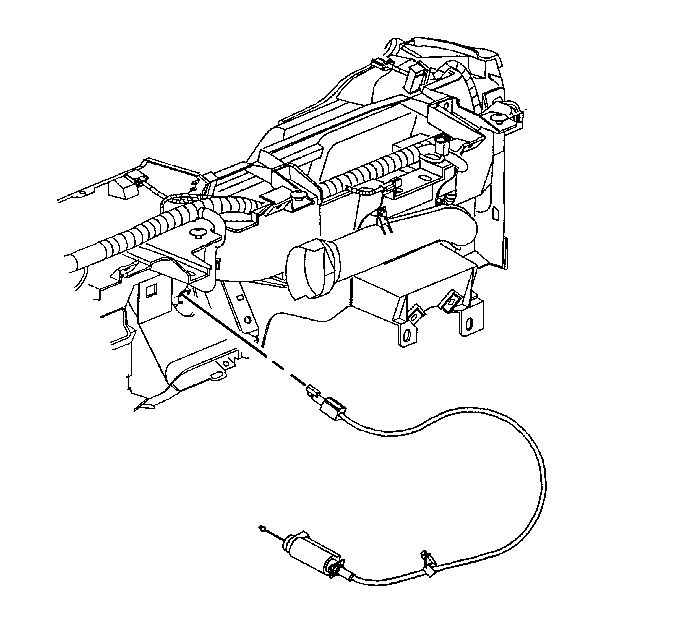
- Depress the locking tab (1) on the cable and pull the cable out of the back of the ignition switch. The locking tab is located on the bottom of the ignition switch facing in the 6 o'clock position
- Remove the park lock cable from the vehicle.
Installation Procedure
- If equipped with RPO Code (T1A) anti-theft option, Install the park lock cable into the Instrument Panel before installing the i/p into the vehicle. Refer to Instrument Panel Carrier Replacement in Instument Panel, Gauges and Console.
- Turn the ignition switch to the run position.
- Install the park lock cable into the back of the i/p.
- Align the park lock cable locking tab (1) with its slot in the ignition switch and snap the cable into the switch. The locking tab should be facing downward at the 6 o'clock position.
- Route the park lock cable back to its original position.
- Connect the park lock cable to the park lock cam on the shifter and slide the cable housing into the shifter.
- If equipped with RPO Code (T1A), install the anti-theft plate and tamper proof fastener onto the shifter using the J-43146 tamper proof bit.
- Install the radio. Refer to Radio Replacement in Entertainment.
- Install the left console side panel. Refer to Front Floor Console Side Trim Panel Replacement - Left Side in Instument Panel, Gauges and Console.
- Install the left I/P closeout panel. Refer to Instrument Panel Insulator Panel Replacement - Left Side in Instument Panel, Gauges and Console.
- Install the console trim Plate. Refer to Console Trim Plate Replacement in Instument Panel, Gauges and Console.



Park Lock Cable Replacement RHD
Removal Procedure
- Shift the park lever into neutral.
- Remove the console trim plate.
- Remove the cable end cap from the transmission park/neutral position switch lever.
- Remove the cable from the bracket by disengaging the lock button.
- Remove the right sound insulator.
- Disconnect the courtesy light in the right sound insulator.
- Disconnect the auxiliary power outlet connector.
- Remove the knee bolster trim panel.
- Remove the right console trim panel. Refer to Front Floor Console Side Trim Panel Replacement - Left Side .
- Remove the bolt that retains the park lock cable to the console.
- Turn the ignition switch to the run position.
- Remove the right hand IP closeout panel. Refer to Instrument Panel Insulator Panel Replacement - Left Side .
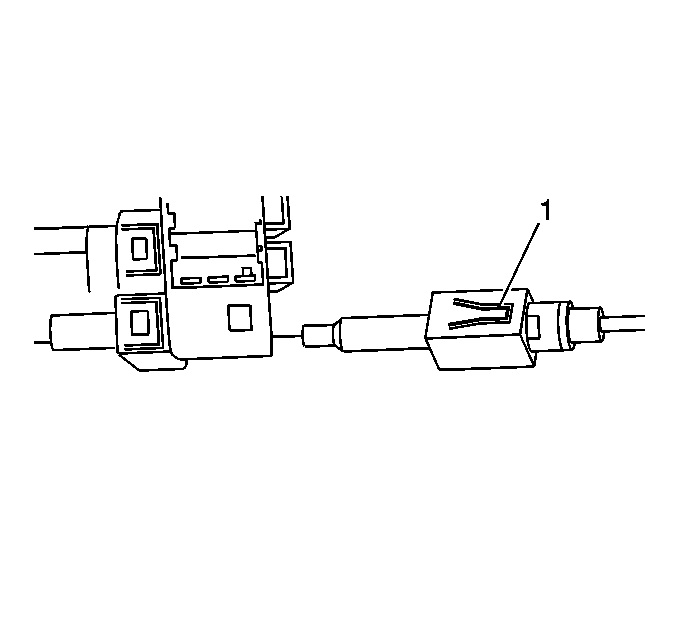
- Depress the locking tab (1) on the cable and pull the cable out of the back of the ignition switch. The locking tab is located on the bottom of the ignition switch facing the 6 o'clock position.
- Remove the park lock cable from the vehicle.


Installation Procedure
- Turn the ignition switch to the run position.
- Route the park lock cable through the IP in the same manner in which it was removed. Align the park lock cable locking tab (1) with the slot in the ignition switch and snap the cable into the switch. The locking tab should face downward at the 6 o'clock position.
- Install the right side IP closeout panel. Refer to Instrument Panel Insulator Panel Replacement - Left Side .
- Connect the park lock cable to the park lock cam on the shifter and slide the cable housing into the shifter.
- Install the bolt that retains the park lock cable to the console.
- Connect the auxiliary power connector to the right console side panel.
- Install the right console side panel. Refer to Front Floor Console Side Trim Panel Replacement - Left Side .
- Install the knee bolster trim panel.
- Connect the courtesy light connector to the right sound insulator.
- Install the right sound insulator.
- Install the console trim plate.


