Removal Procedure
Notice: To prevent possible seat belt damage, refer to the following items before
servicing or replacing lap and shoulder belts, including single loop belt
systems:
| • | Lap and shoulder belts will be
serviced as follows: |
| - | Replace only the part in question. |
| - | Do not intermix standard and deluxe
belts on front or rear seats. |
| - | All attachment hardware
must be replaced, not reused. |
| • | Keep sharp edges and damaging objects away from belts. |
| • | Avoid bending or damaging any portion of the belt buckle
or latch plate. |
| • | Do not bleach or dye belt or strap
webbing. Clean with a mild soap solution and water. |
| • | When installing lap or shoulder belt anchor bolts, start the bolts by hand
to ensure that the bolts are threaded straight. |
| • | Do not attempt repairs on lap or shoulder belt retractor mechanisms to lap
belt retractor covers. Replace defective assemblies with new service replacement
parts. |
| • | Do not attempt to remove the seat belt retractor
cover. The cover and the long rivet securing the cover to the retractor are
not available as service replacement parts. |
- Remove the rear seat cushion.
Refer to
Rear Seat Cushion Replacement
in Seats.
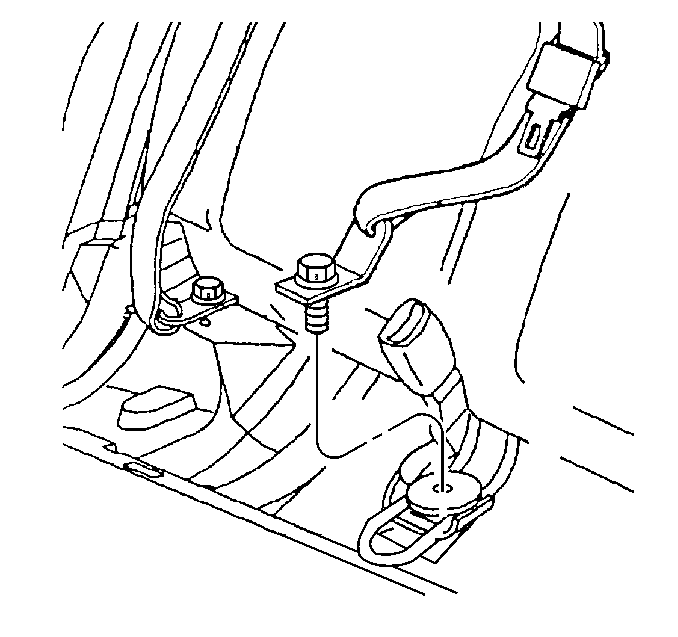
- Remove the rear seat center belt anchor bolt.
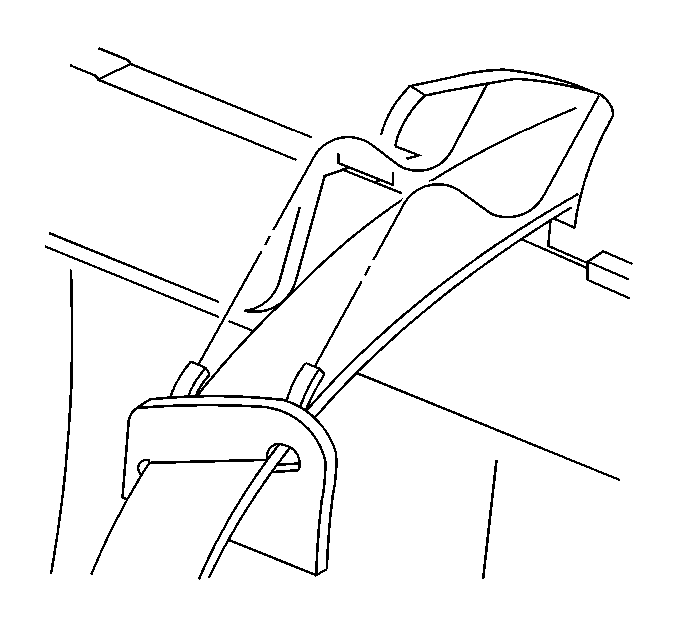
- Disengage the center belt
escutcheon from the rear shelf panel.
- Flip the rear seat center belt up on the rear shelf panel to expose
the retractor anchor bolt.
- Remove the rear seat center
belt retractor anchor bolt.
- Remove the rear trim panel. Refer to
Rear Window Shelf Trim Panel Replacement
in Interior Trim.
- Remove the rear compartment trim panel to access the rear seat
center belt retractor. Refer to
Rear Compartment Trim Panel Replacement
in Body Rear End.
- Remove the rear seat center belt through the rear compartment.
Installation Procedure
- From the rear compartment,
feed the rear seat center belt anchor plate and belt through opening in the
rear shelf panel.
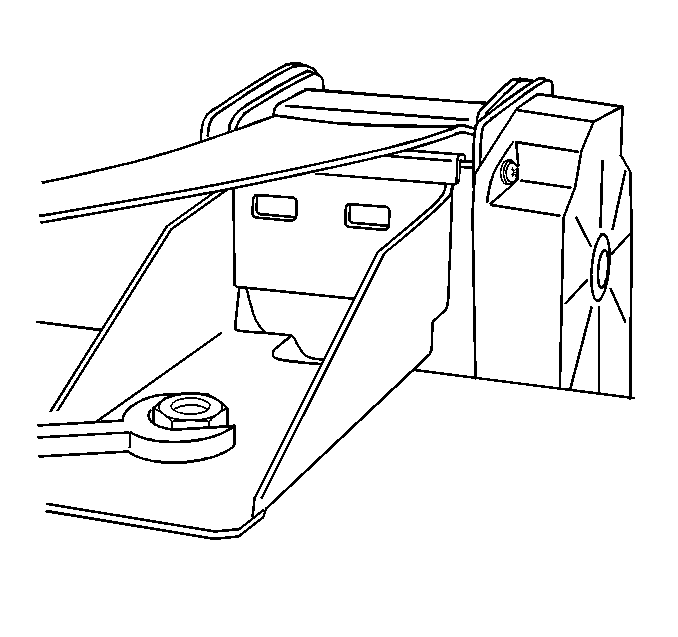
- Install the rear seat center retractor on to the cross car beam.
Ensure the retainer tab engages the notch in the beam.
Notice: Use the correct fastener in the correct location. Replacement fasteners
must be the correct part number for that application. Fasteners requiring
replacement or fasteners requiring the use of thread locking compound or sealant
are identified in the service procedure. Do not use paints, lubricants, or
corrosion inhibitors on fasteners or fastener joint surfaces unless specified.
These coatings affect fastener torque and joint clamping force and may damage
the fastener. Use the correct tightening sequence and specifications when
installing fasteners in order to avoid damage to parts and systems.
- From inside the
vehicle, install the rear seat center shoulder retractor bolt.
Tighten
Tighten the rear seat center shoulder retractor bolt to 30 N·m
(22 lb ft).
- Install the rear seat
center belt escutcheon to the rear shelf opening.
Important: Assure that the bolt threads and bolt hole are free of any sealer patch
material, and that the belt is not twisted.
- Install the rear seat center belt lower bolt. Ensure the belt anchor
is facing forward.
Tighten
Tighten the rear seat center belt bolt to 41 N·m (30 lb ft).
- Install the rear compartment trim panel. Refer to
Rear Compartment Trim Panel Replacement
in Body
Rear End.
- Install the rear trim panel. Refer to
Rear Window Shelf Trim Panel Replacement
in Interior Trim.
- Ensure the seat belt buckles are stowed in the seat back pockets
and install the rear seat cushion. Refer to
Rear Seat Cushion Replacement
in Seats.
