For 1990-2009 cars only
- Remove the 2nd clutch accumulator housing bolts (318).
- Remove the 2nd clutch accumulator housing (333) and spring (329).
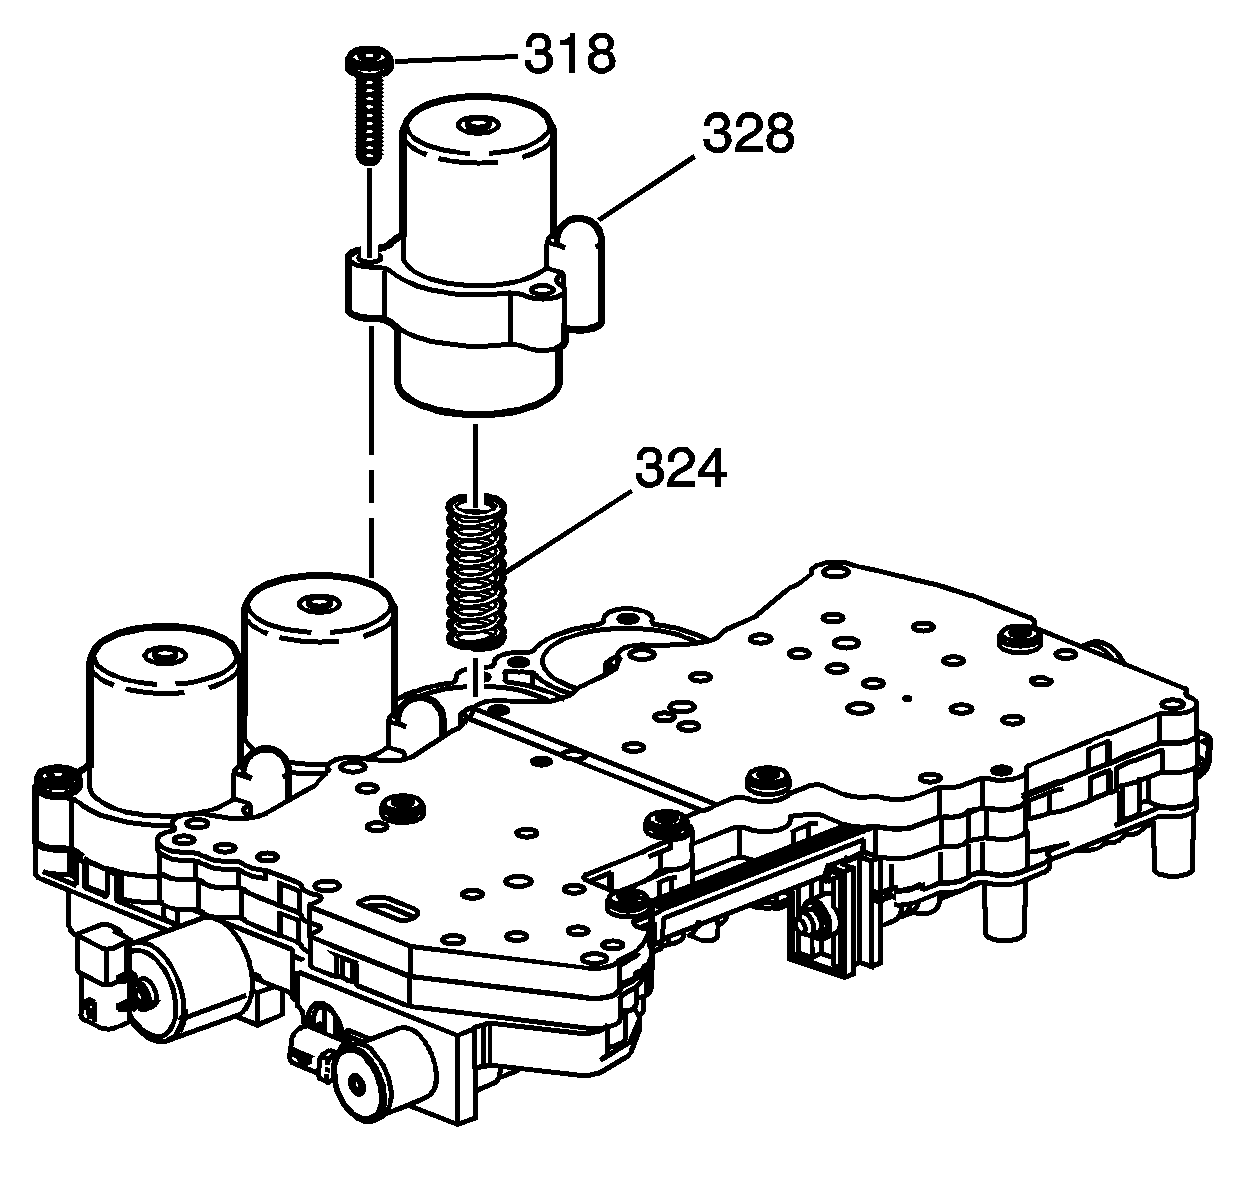
- Remove the intermediate clutch housing bolts (318).
- Remove the intermediate clutch accumulator housing (328), and spring (324).
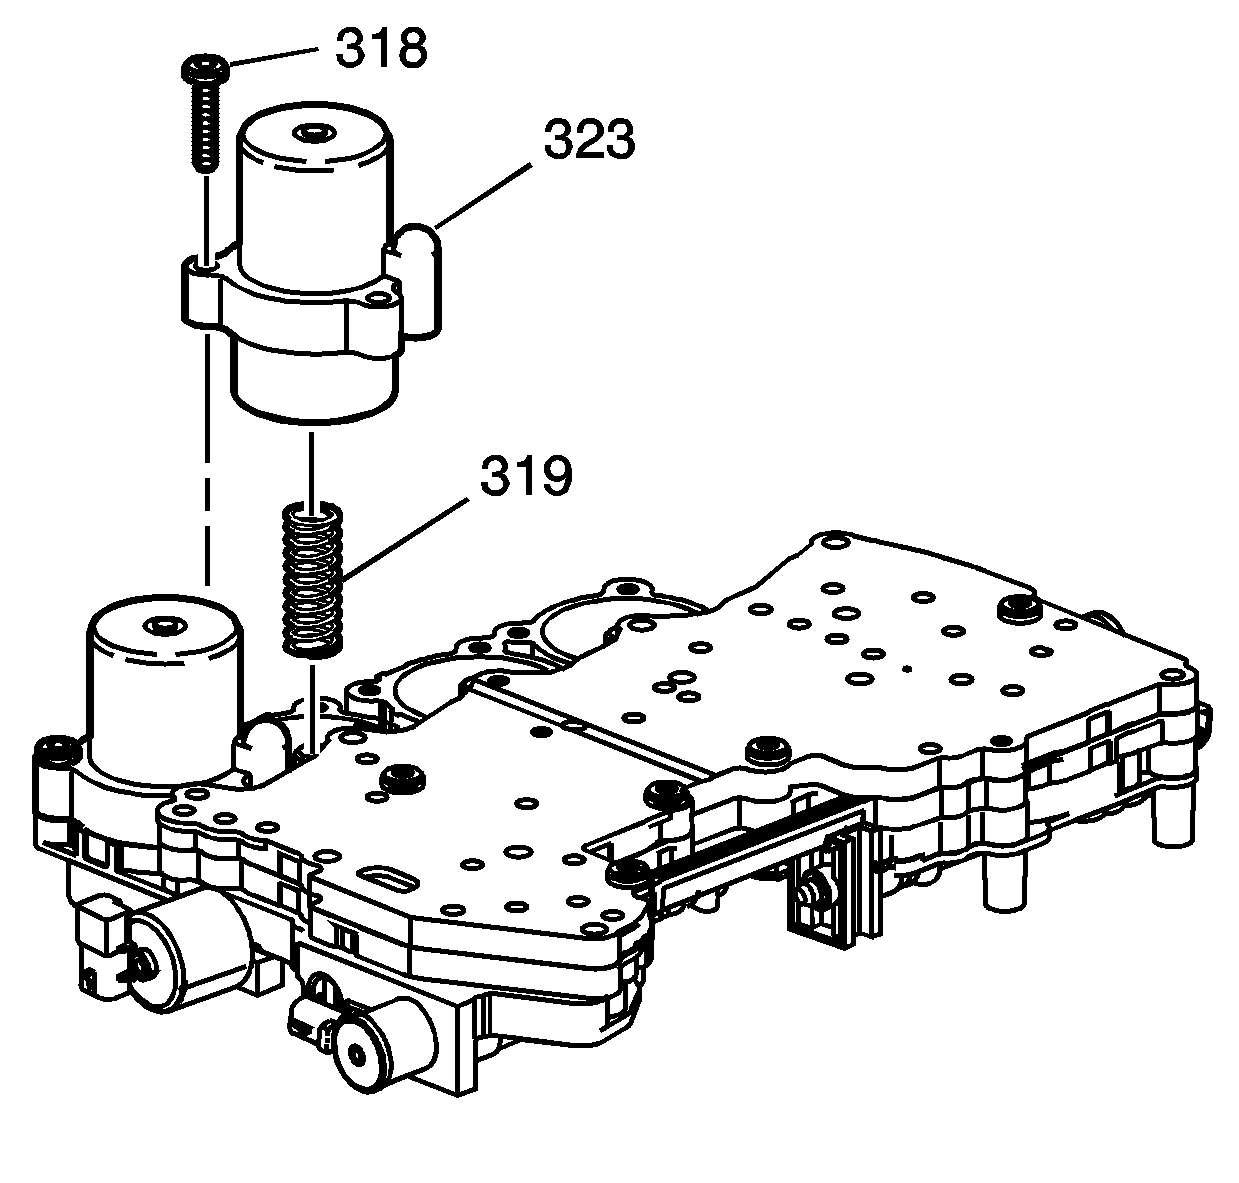
- Remove the overdrive clutch accumulator housing bolts (318).
- Remove the overdrive clutch accumulator housing (323), and spring (319).
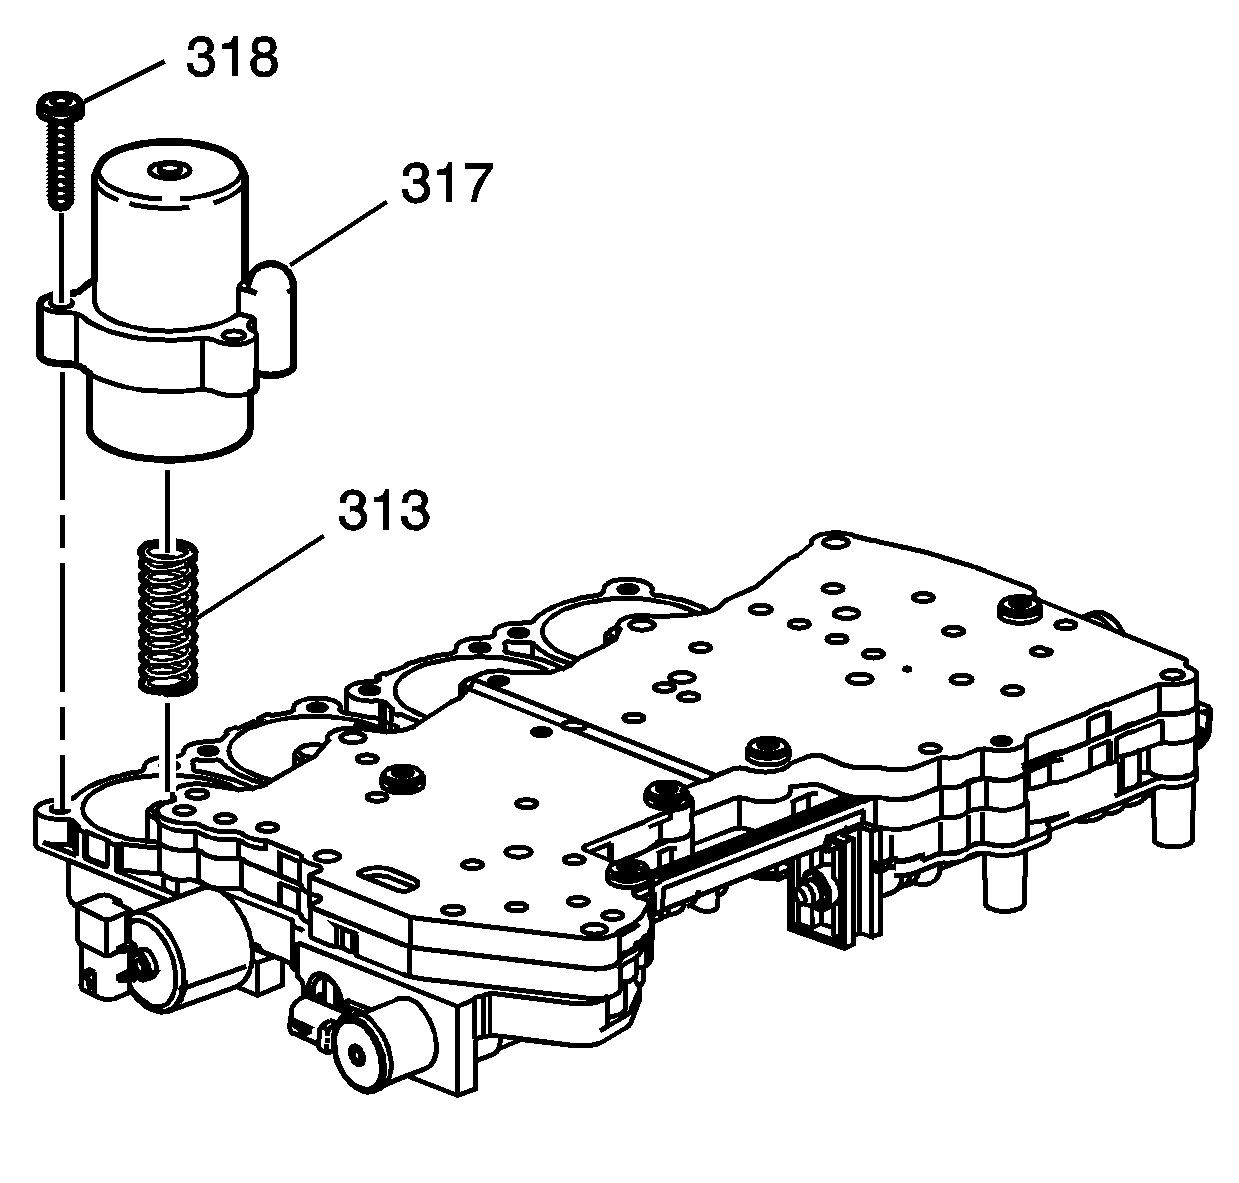
- Remove the direct clutch accumulator housing bolts (318).
- Remove the direct accumulator housing (317), and spring (313).
- Release the piston with air pressure.
- Remove the 2nd clutch accumulator piston (331) from the 2nd clutch accumulator housing (333).
- Remove the 2nd clutch accumulator piston rings (332, 330).
- Release the piston with air pressure.
- Remove the intermediate clutch accumulator piston (326) from the intermediate clutch accumulator housing (328).
- Remove the intermediate clutch accumulator piston fluid seal rings (325, 327).
- Release the piston with air pressure.
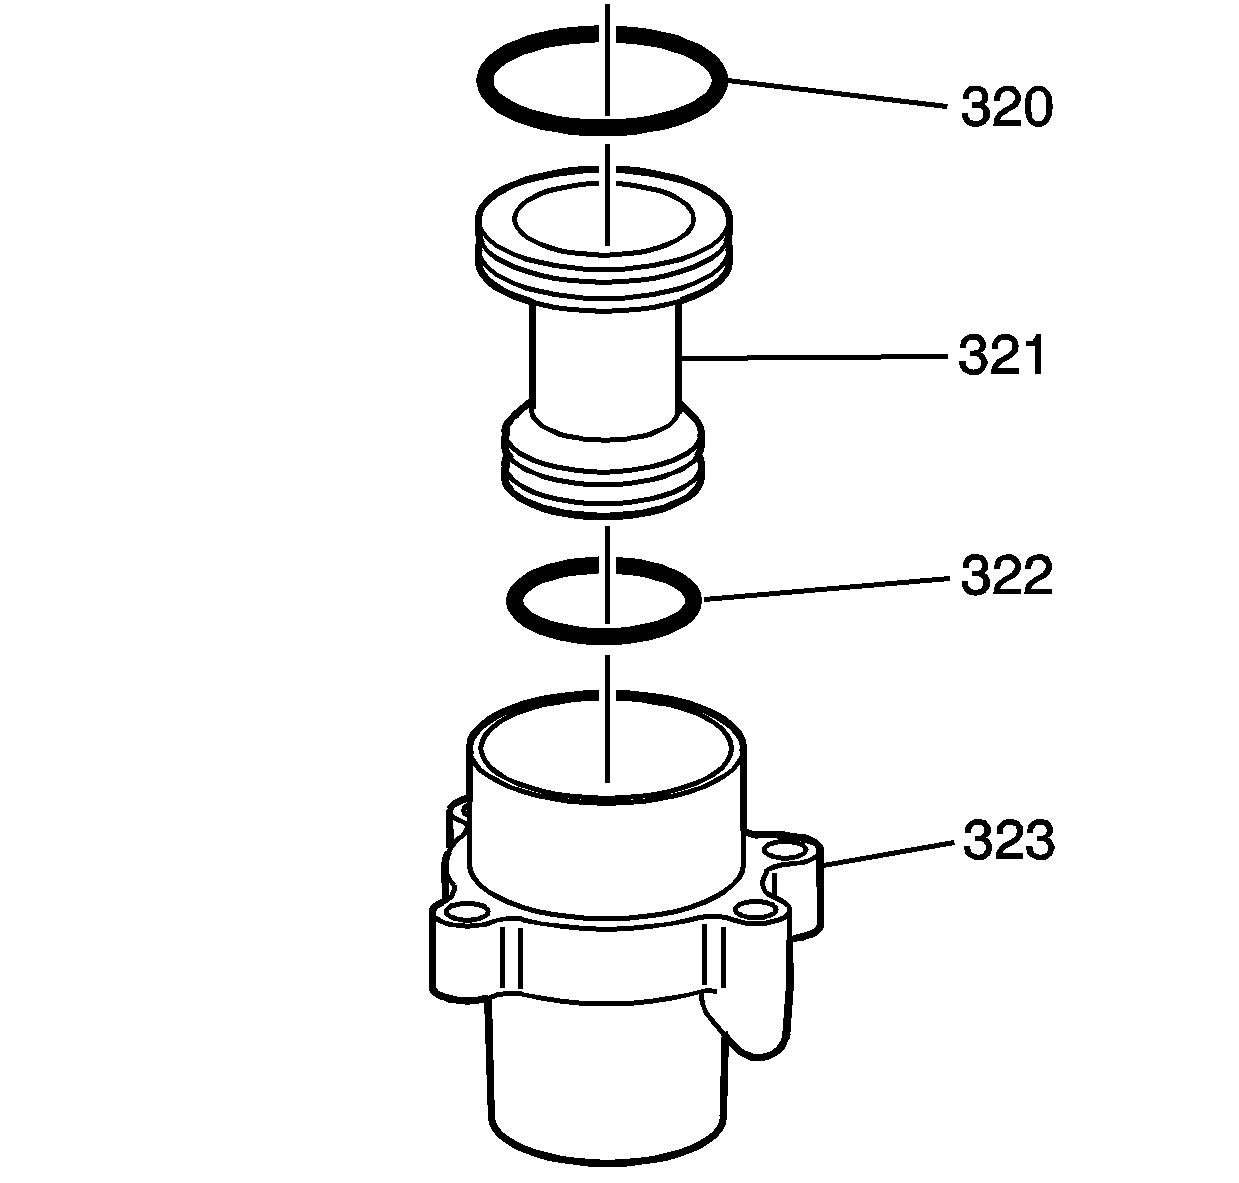
- Remove the overdrive clutch accumulator piston (321) from the overdrive clutch accumulator housing (323).
- Remove the overdrive clutch accumulator piston fluid seal ring (320, 322).
- Release the piston with air pressure.
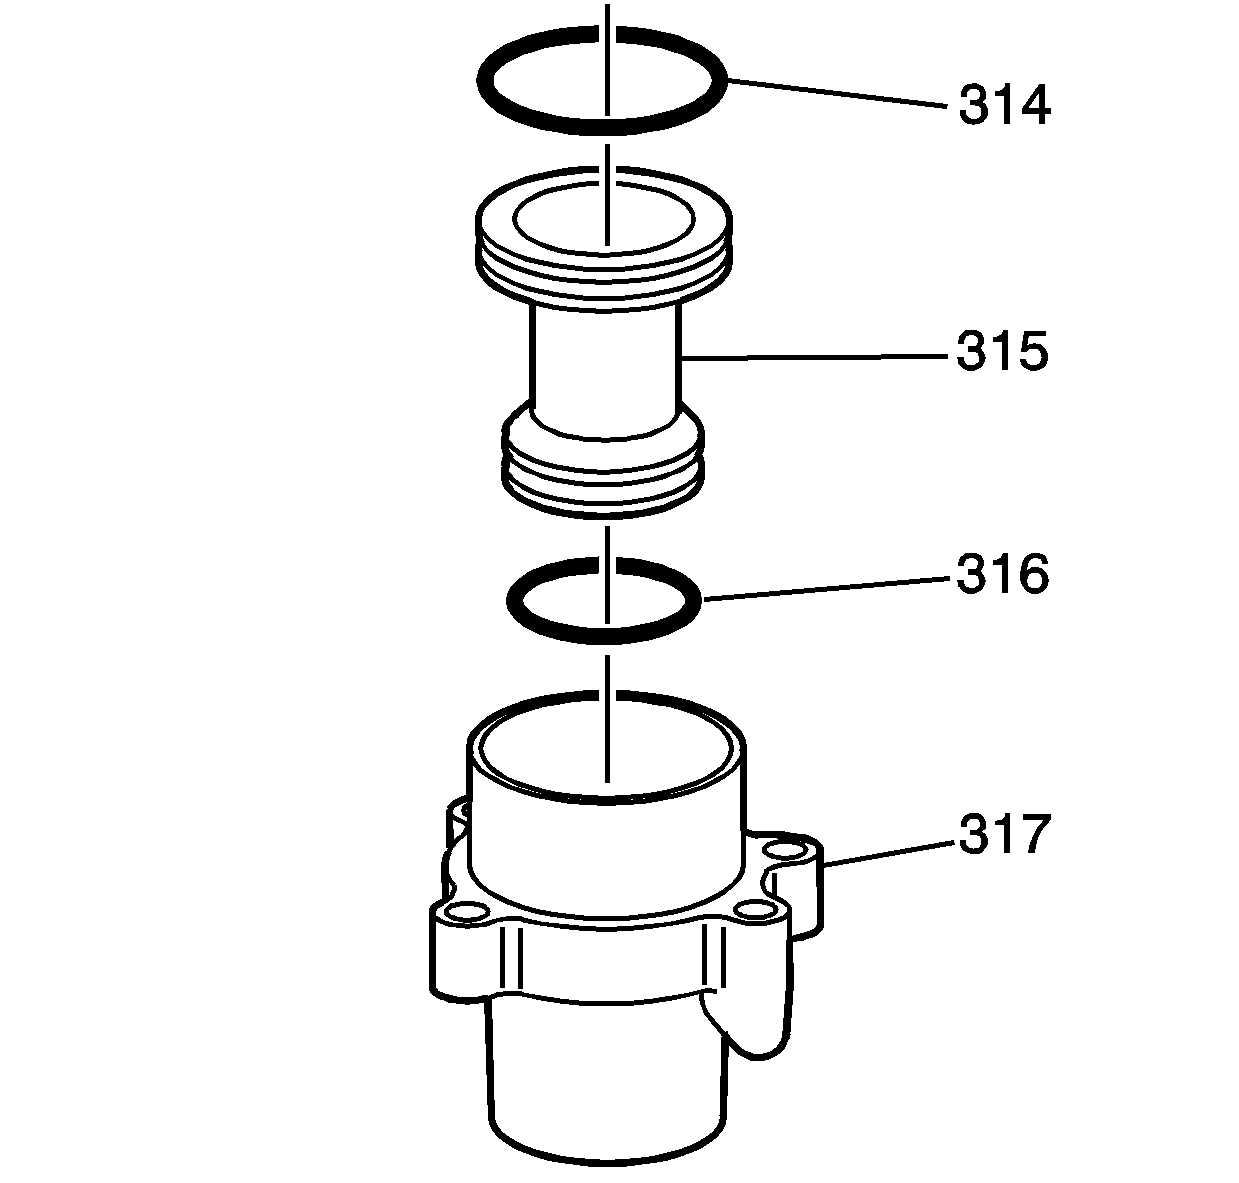
- Remove the direct accumulator housing piston (315) from the direct accumulator housing (317).
- Remove the direct clutch accumulator piston fluid seal rings (314, 316).
- Remove the control valve body bolts (50, 300).
- Remove the control valve body channel plate (301).
- Remove the channel plate ball check spring (302) and the gasket (303).
- Remove the control valve body channel plate (304).
- Remove the checkballs (306) and the gasket (305).
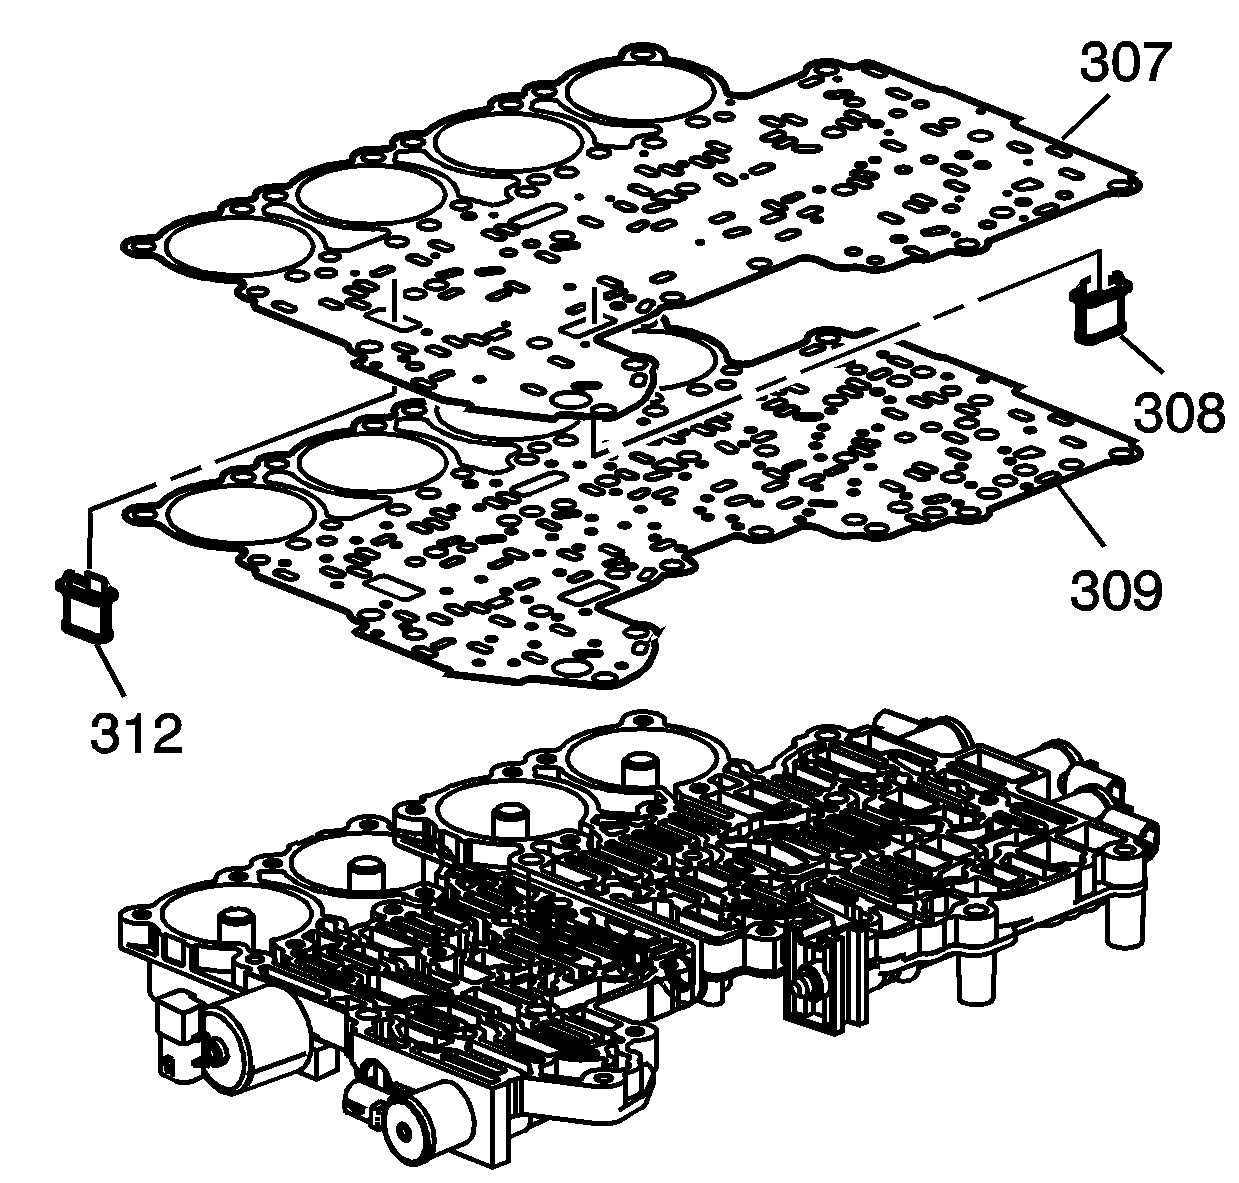
- Remove the control valve body spacer plate (307).
- Remove the filters (308, 312).
- Remove the spacer plate gasket (309).
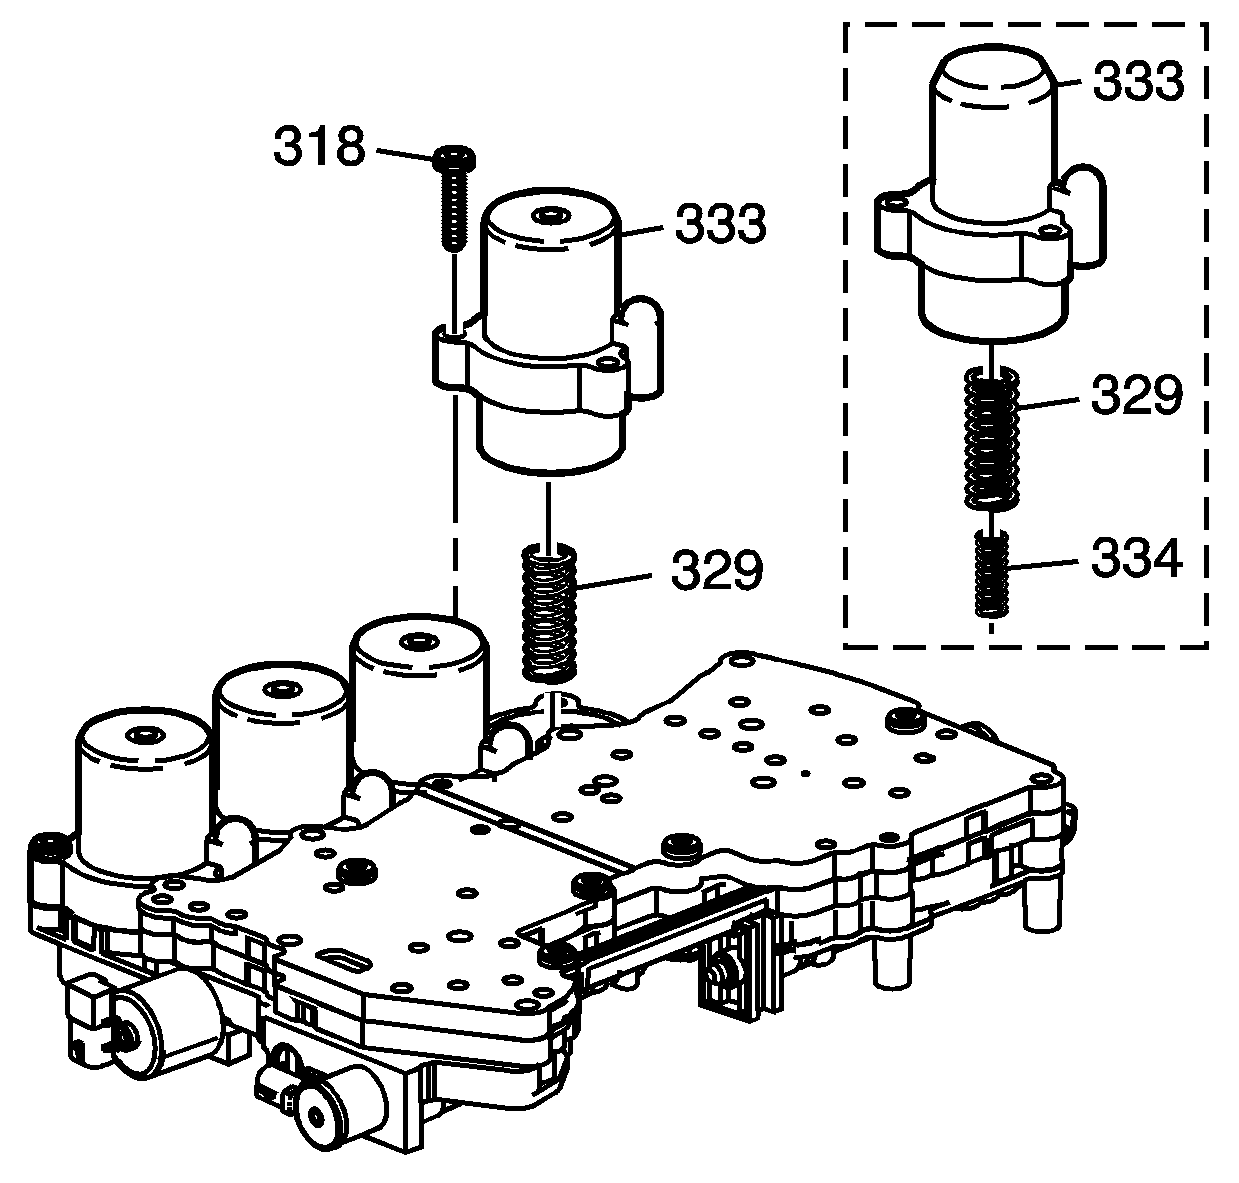
Caution: Note the position of each accumulator before removal. The accumulators must be assembled in the same positions, or damage may occur.
Note: The 5L50-E has a unique stackup on the 2nd clutch accumulator housing.
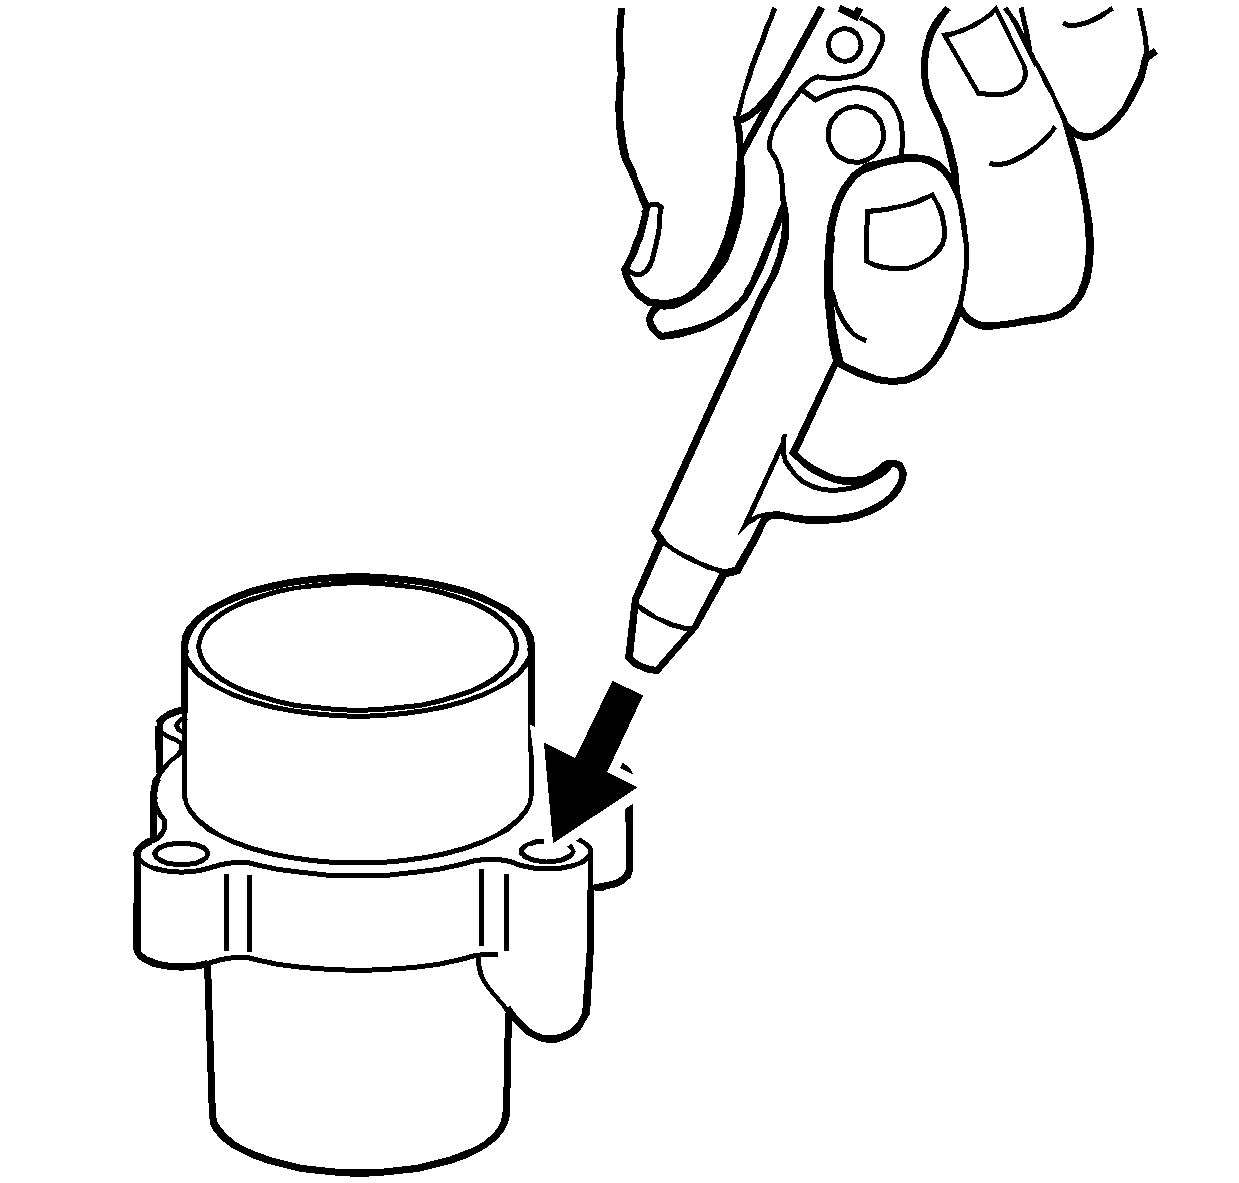
Note: It may be necessary to use air pressure to remove the piston.
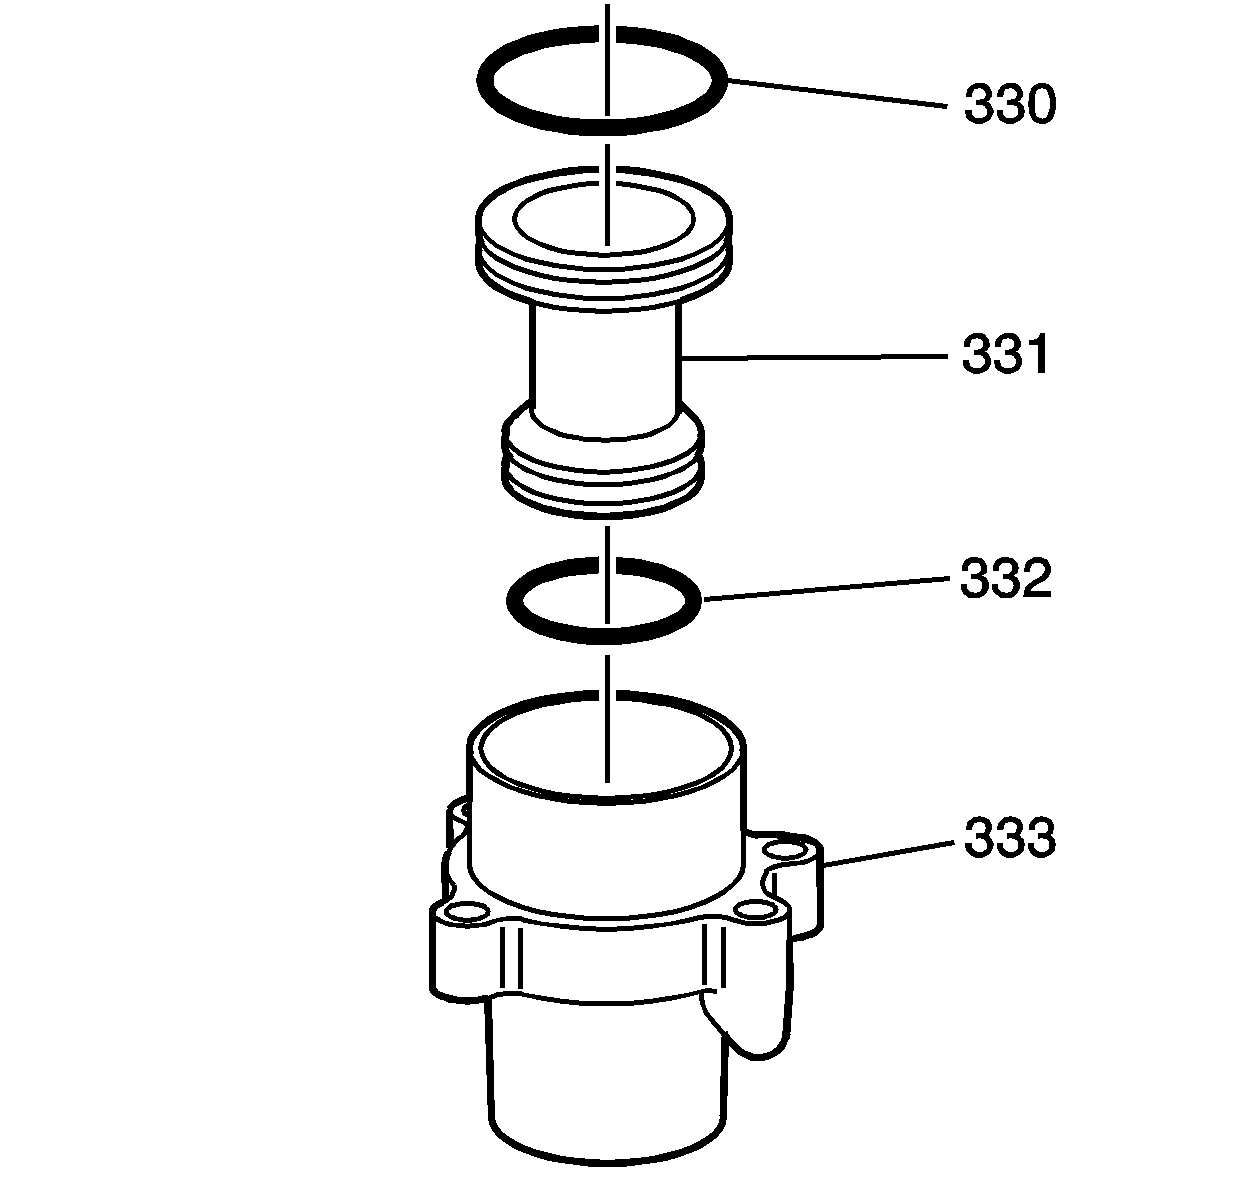

Note: It may be necessary to use air pressure to remove the piston.
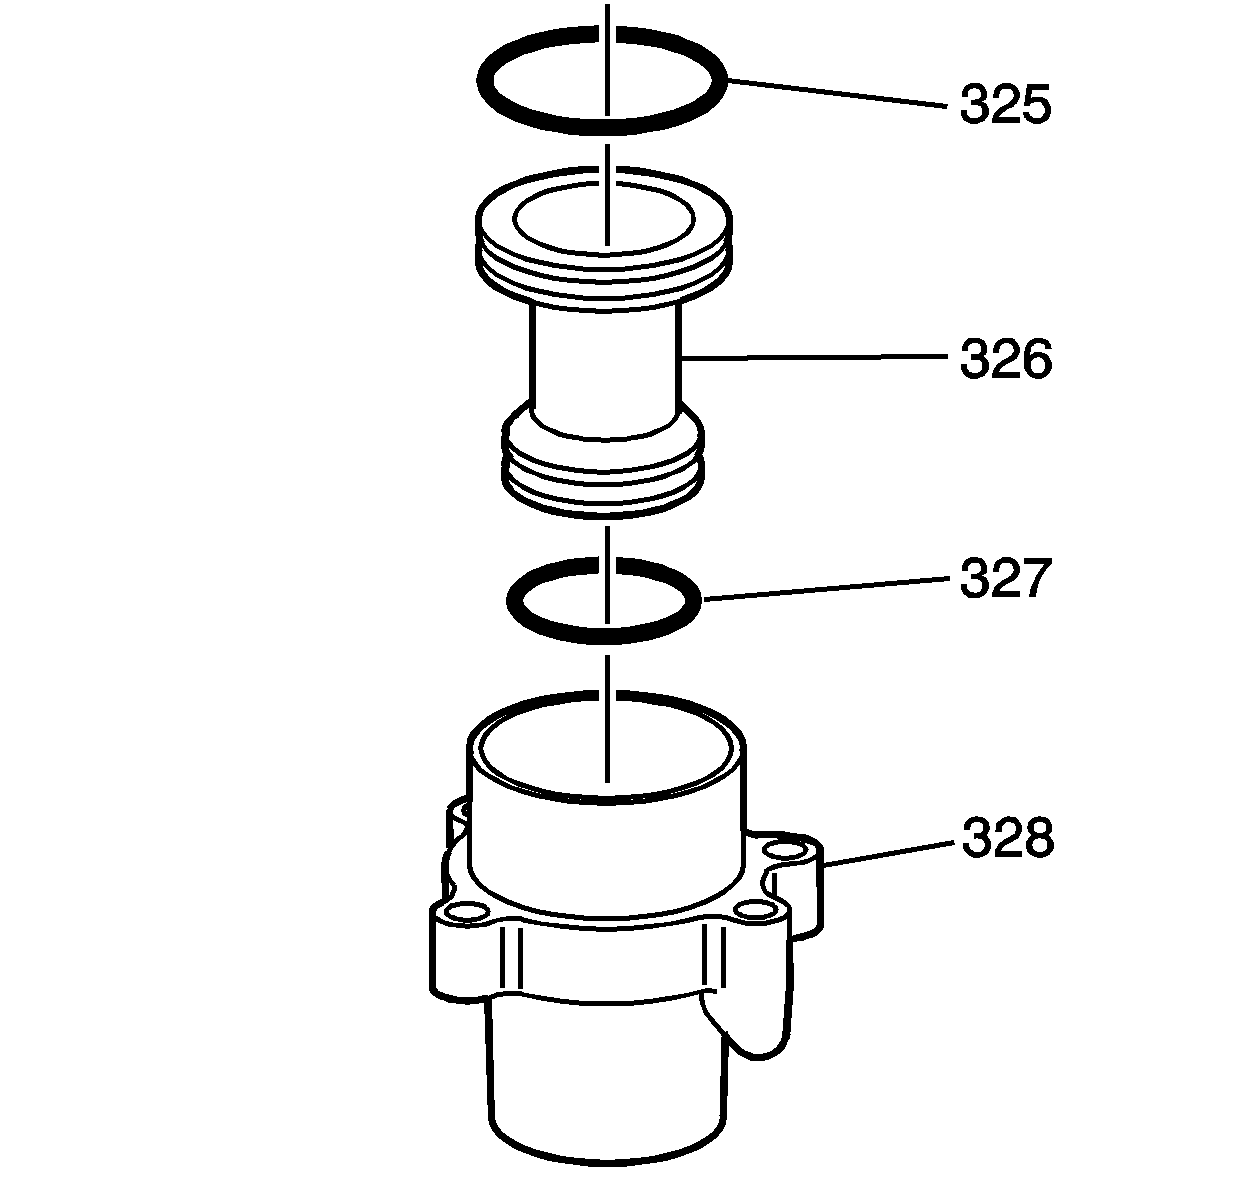

Note: It may be necessary to use air pressure to remove the piston.

Note: It may be necessary to use air pressure to remove the piston.
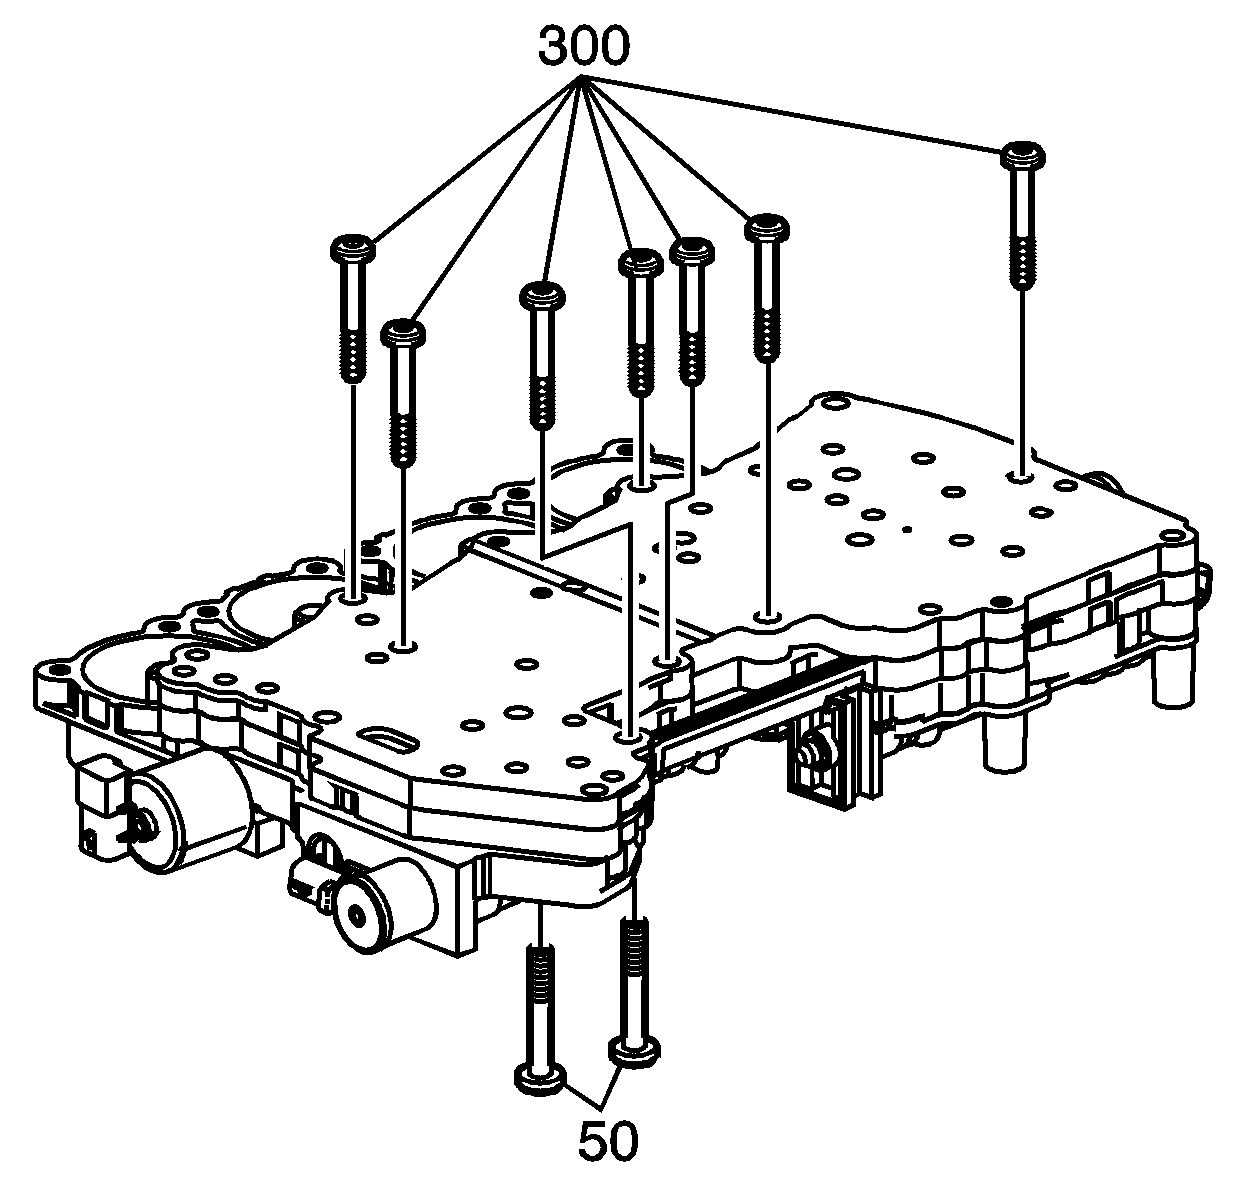
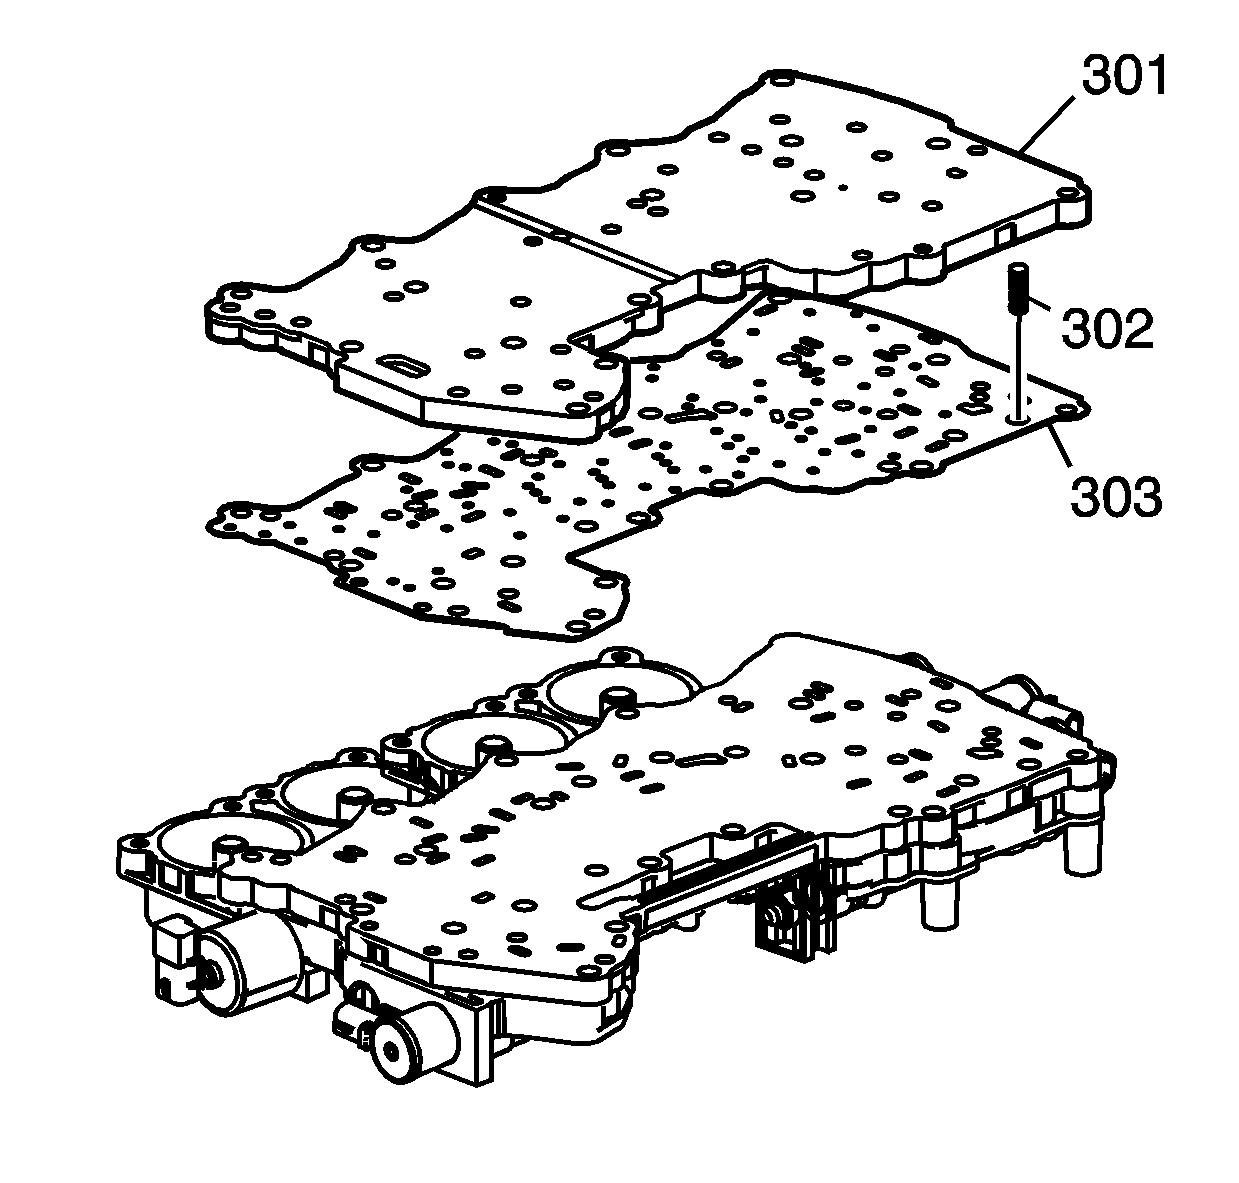
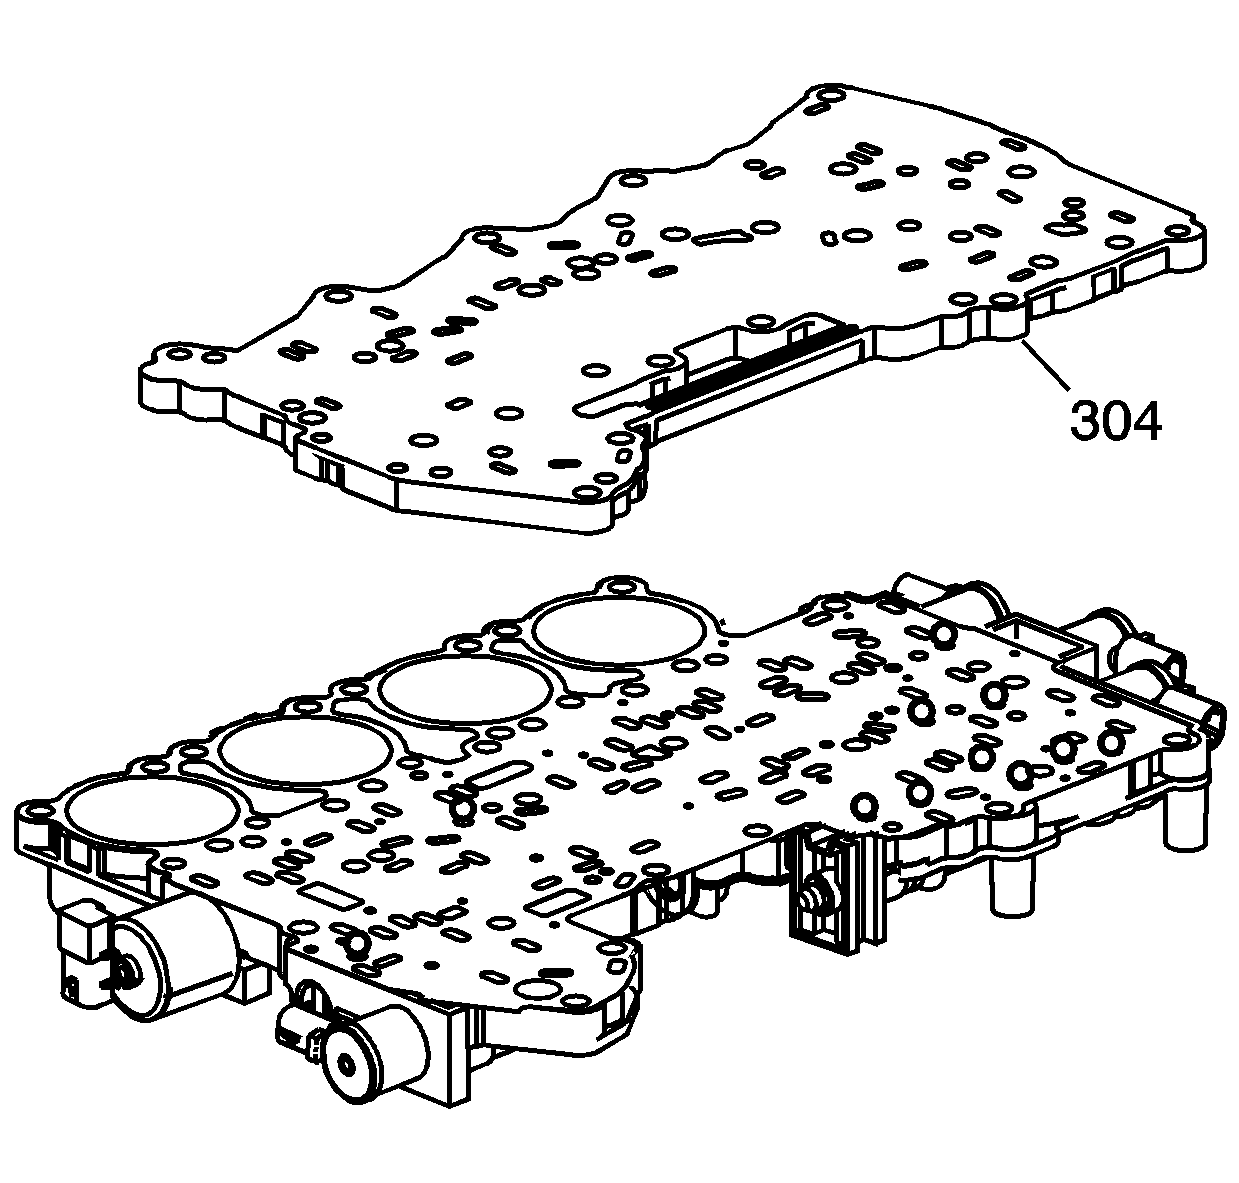
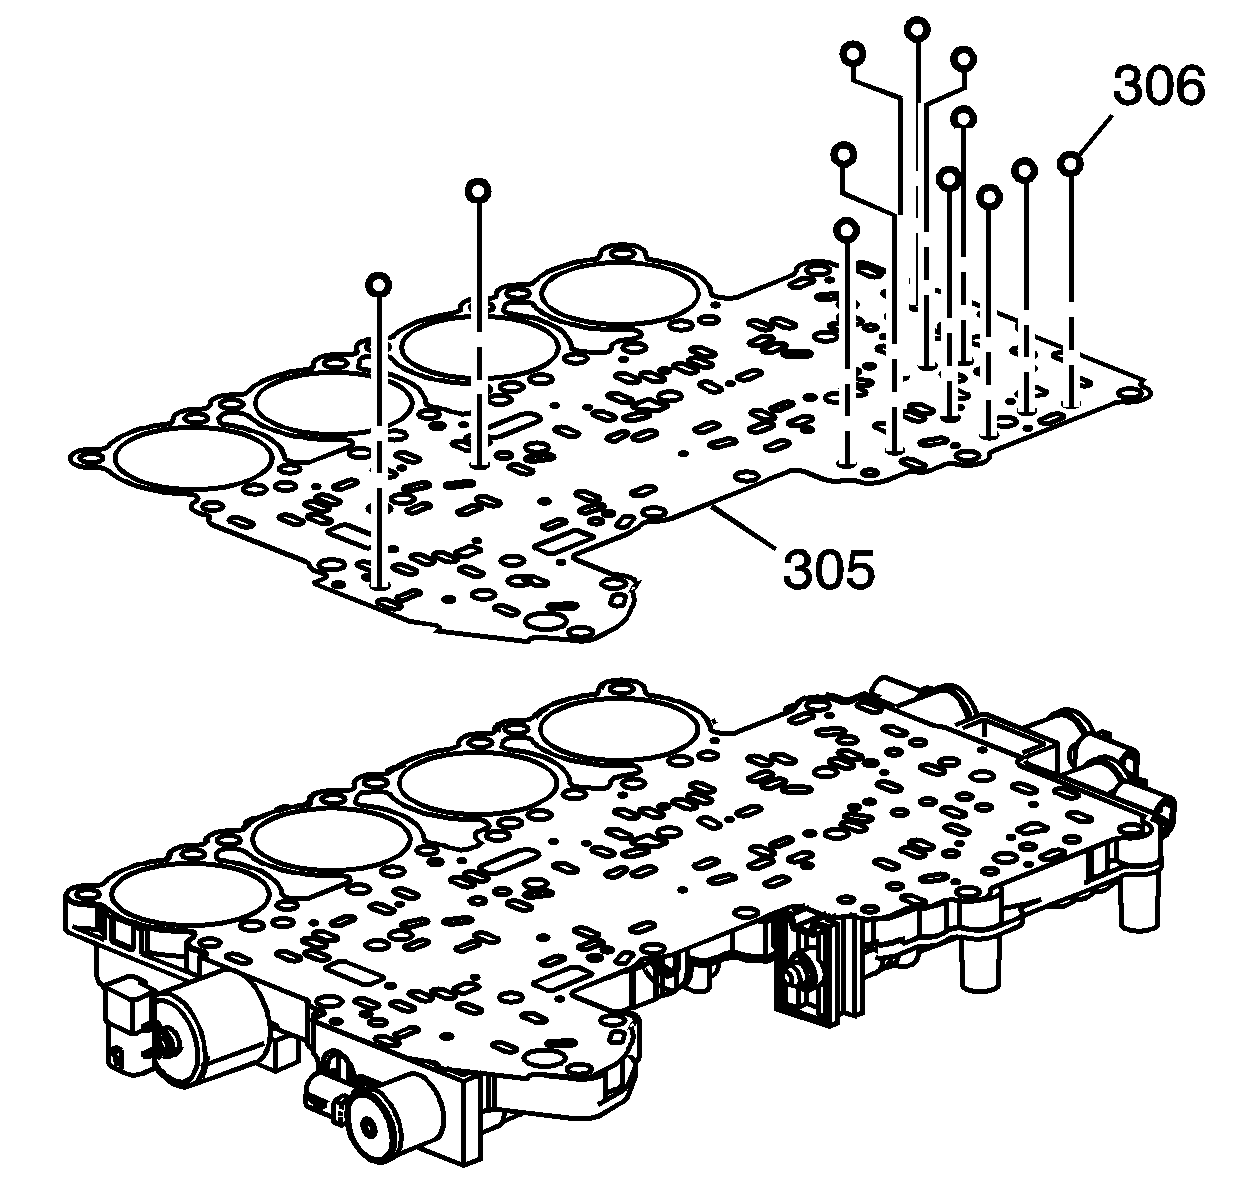
Note: The checkballs (306) may be inside the bottom channel plate, or may be sitting on gasket (305).
