For 1990-2009 cars only
Special Tools
| • | J 39400-A Halogen Leak Detector |
| • | J 44827 Transmission Cooler Quick Connect |
Removal Procedure
- Reposition the condenser to access the auxiliary transmission oil cooler lines. Refer to Air Conditioning Condenser Replacement.
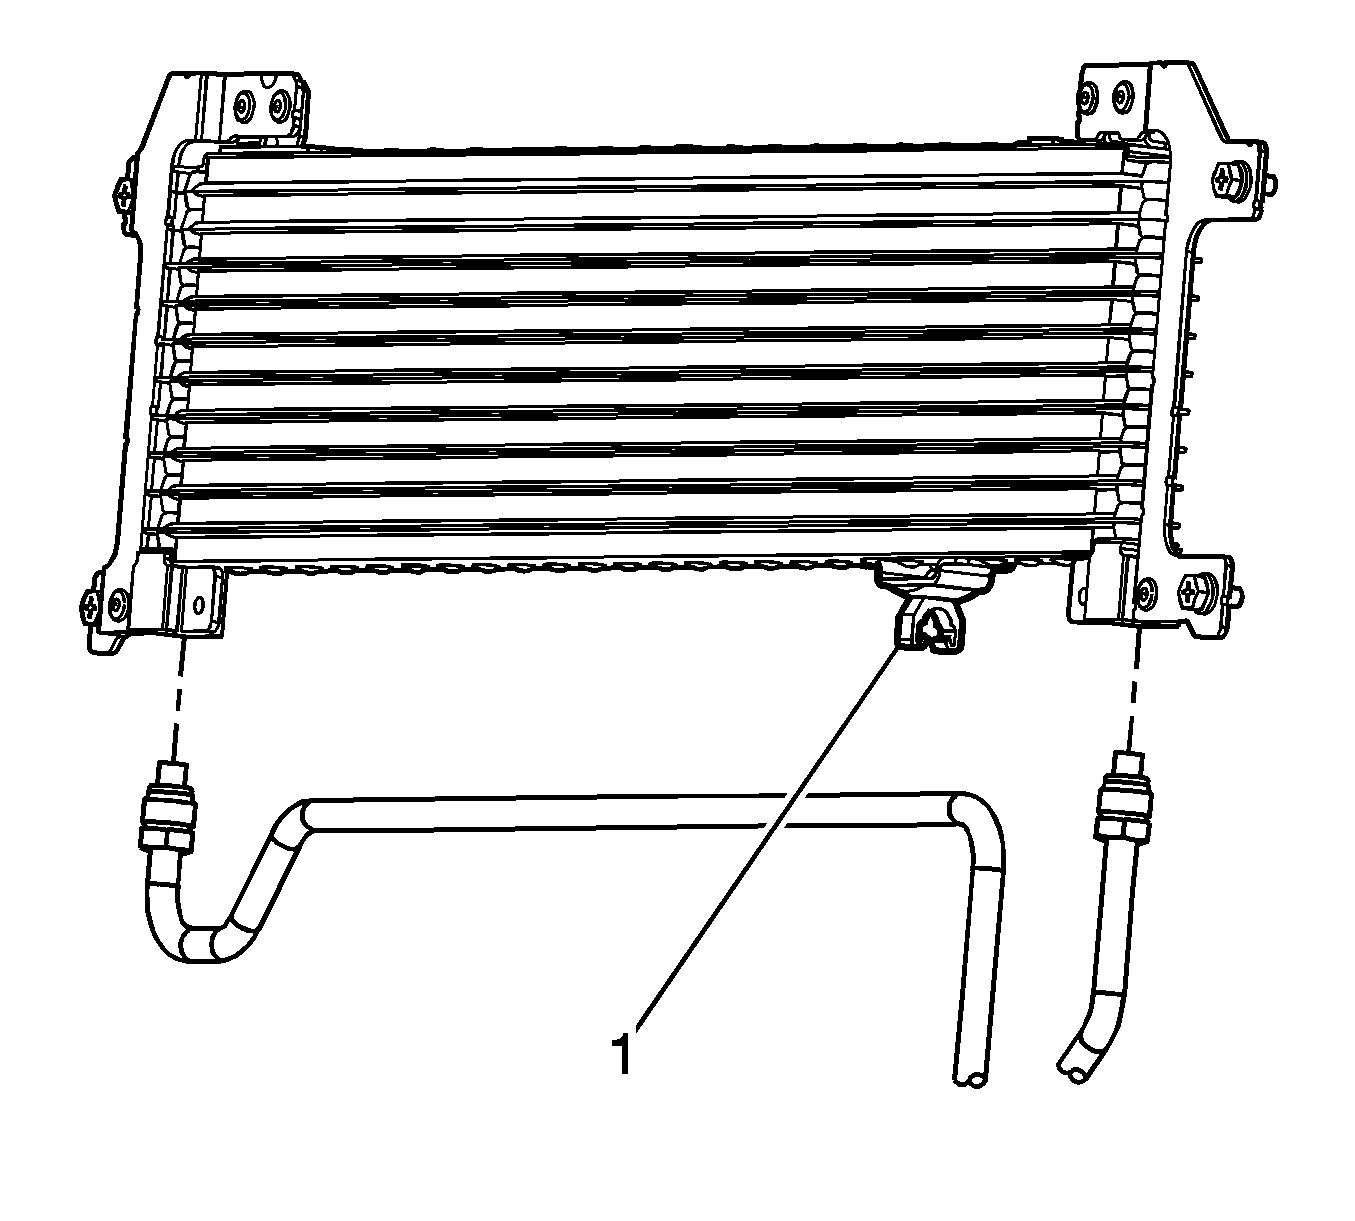
- Disconnect the transmission oil cooler (TOC) lines from the TOC.
- Disconnect the TOC line from the TOC retainer clip (1).
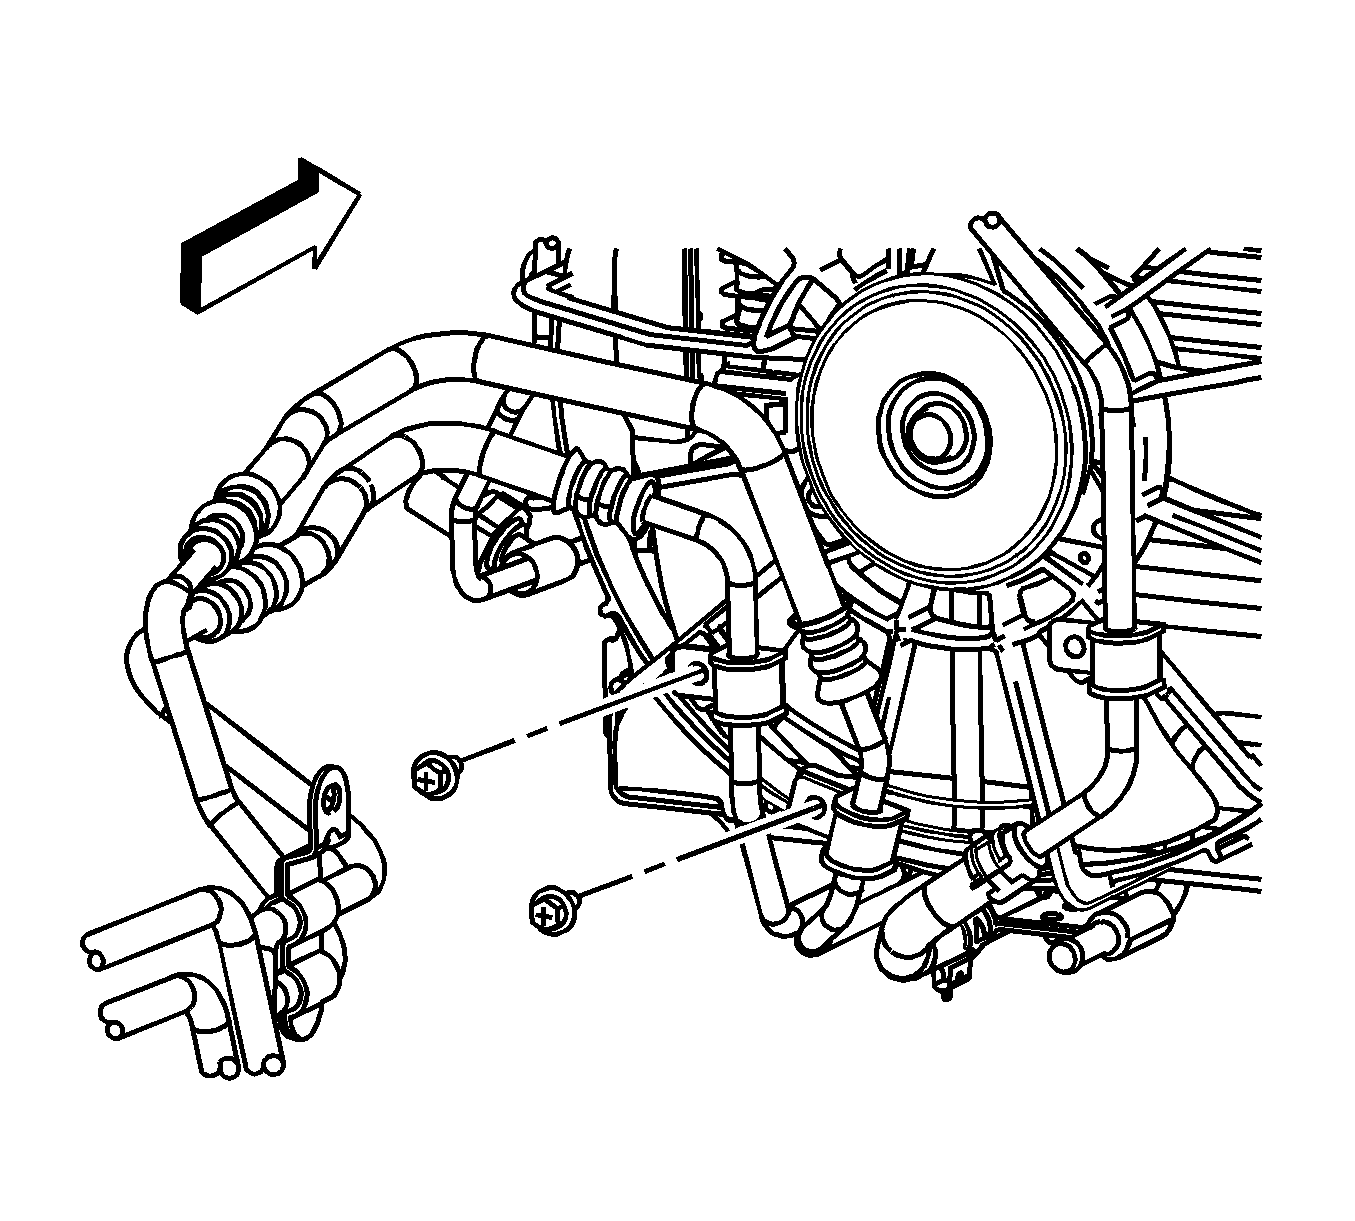
- Remove the TOC to cooling fan shroud bolts.
- Remove the LH front wheel. Refer to Tire and Wheel Removal and Installation.
- Remove the LH front splash shield retainers.
- Remove the LH front splash shield.
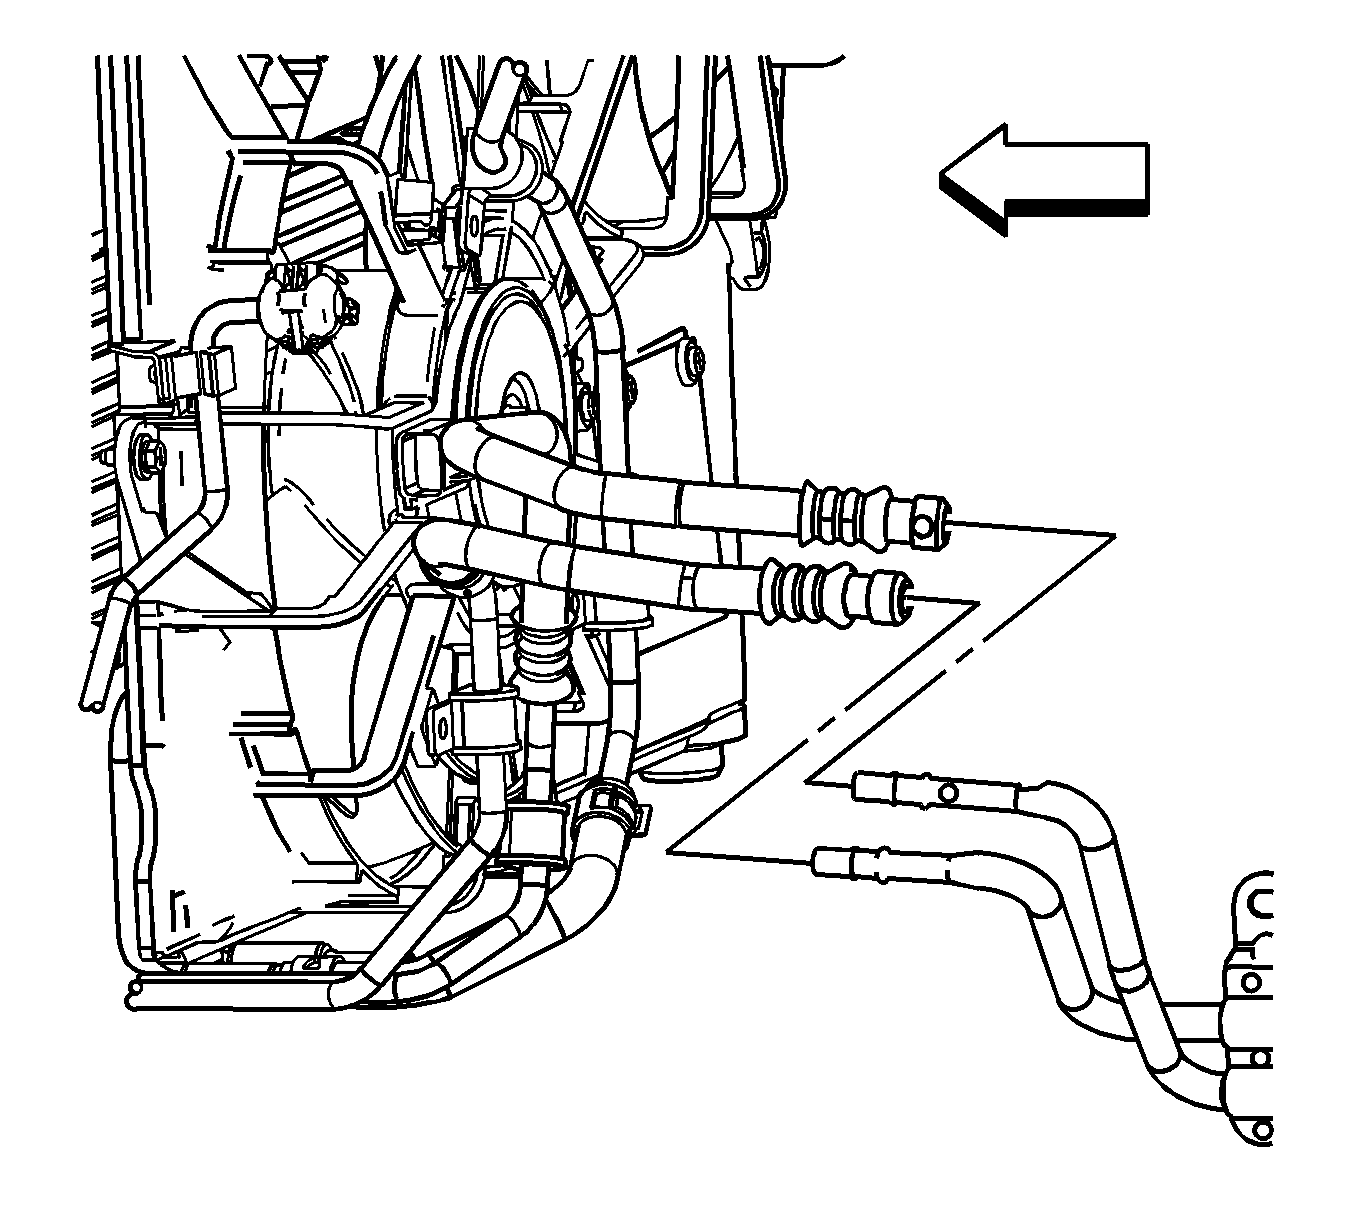
- Using the J 44827 , disconnect the front TOC lines from the rear TOC lines.
- Remove the front TOC lines.
Note: It is not necessary to discharge the refrigerant from the A/C system during auxiliary transmission oil cooler (TOC) front line replacement.
Remove the A/C condenser mounting bolts and reposition the condenser.


Installation Procedure
- Install the front TOC lines.
- Connect the front TOC lines to the rear TOC lines.
- Install the LH front splash shield.
- Install the LH front splash shield retainers.
- Install the LH front wheel. Refer to Tire and Wheel Removal and Installation.
- Install the TOC to cooling fan shroud bolts.
- Connect the TOC line to the TOC retainer clip (1).
- Connect the transmission oil cooler (TOC) lines to the TOC.
- Reposition and reinstall the condenser. Refer to Air Conditioning Condenser Replacement.

Caution: Refer to Exterior Trim Emblem Removal Caution in the Preface section.

Tighten
Tighten the bolts to 6.5 N·m (58 lb in).
Tighten
Tighten the fittings to 20 N·m (15 lb ft).

