Ultra View Sunroof Noise (Install Mylar Washers)

| Subject: | Ultra View Sunroof Noise (Install Mylar Washers) |
| Models: | 2004-2007 Cadillac SRX |
This bulletin is being revised to add additional illustrations, Correction information and change warranty information. Please discard Corporate Bulletin Number 06-08-67-012A (Section 08 - Body and Accessories).
Condition 1
Some customers may comment that there is a creak, snap or pop noise coming from the sunroof assembly while driving on rough roads or while making turns. The noise may also occur when the sunroof is closed, and will go away when the sunroof is slightly opened.
Condition 2
Some customers may comment that the sunroof noise is coming from the left front and happens when there is a torsional load into the body, like going up a driveway.
Condition 3
Some customers may comment that the sunroof noise is coming from the right rear.
Cause 1
There are two potential causes for the noise concerns.
| • | The first one may be that the front and rear track guides that are attached to the sunroof' SMC frame can have a stick/slip condition. The movement between the two pieces may create the noise. |
| • | The second cause for the noise may be the interface between the sunroof frame alignment pin and the roof sheet metal. |
Cause 2
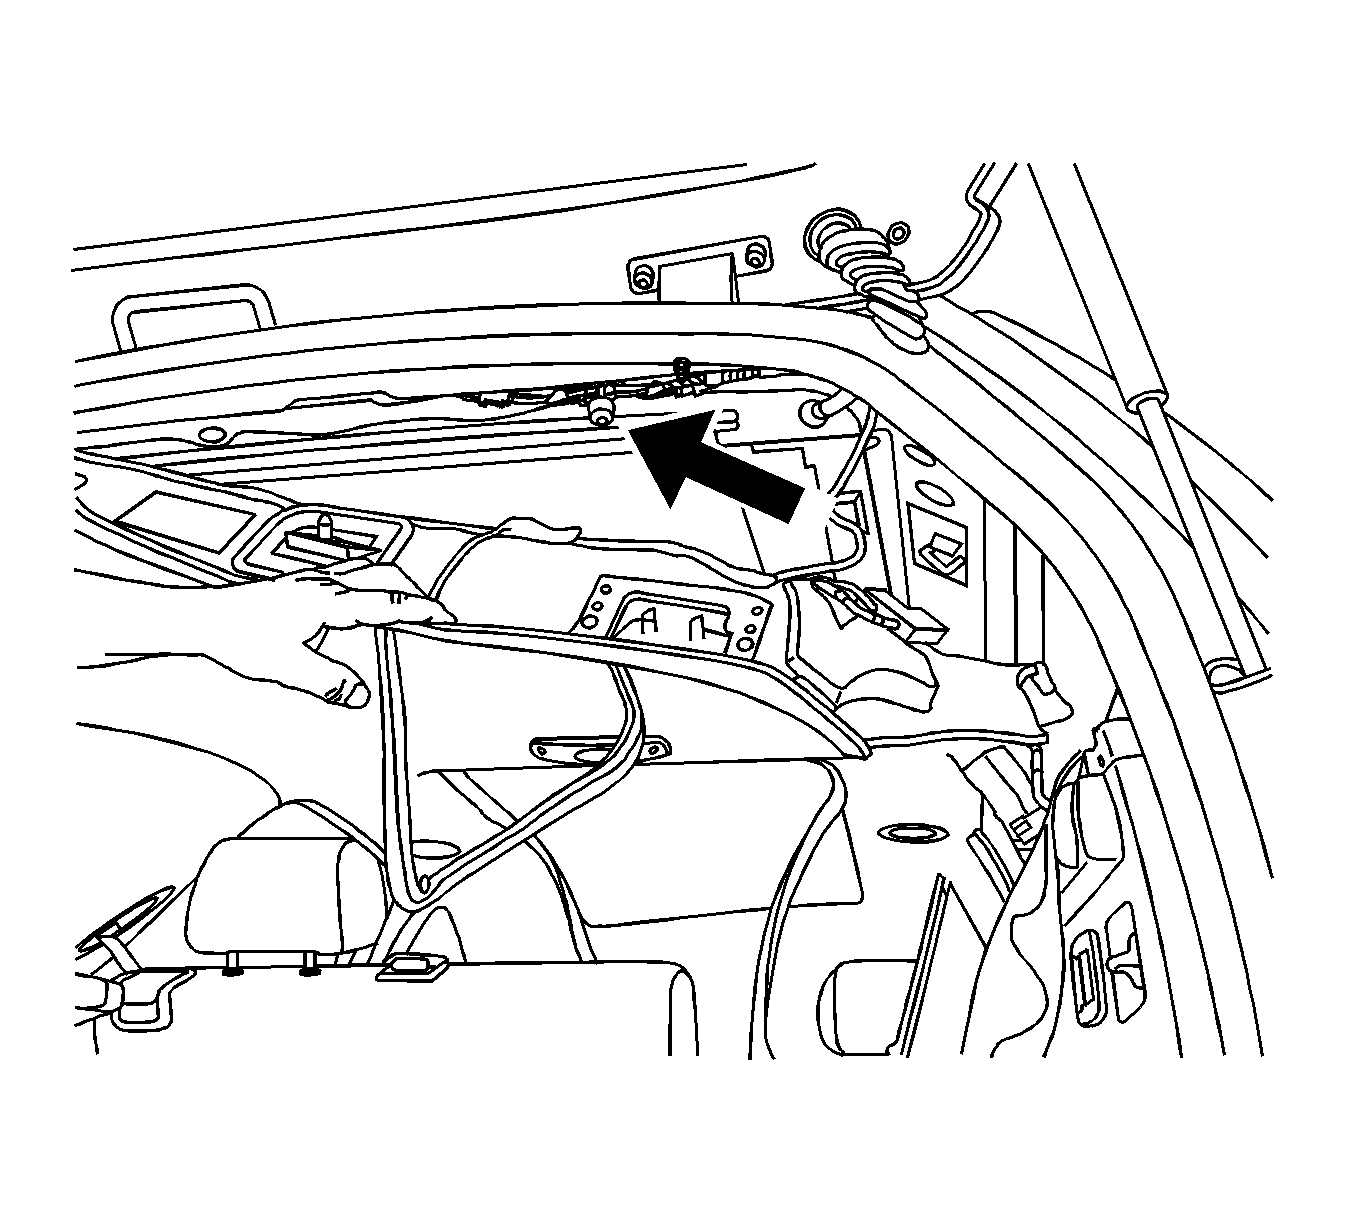
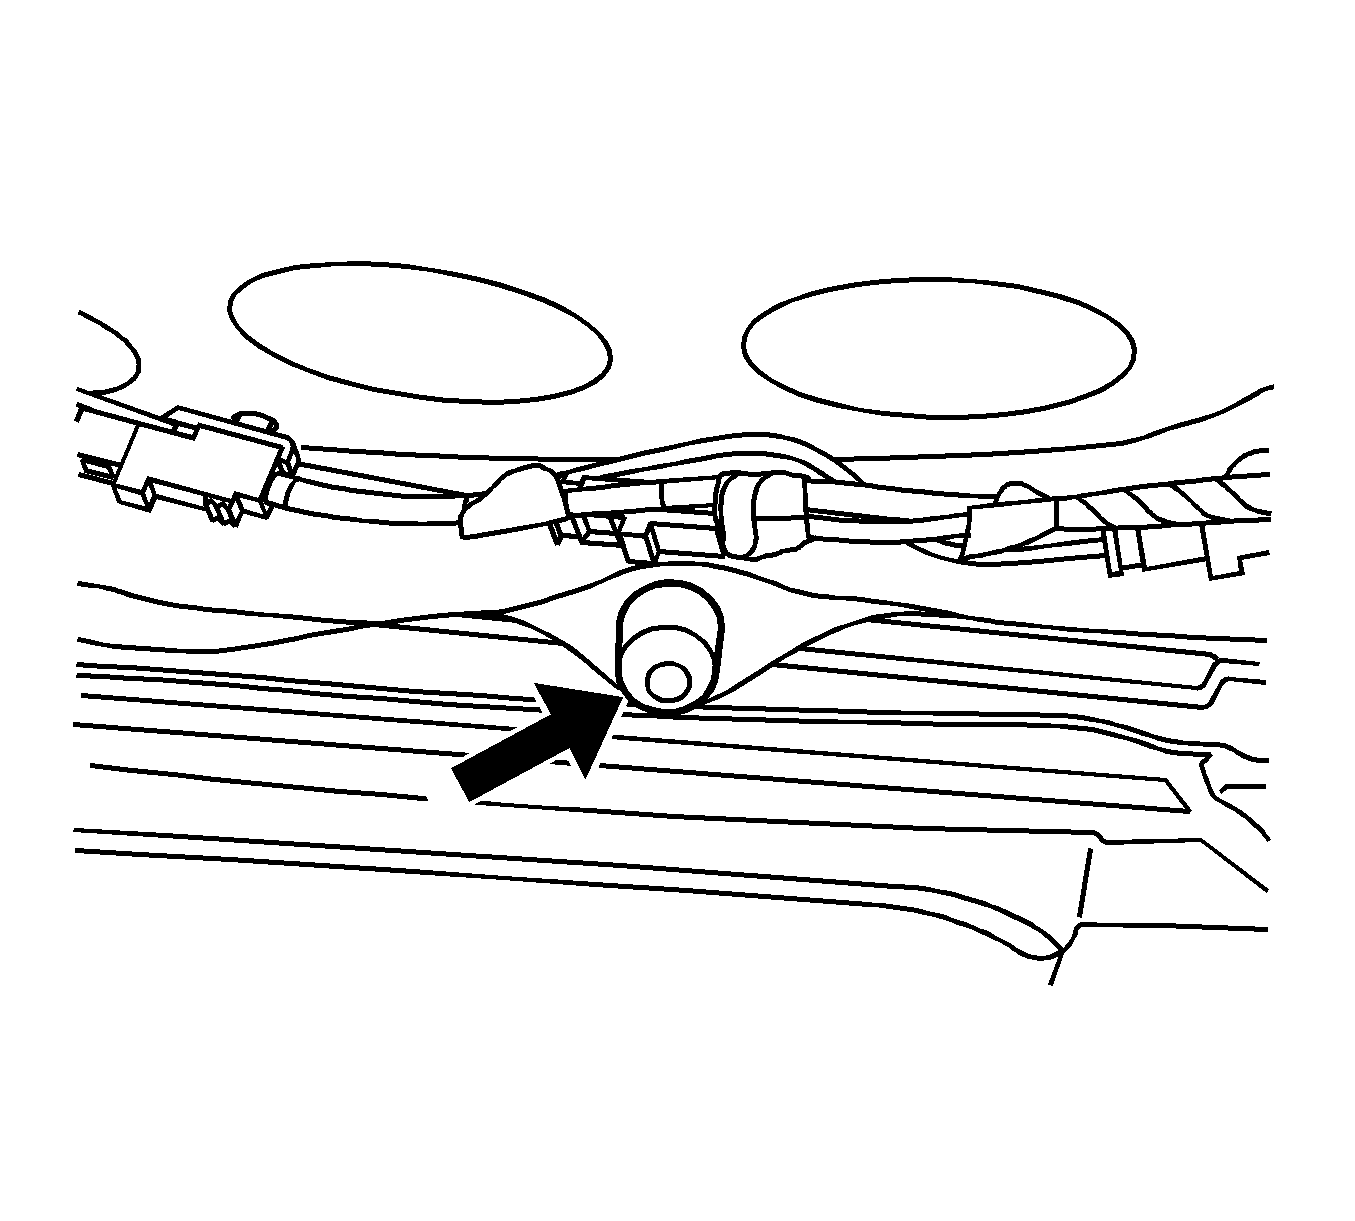
The left front alignment pin may be making contact to the roof sheet metal. Vehicles built after VIN 70149506 will have a red cap over the alignment pin and should not need to be removed.
Cause 3
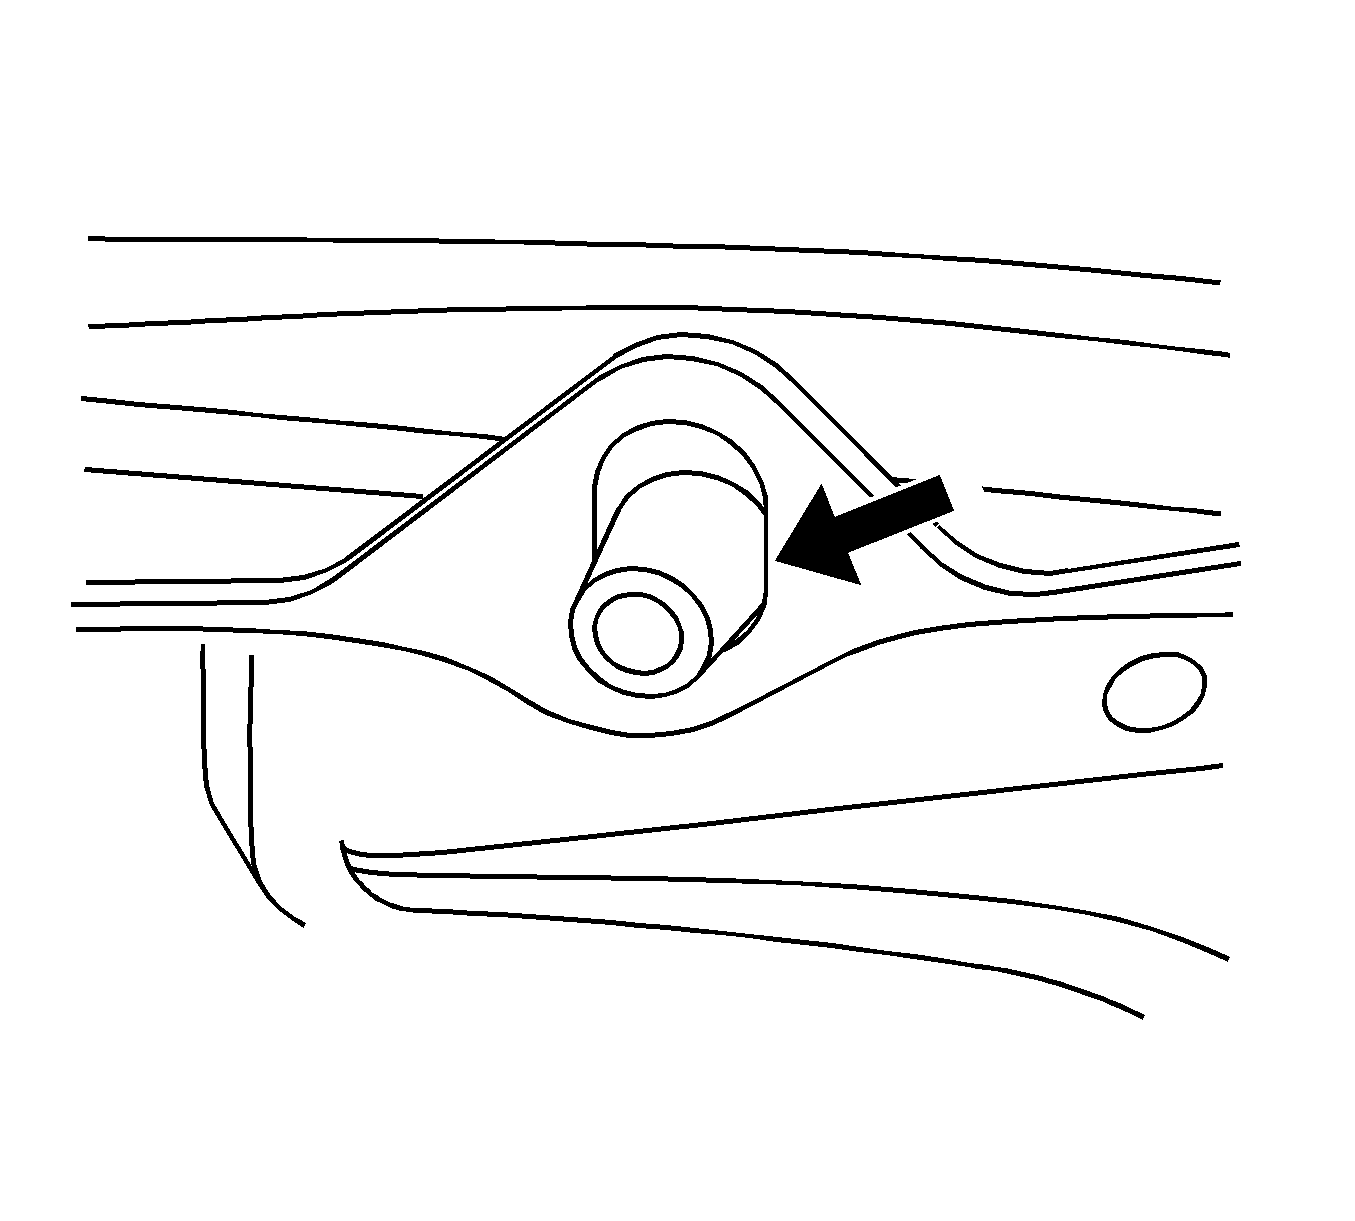
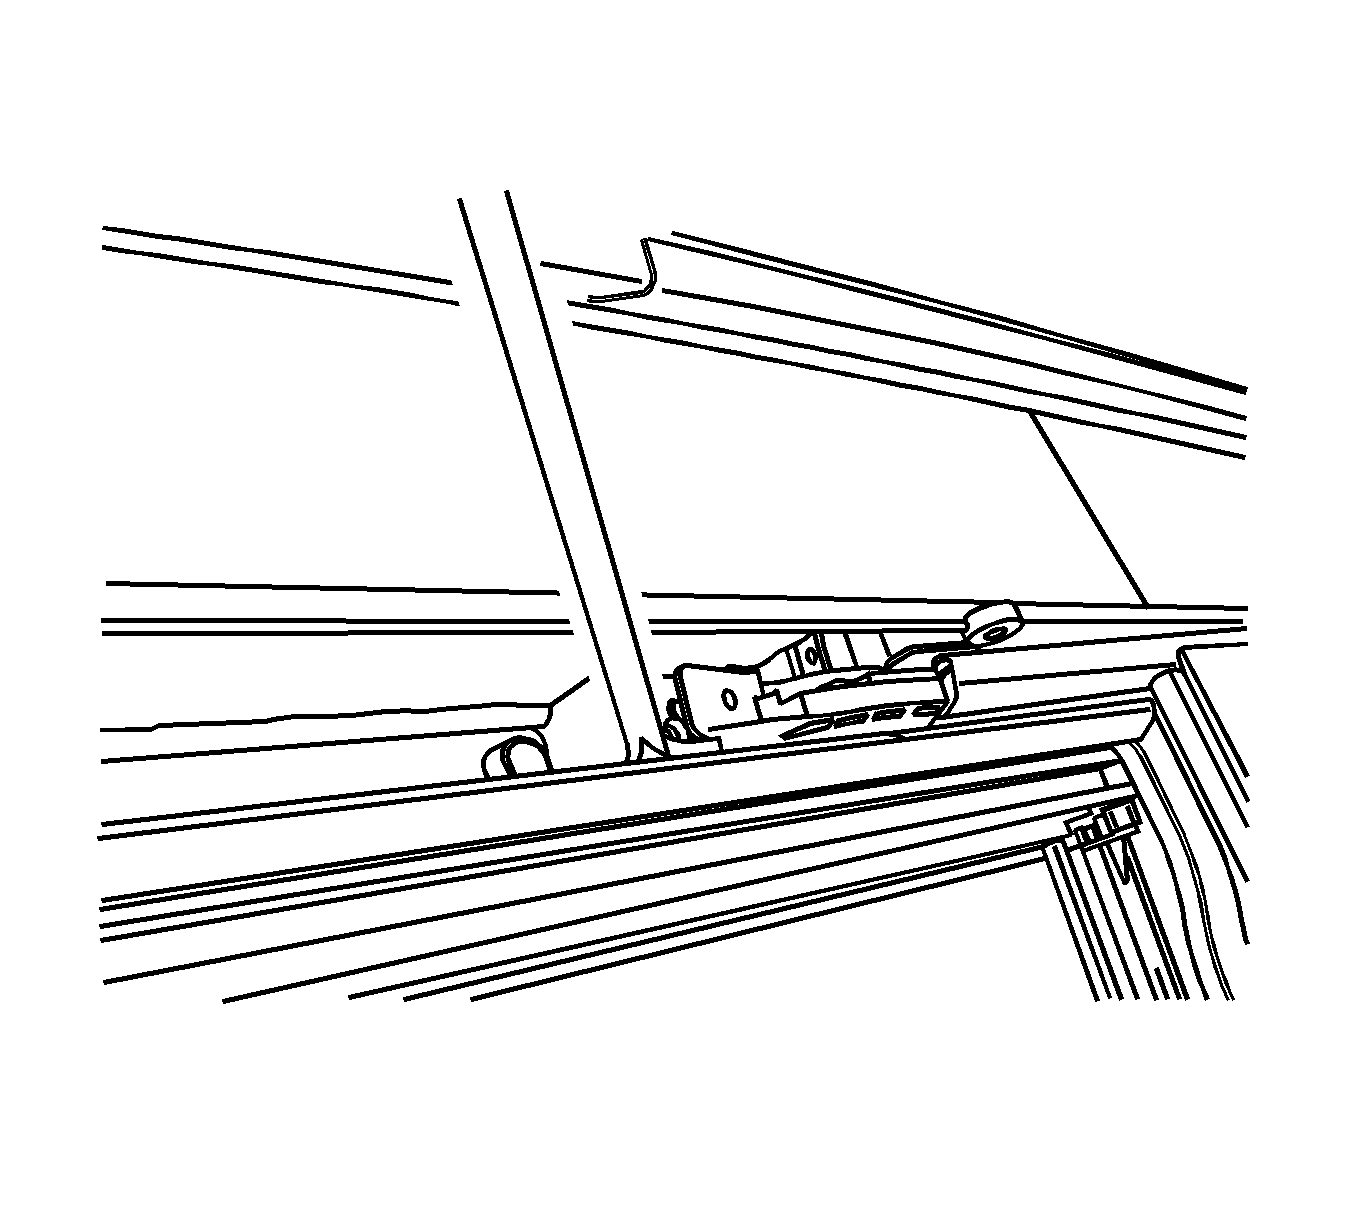
The right rear alignment pin may be making hard contact to the roof sheet metal. Refer to the illustration above.
Correction 1
- Open the sunroof 100-125 mm (4-5 in).
- Remove four (T20) fasteners for the sunroof glass.
- Remove the glass (2 person procedure).
- Remove the two screws on the rear end cap. Refer to the illustration above (Passenger side shown, driver side similar).
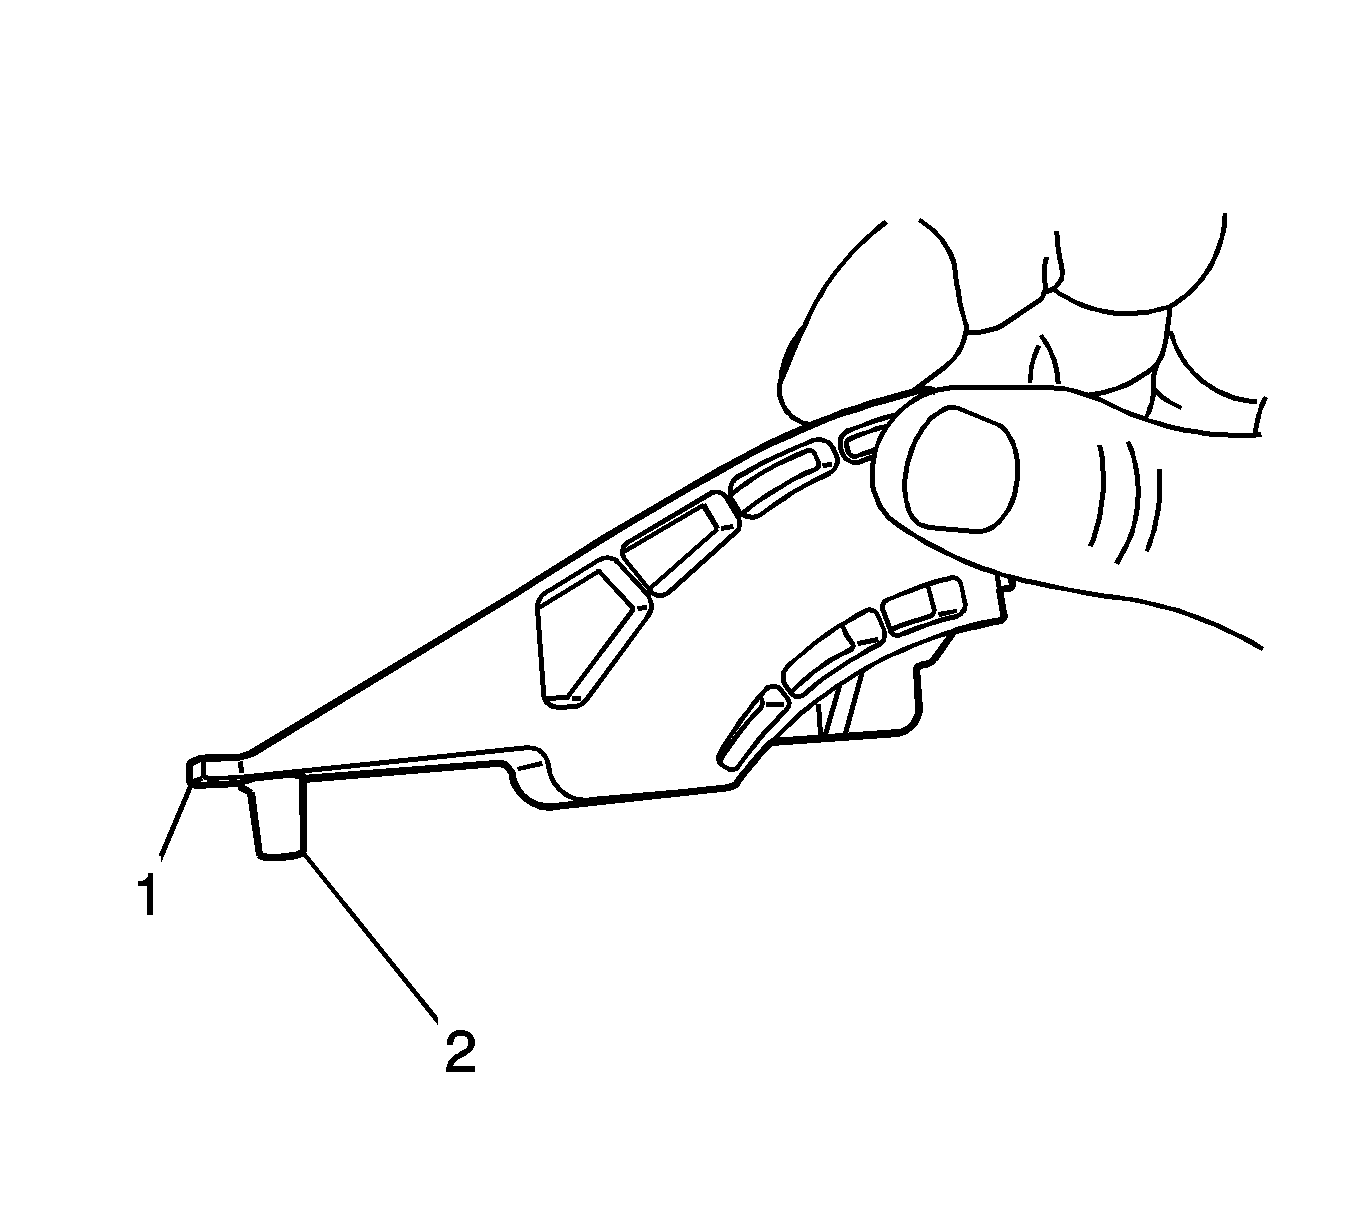
- Gently pry the front edge of the end cap (1) up to disengage the pin (2) (Small lady slipper works well). Refer to the illustration above.
- Remove the end cap. Refer to the illustration above.
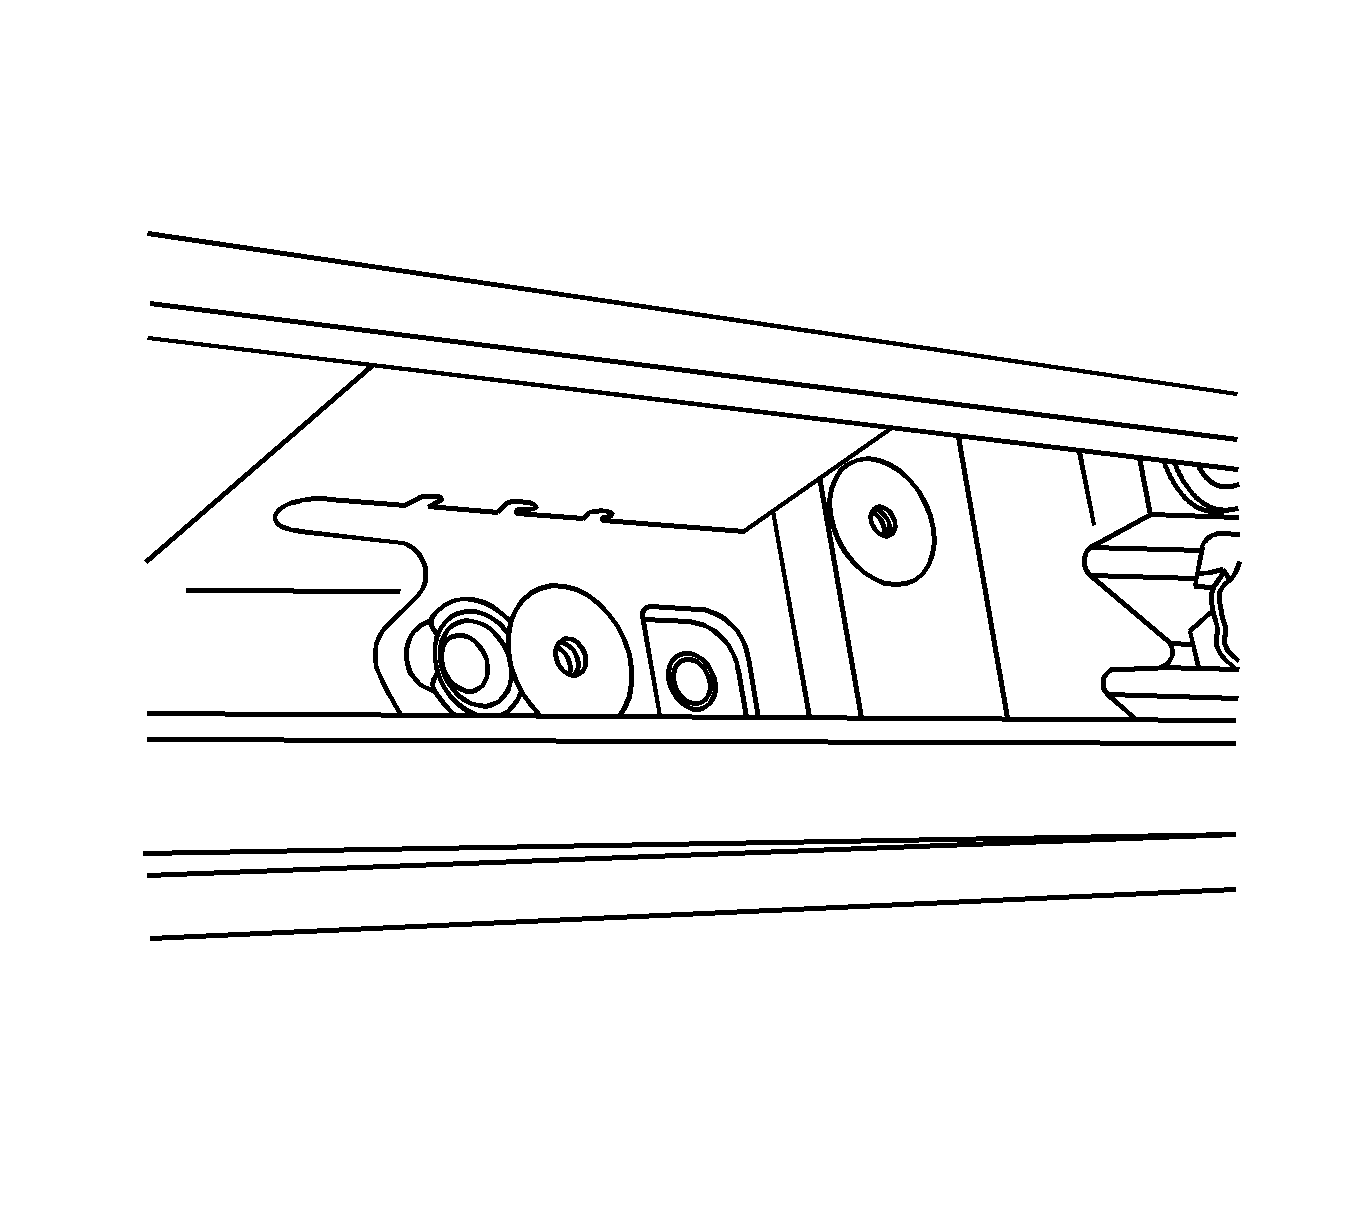
- Install two Mylar washers over the brass inserts. Refer to the illustration above.
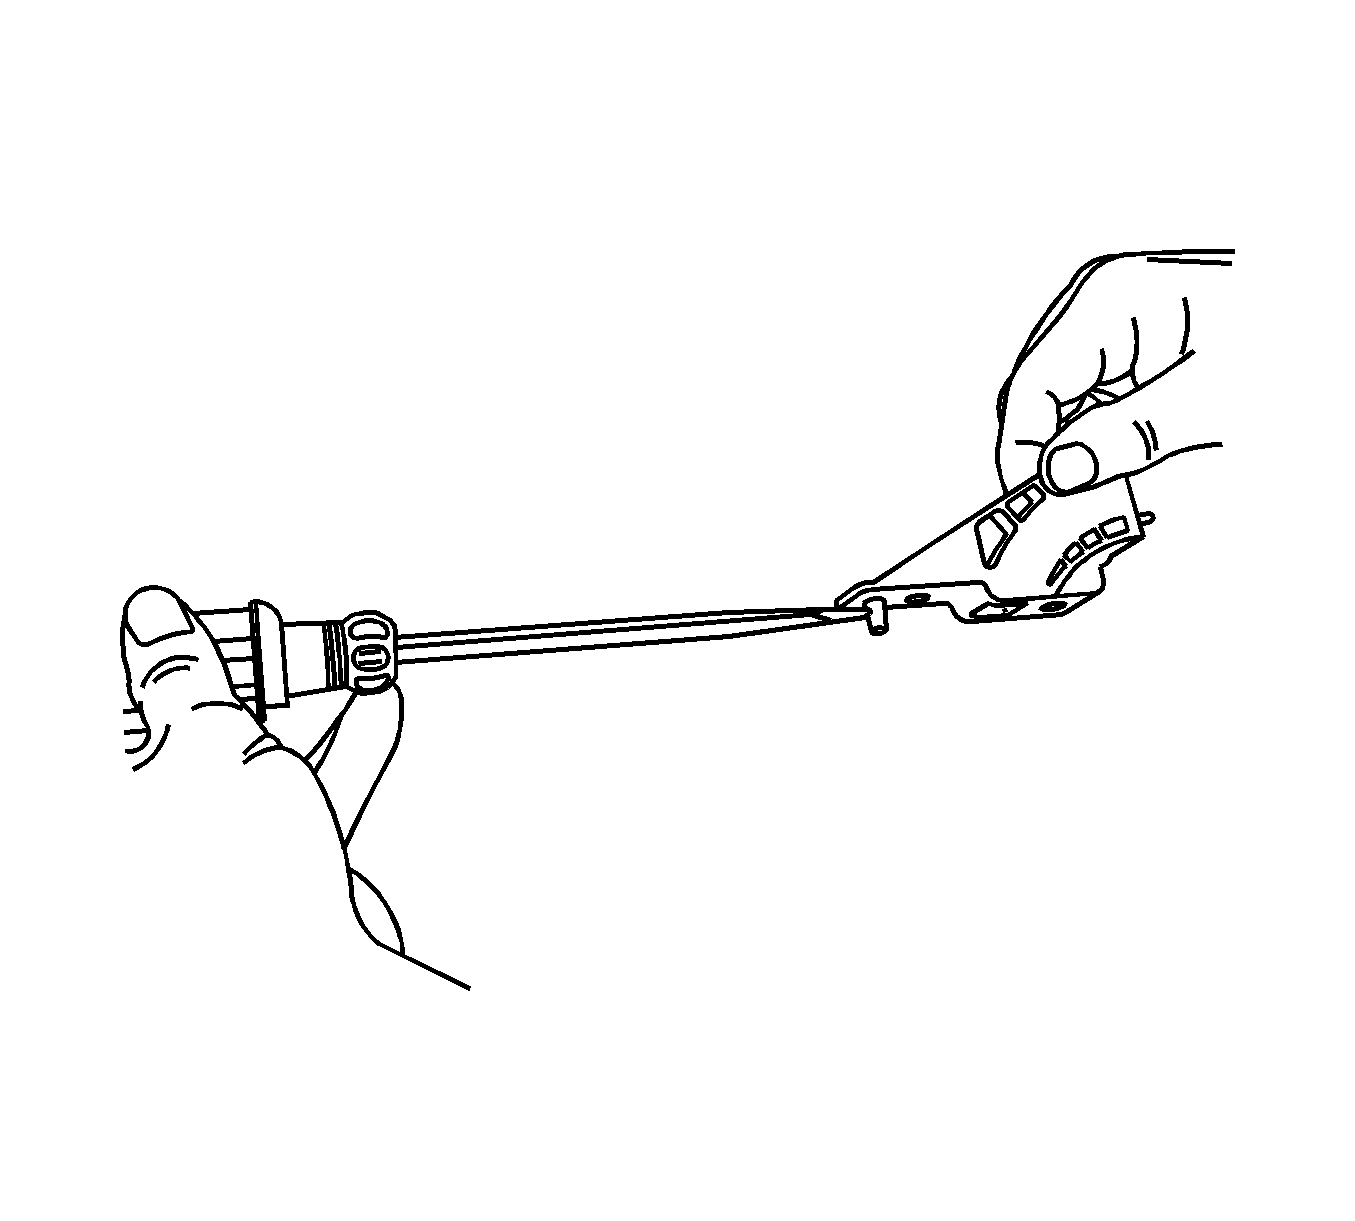
- To re-install the end cap (make sure Mylar washers are not displaced), use a screwdriver to push the locator pin rearward. You should hear a distinct ‘snap’ when it is in position. Refer to the illustration above.
- Apply Thread locker, P/N 12345382 (in Canada, 10953489) (med. Strength - Blue), to the screws before tightening.
- Replace the glass. Finger tighten the sunroof glass attachment fasteners.
- In some cases, the two front end caps may need Mylar washers. The procedure is similar. Remove the visor, assist handle, visor retainer/support, and A-pillar trim. Gently pull down the corner of the headliner without creasing. Proceed with steps 4-10.
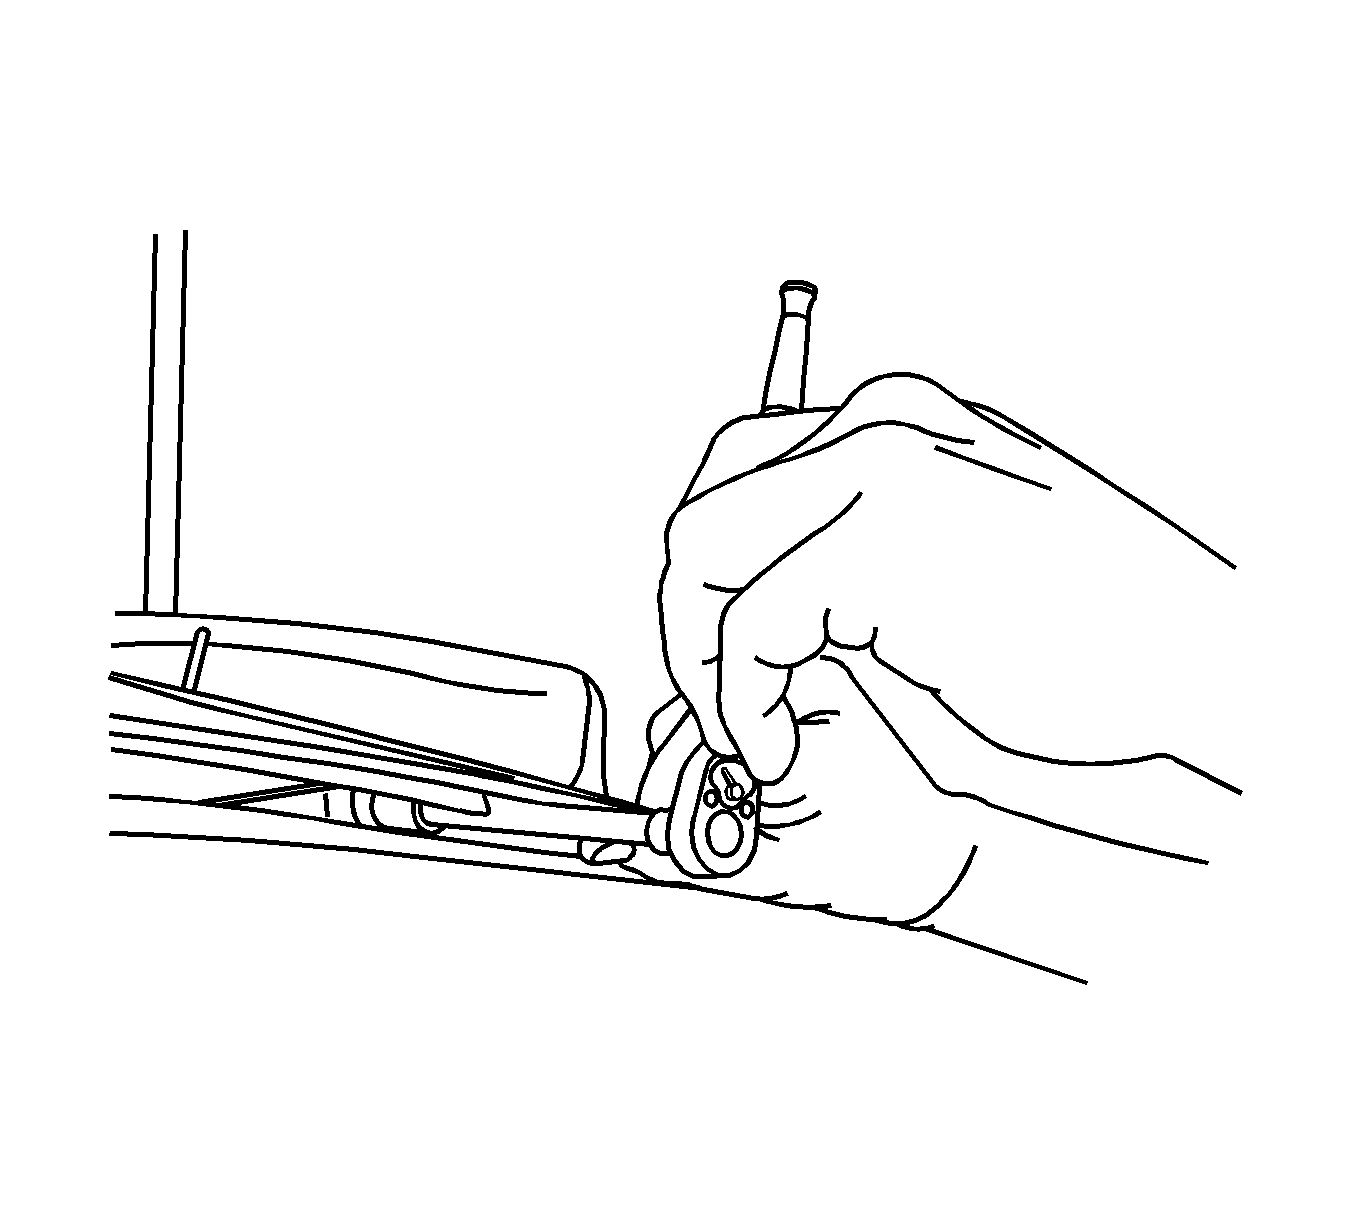
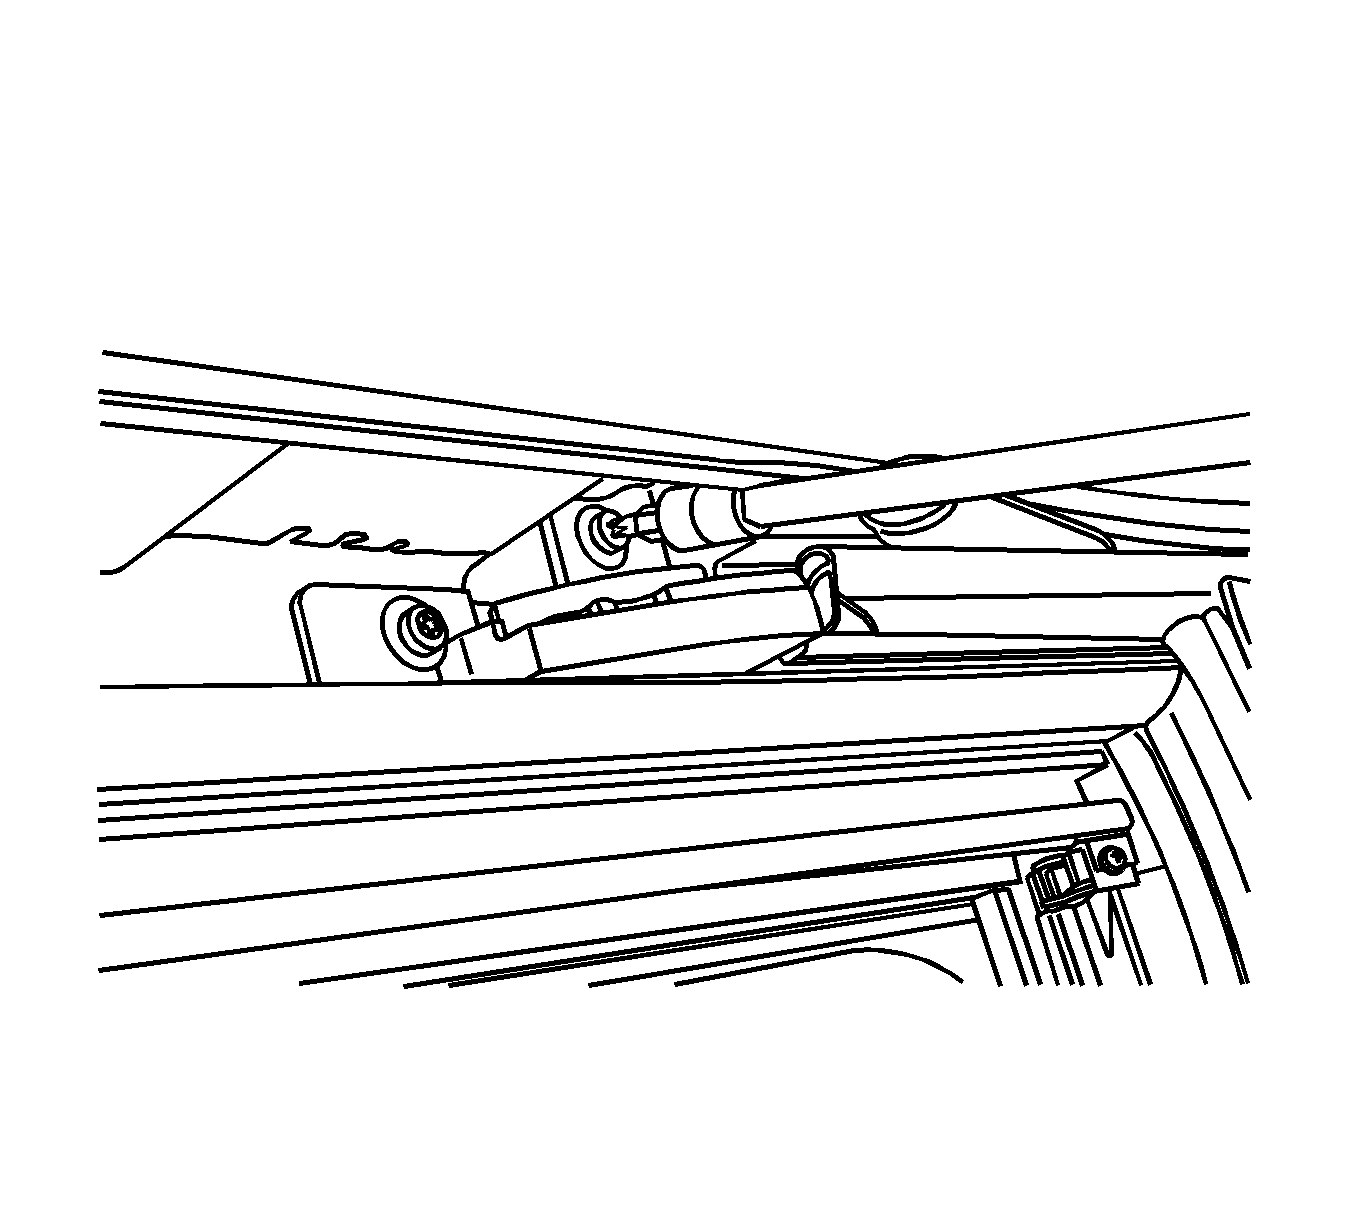
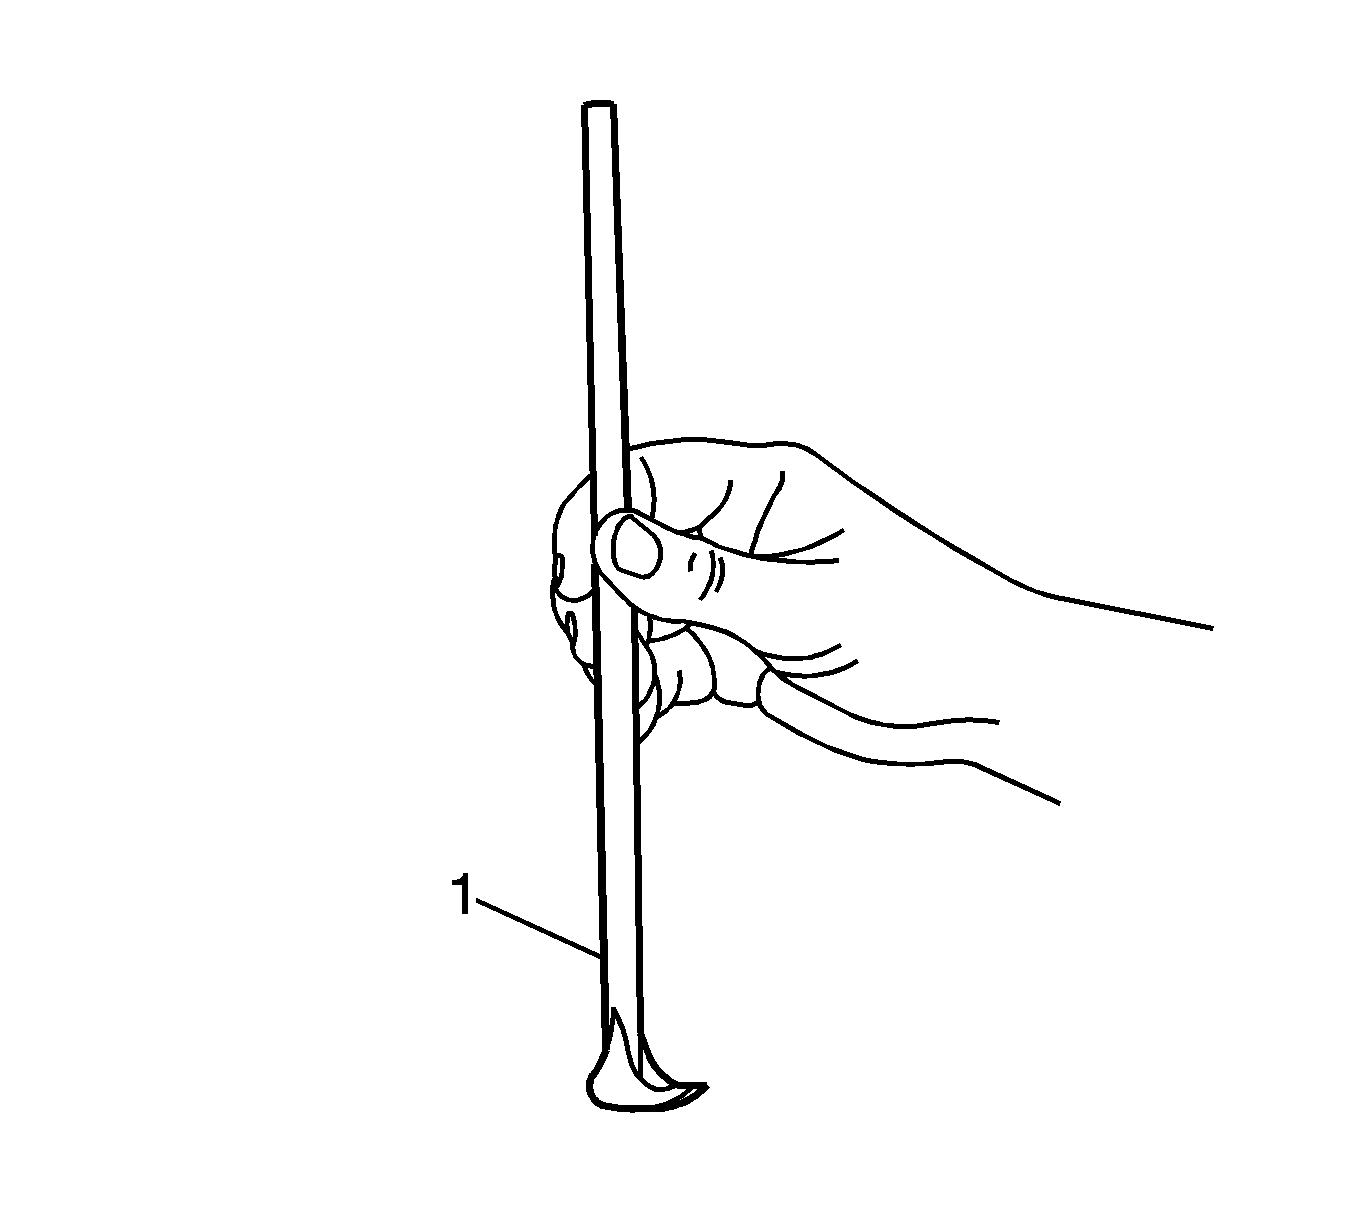
Notice: Over-tightening may strip the brass insert and damage the sunroof module.
Tighten
Tighten the screws to 5.5 N·m (48 lb in).
Important: The rear J-clips should be positioned to the rear as far as possible.
Tighten
Tighten the fasteners to 5.5 N·m (48 lb in).
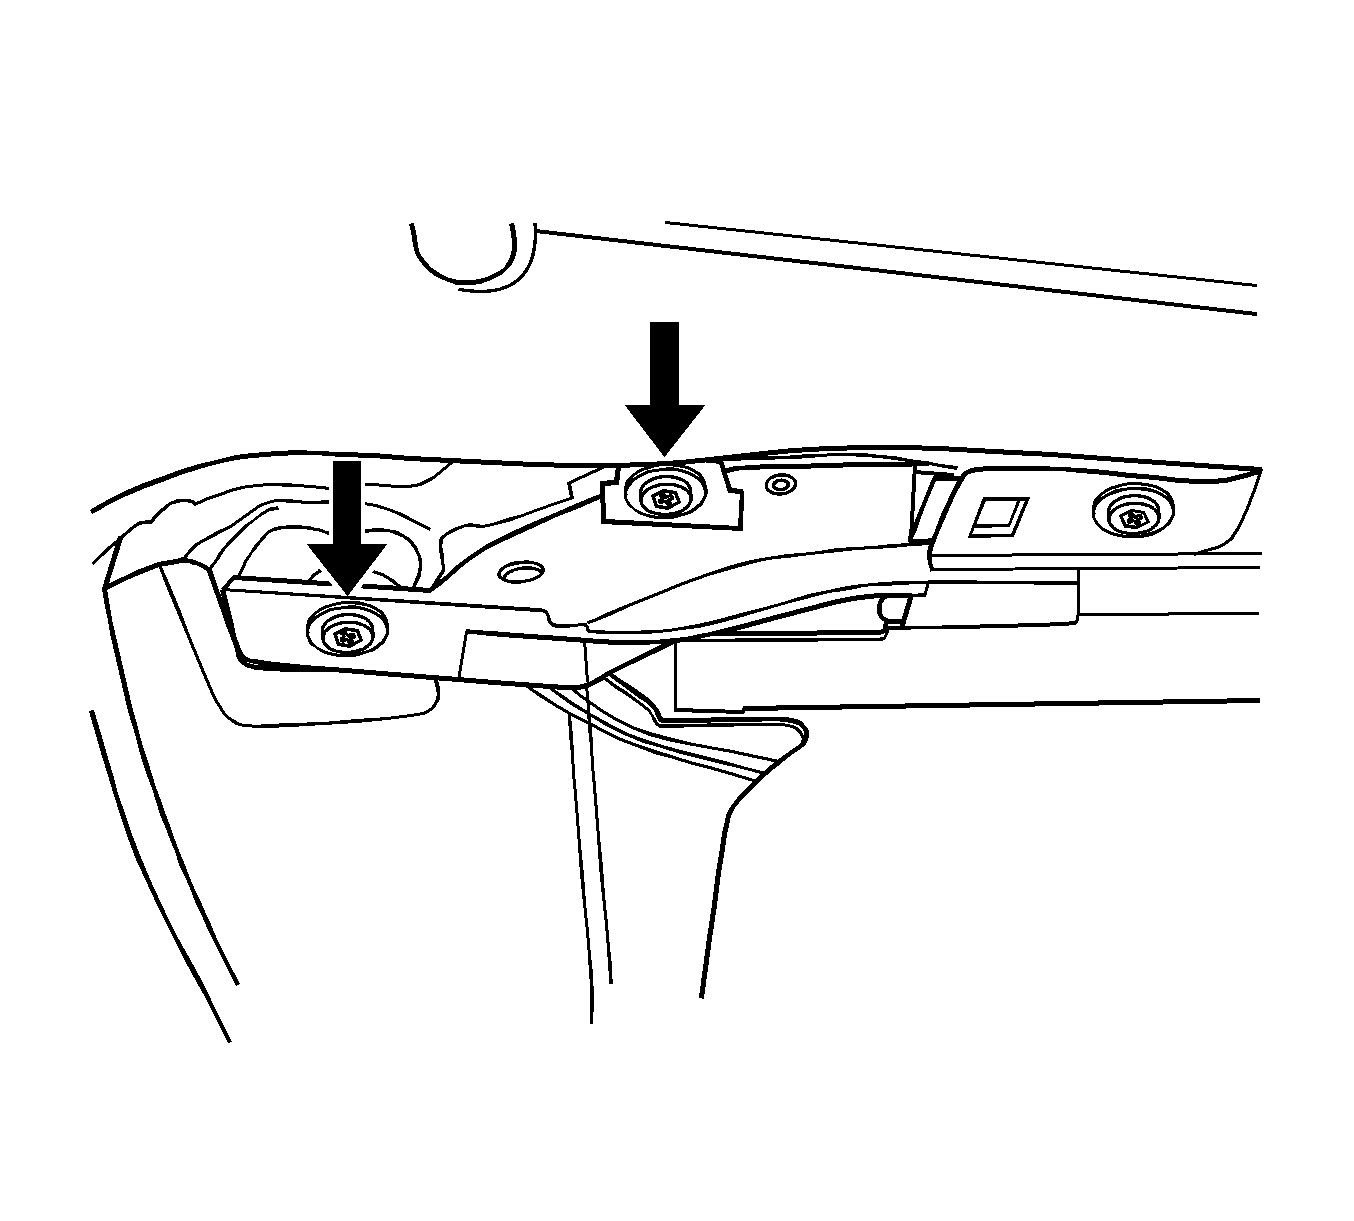
In some cases, the two front end caps may need Mylar washers. The procedure is similar. Remove the visor, assist handle, visor retainer/support, and A-pillar trim. Gently pull down the corner of the headliner without creasing. Refer to the illustration above.
Correction 2
Important: Vehicles produced after December 1, 2006 with a VIN breakpoint of 70149506 will have a red protective cap over the front and rear sunroof guide pins. The alignment pins should not have to be removed from the vehicle.
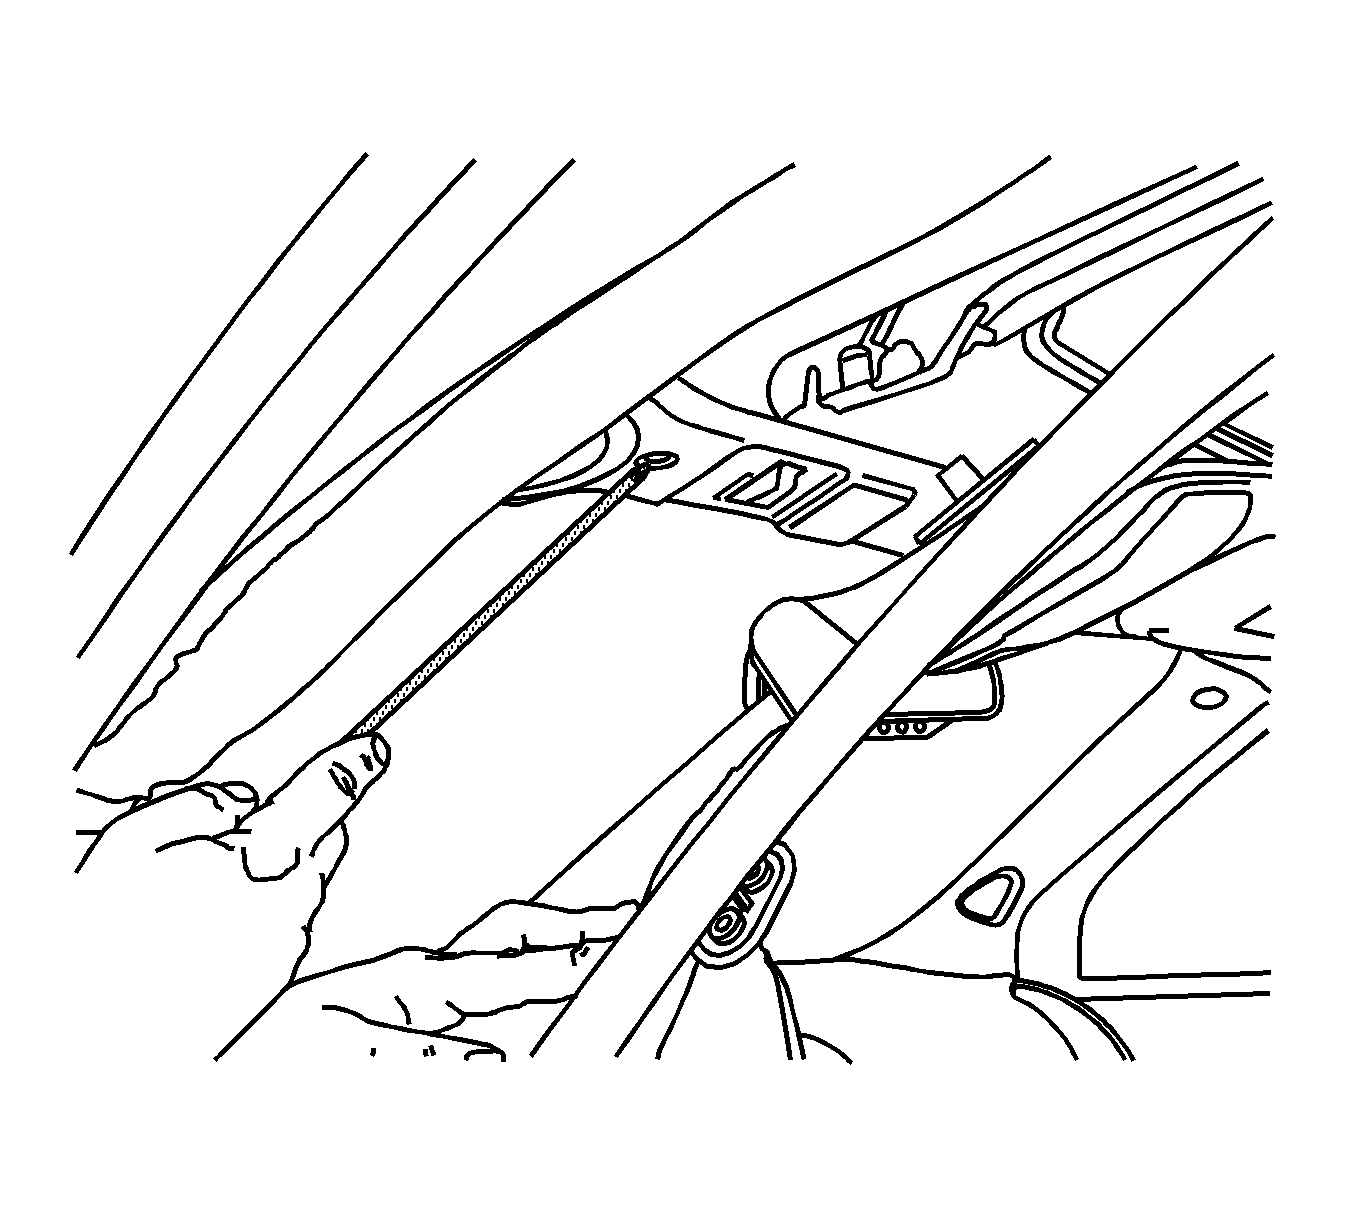
- To gain access, drop the left front part of the headliner. Refer to the illustration above.
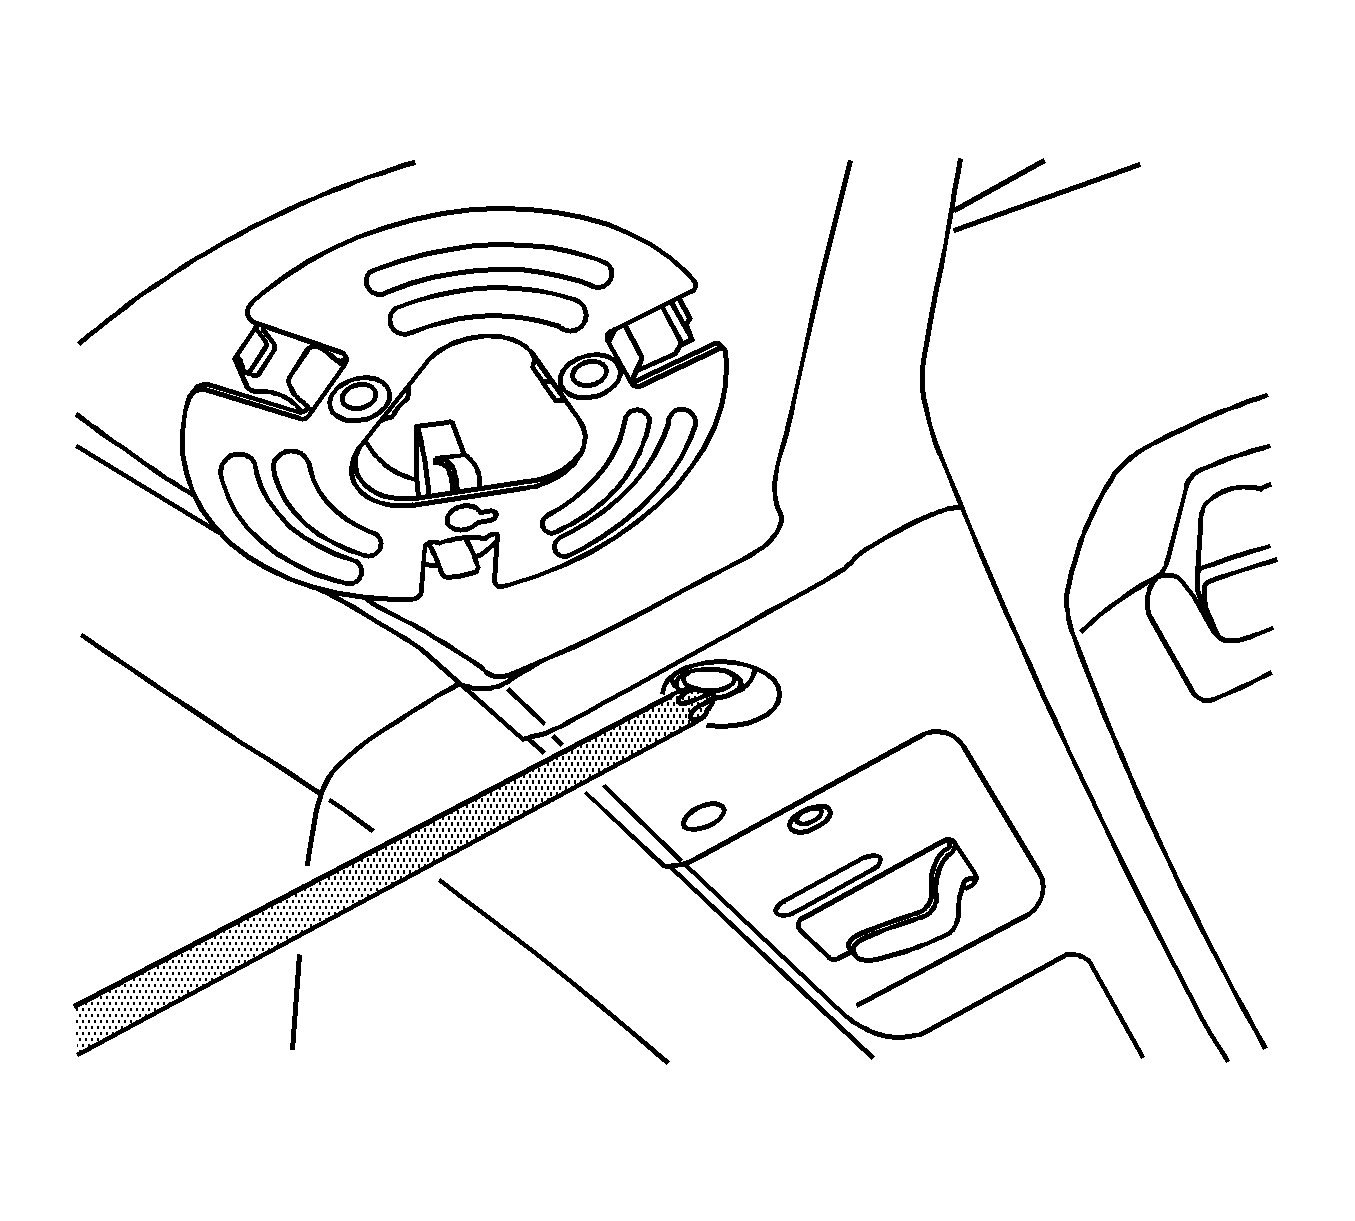
- Use a body shop reciprocating saw or hack saw to cut the pin off above the sheet metal. Refer to the illustration above.
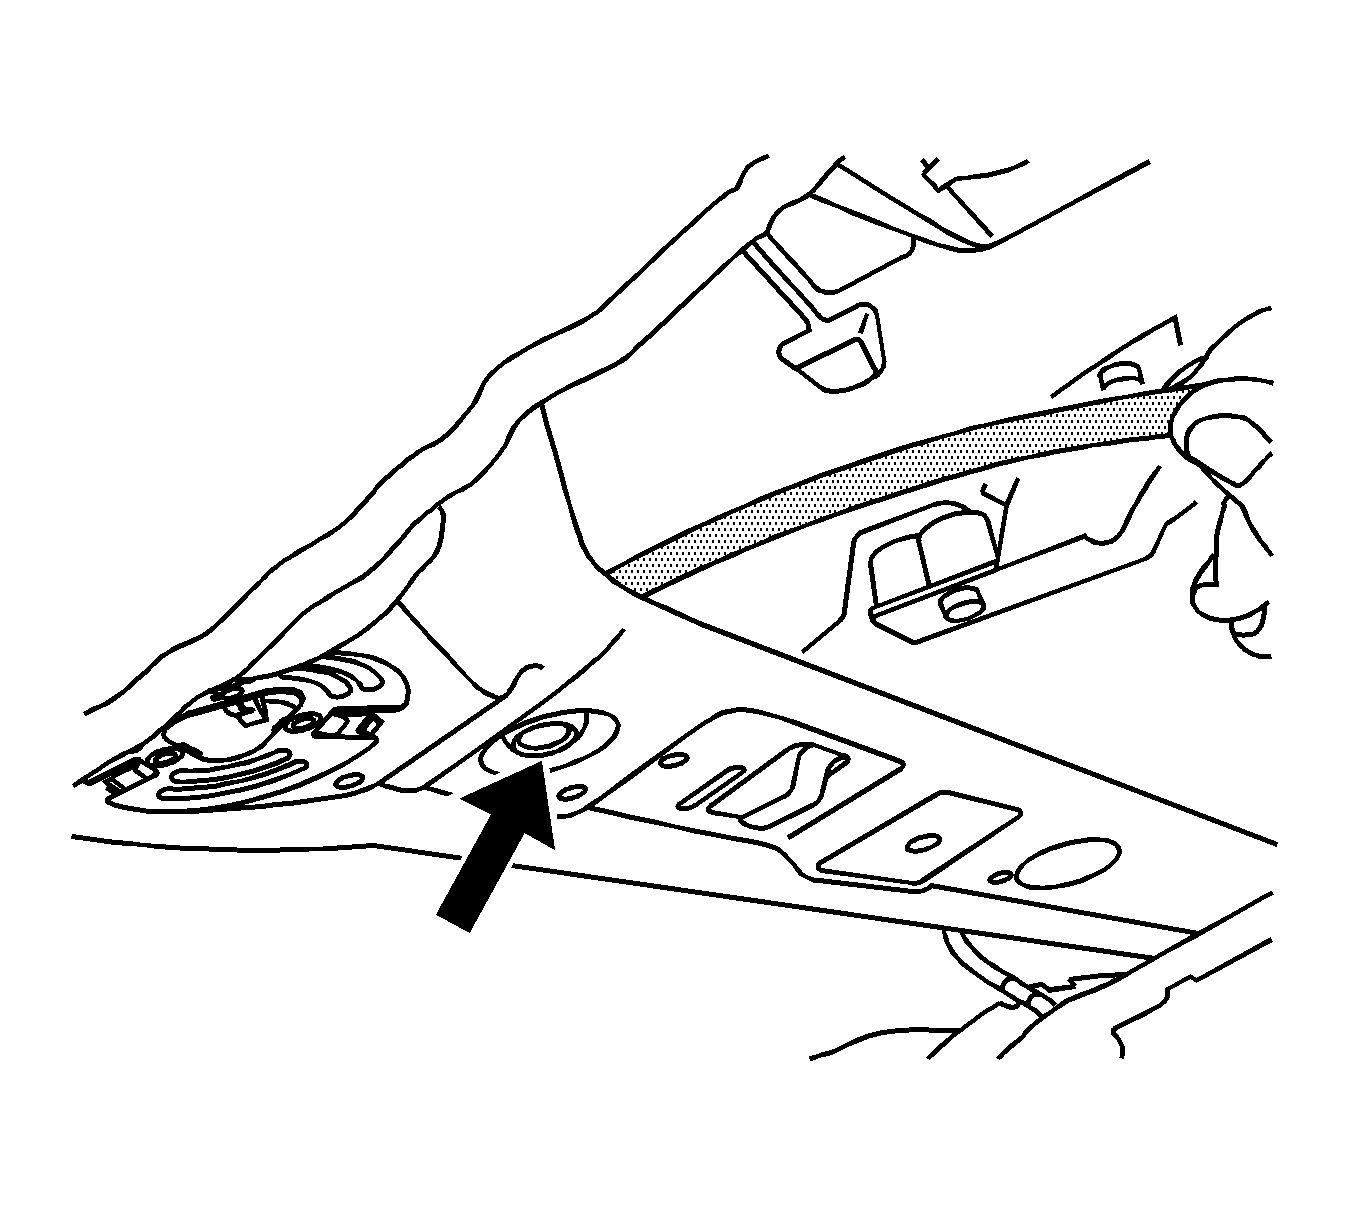
- After removing the pin, inspect the area where the pin was. If you notice a hole in the sunroof frame, seal the hole with body seam sealer. Refer to the illustration above.
Correction 3
Important: Vehicles produced after December 1, 2006 with a VIN breakpoint of 70149506 will have a red protective cap over the front and rear sunroof guide pins. The alignment pins should not have to be removed from the vehicle.
- Lower the right rear corner of the headliner to gain access to the guide pin. Refer to the illustration above.
- Slightly bend the sheet metal around the SMC guide pin for clearance. Refer to the illustration above.
Parts Information
Part Number | Description |
|---|---|
15911310 | Washers |
Warranty Information
For vehicles repaired under warranty, use:
Labor Operation | Description | Labor Time |
|---|---|---|
C9813 | Remove Left Front Guide Pin | 0.5 hr |
C9814 | Adjust Sheet Metal around Guide Pin | 0.4 hr |
C9815 | Install Mylar Washers on End Caps | 1.3 hrs |
