Camshaft Cover Replacement Left
Removal Procedure
Tools Required
| • | J 38185 Hose Clamp Pliers |
| • | J 38823 Water Pump Drive Pulley Installer |
| • | J 38825 Water Pump Drive Pulley Remover |
- Remove the two nuts (2) from the intake manifold sight shield (1).
- Remove the sight shield (1) from the engine.
- Remove the upper filler panel. Refer to Filler Panel Replacement - Upper in Body Front End.
- Partially drain the cooling system. Refer to Cooling System Draining and Filling in Engine Cooling.
- Position the J 38185 (2) to the clamp in order to remove the inlet radiator hose (1) from the water housing crossover.
- Disconnect the PCV fresh air tube (1) from the camshaft cover.
- Remove the Ignition coil cassette. Refer to Coil Cassette Replacement - Bank 1 in Engine Controls-4.6 L.
- Remove the four spark plug boots.
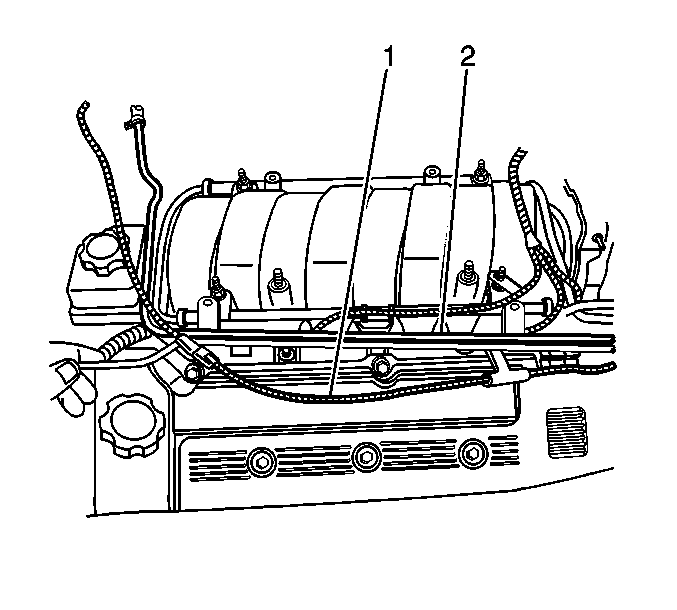
- Remove the two pushnuts securing the engine coolant heater wire (1) and position aside (if equipped).
- Carefully position aside the surge tank pipe (2) from the fuel rail studs.
- Disconnect the cable harness clips at the front of the camshaft cover and position the cable harness aside.
- Remove the water pump drive belt shield fasteners.
- Remove the water pump drive belt shield.
- Disconnect the water pump drive belt.
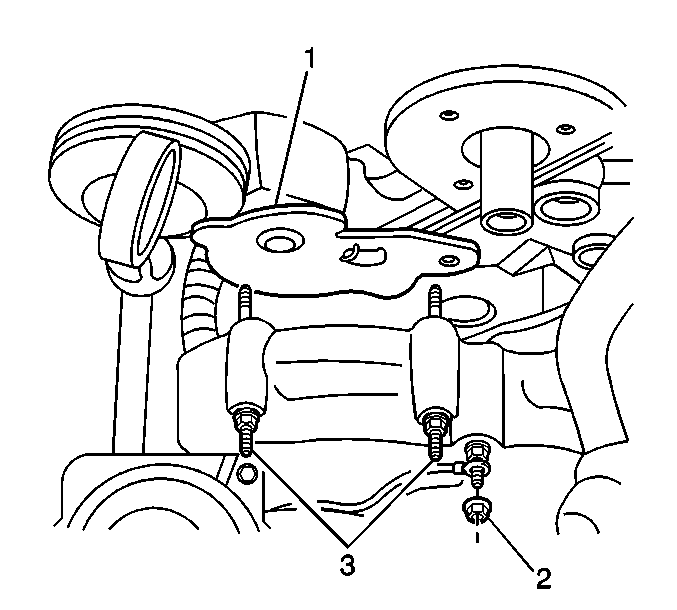
- Loosen the two bolts (3) attaching the water pump belt tensioner (1) to the water crossover.
- Remove the water pump belt tensioner (1).
- Remove the plastic dust cap from the end of the camshaft.
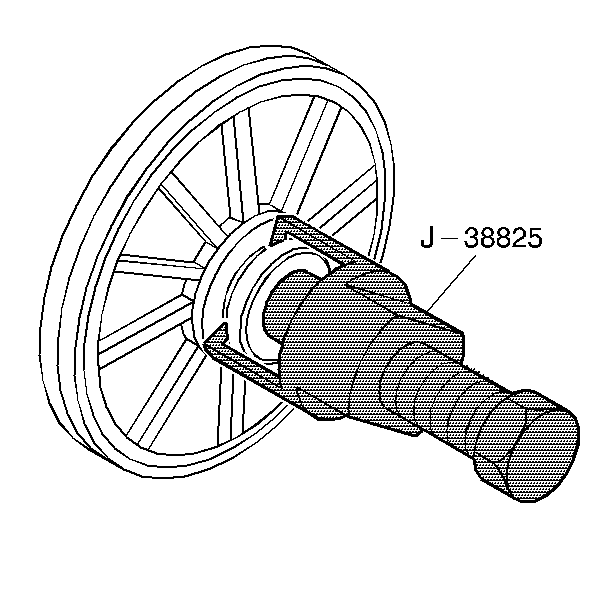
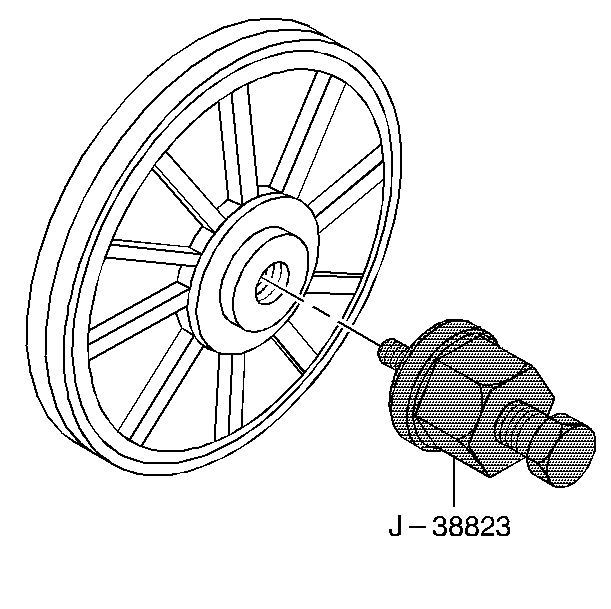
- Remove the water pump pulley using the J 38825 .
- Remove the three camshaft seal retainer bolts.
- Remove the camshaft seal (1).
- Remove the nine camshaft cover bolts.
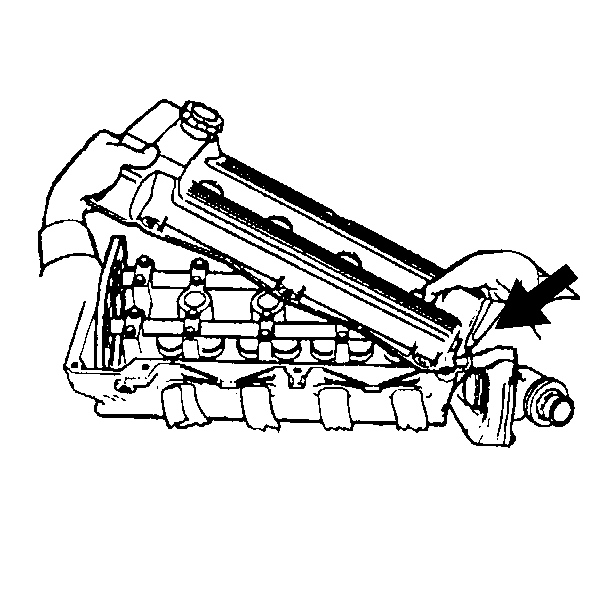
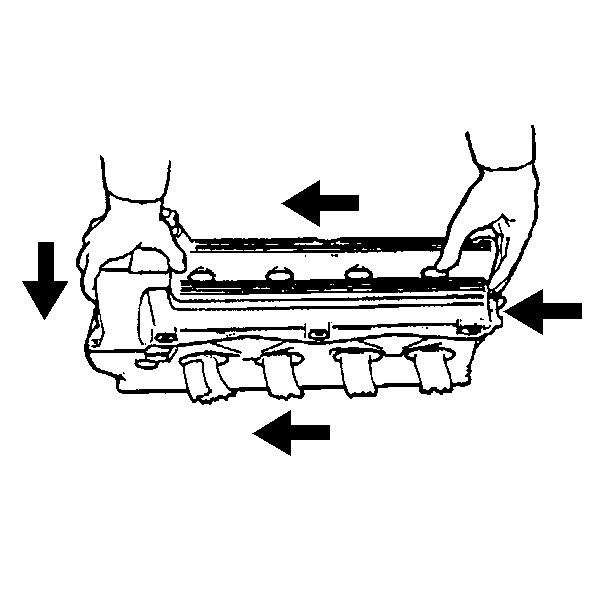
- Lift the camshaft drive end of the camshaft cover up.
- Remove the camshaft cover reward to clear the water pump drive shaft.
- Discard the camshaft cover seal if there is any evidence of damage or if the seal comes out of the groove in the cover during removal.
- Clean and inspect the camshaft cover. Refer to Camshaft Cover Cleaning and Inspection .




Important: DO NOT reuse the camshaft seal.


Installation Procedure
- Install the camshaft cover seal as required.
- Insert the water pump drive shaft through the hole in the camshaft cover.
- Position the camshaft cover downward over the camshaft drive end.
- Install the nine camshaft cover bolts.
- Lubricate the seal lips.
- Install the new camshaft seal to the end of the intake cam.
- Seal the bolt threads with sealer GM P/N 1052080.
- Install the water pump pulley using the J 38823 .
- Install the plastic dust cap into the end of the camshaft.
- Install the water pump belt tensioner (1).
- Connect the water pump drive belt.
- Install the water pump drive belt shield.
- Install the water pump drive belt shield fasteners.
- Connect the cable harness clips to the cable harness at the front of the camshaft cover.
- Position the surge tank pipe (2) on to the fuel rail studs.
- Position the engine coolant heater wire (1) on to the fuel rail studs (if equipped).
- Install the two pushnuts (1).
- Install the spark plug boots onto the coil cassette.
- Install the ignition coil cassette. Refer to Coil Cassette Replacement - Bank 1 in Engine Controls-4.6 L.
- Connect the PCV fresh air tube (1).
- Position the J 38185 (2) to the clamp in order to connect the inlet radiator hose (1) to the water housing crossover.
- Position the intake manifold sight shield (1) to the engine.
- Install the two intake manifold sight shield nuts (2).
- Install the upper filler panel. Refer to Filler Panel Replacement - Upper in Body Front End.
- Fill the cooling system. Refer to Cooling System Draining and Filling in Engine Cooling.
Important: Be careful to prevent the exposed section of the camshaft cover seal from being damaged by the edge of the cylinder head casting.

Notice: Use the correct fastener in the correct location. Replacement fasteners must be the correct part number for that application. Fasteners requiring replacement or fasteners requiring the use of thread locking compound or sealant are identified in the service procedure. Do not use paints, lubricants, or corrosion inhibitors on fasteners or fastener joint surfaces unless specified. These coatings affect fastener torque and joint clamping force and may damage the fastener. Use the correct tightening sequence and specifications when installing fasteners in order to avoid damage to parts and systems.
Tighten
Tighten the bolts to 10 N·m (89 lb in).

Tighten
Tighten the bolts to 3 N·m (27 lb in).

Tighten
Tighten the two bolts (3) to 10 N·m (89 lb in).

Tighten
Tighten the fasteners to 10 N·m (89 lb in).

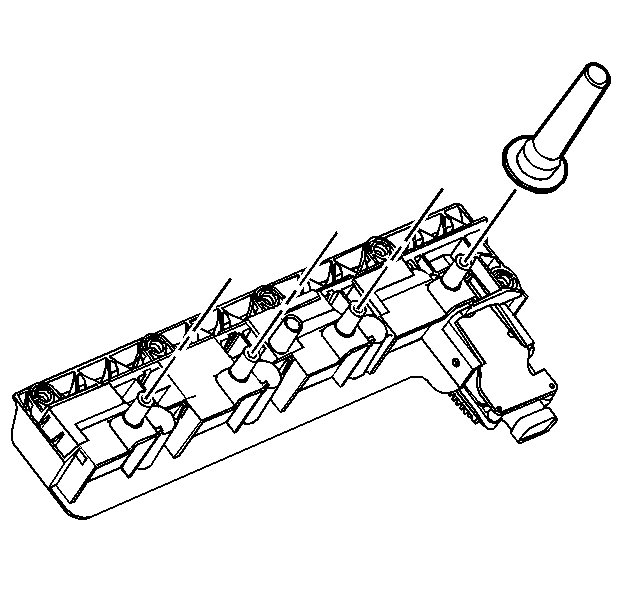
Ensure that the boots are fully seated against the cassette.


Tighten
Tighten the nuts to 3 N·m (27 lb in).
Camshaft Cover Replacement Right
Removal Procedure
- Remove the two nuts (2) from the intake manifold sight shield (1).
- Remove the sight shield (1) from the engine.
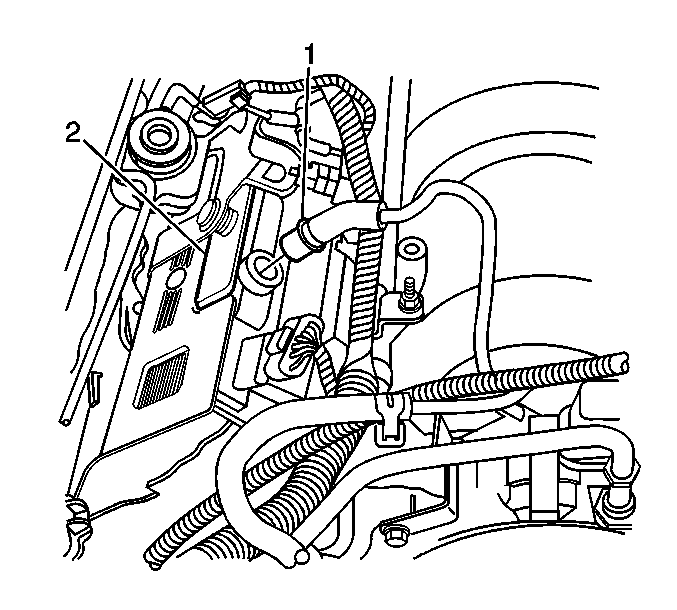
- Disconnect the PCV valve (1) from the camshaft cover (2).
- Disconnect the oxygen sensor wire.
- Remove the ignition coil cassette. Refer to Coil Cassette Replacement - Bank 2 in Engine Controls-4.6 L.
- Remove the four spark plug boots.
- Disconnect the cable harness clips at the front of the camshaft cover and position the cable harness aside.
- Remove the nine camshaft cover bolts.
- Remove the camshaft cover.
- Discard the camshaft cover seal if there is any evidence of damage or if the seal comes out of the groove in the cover during removal.
- Clean and inspect the camshaft cover. Refer to Camshaft Cover Cleaning and Inspection .


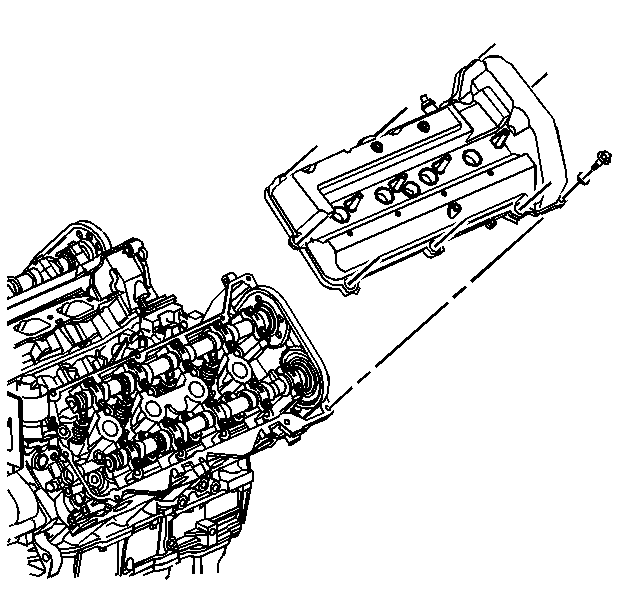
Installation Procedure
- Install the camshaft cover seal as required.
- Install the camshaft cover.
- Install the nine camshaft cover bolts.
- Install the spark plug boots onto the coil cassette.
- Install the ignition coil cassette. Refer to Coil Cassette Replacement - Bank 2 in Engine Controls-4.6 L.
- Connect the cable harness clips to the cable harness at the front of the camshaft cover.
- Connect the oxygen sensor wire.
- Connect the PCV valve (1) to the camshaft cover (2).
- Position the intake manifold sight shield (1) to the engine.
- Install the two intake manifold sight shield nuts (2).
Important: Be careful to prevent the exposed section of the camshaft cover seal from being damaged by the edge of the cylinder head casting.

Notice: Use the correct fastener in the correct location. Replacement fasteners must be the correct part number for that application. Fasteners requiring replacement or fasteners requiring the use of thread locking compound or sealant are identified in the service procedure. Do not use paints, lubricants, or corrosion inhibitors on fasteners or fastener joint surfaces unless specified. These coatings affect fastener torque and joint clamping force and may damage the fastener. Use the correct tightening sequence and specifications when installing fasteners in order to avoid damage to parts and systems.
Tighten
Tighten the bolts to 10 N·m (89 lb in).

Ensure that the boots are fully seated against the cassette.


Tighten
Tighten the nuts to 3 N·m (27 lb in).
