Refer to Engine Control Schematics
Ignition Control Module -- Rear Bank

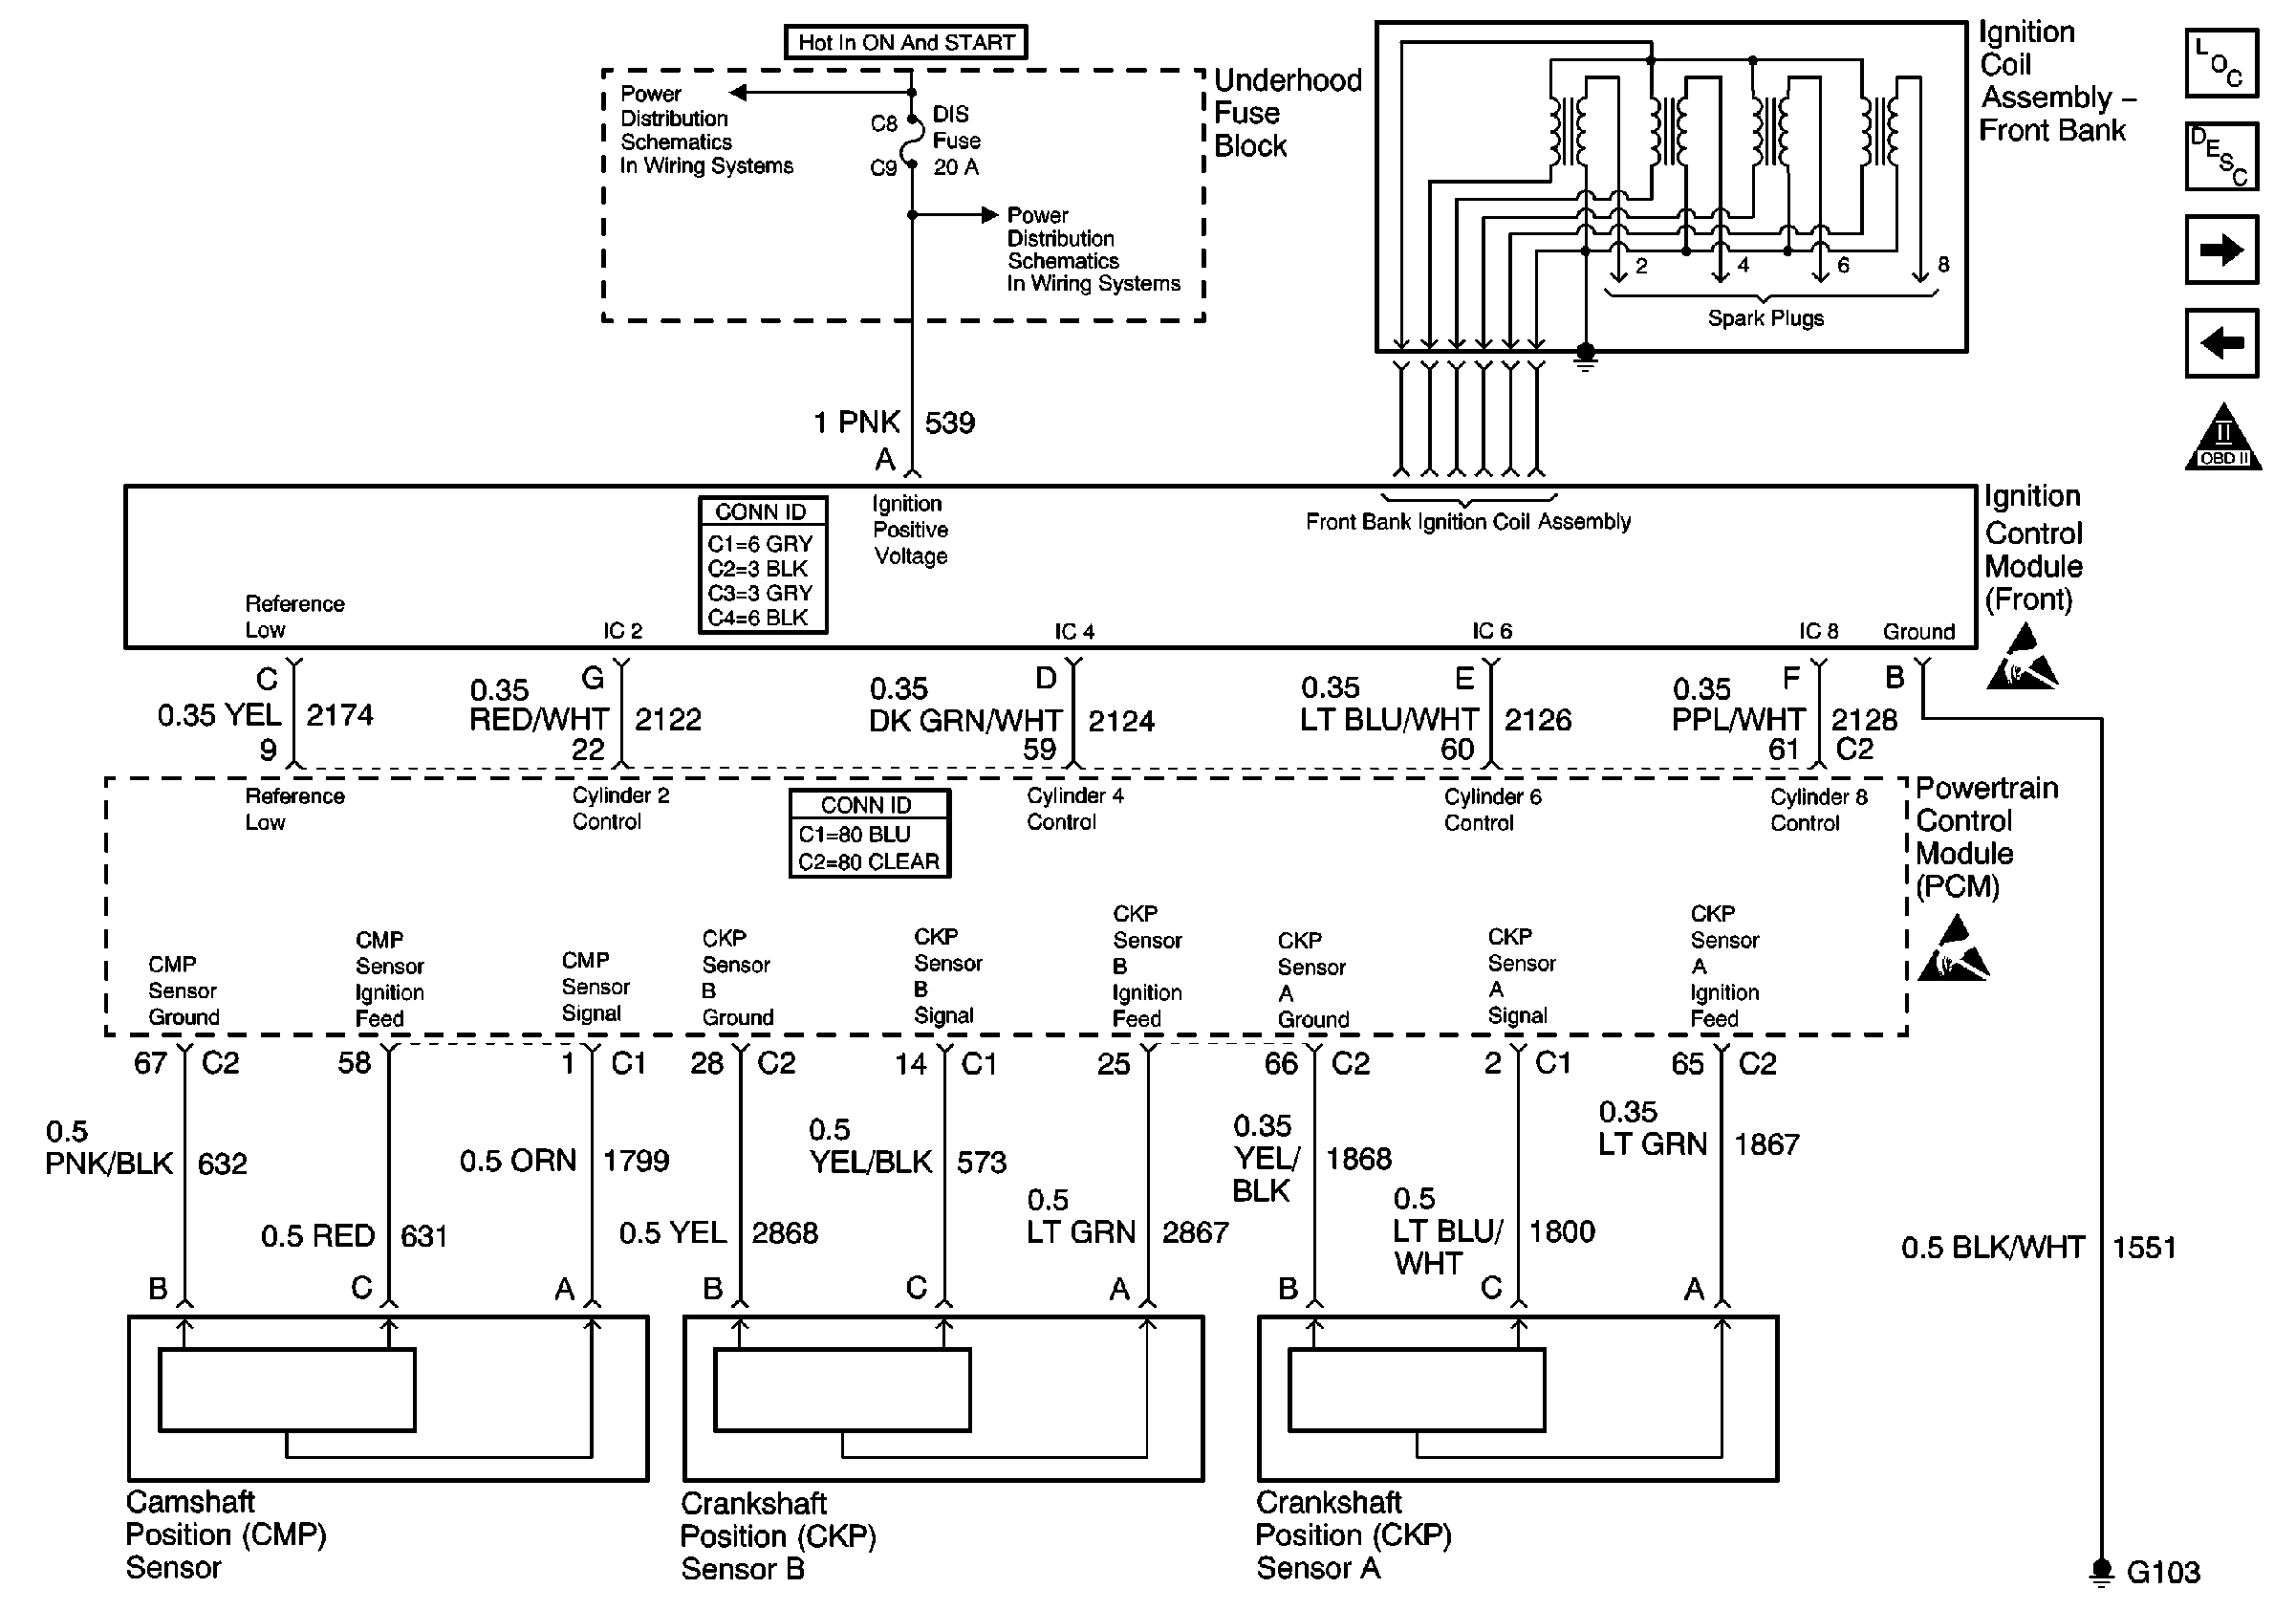
and
Ignition Control Module -- Front Bank
.
Circuit Description
The electronic ignition system uses an individual ignition coil for each cylinder. There are two separate ignition module assemblies located in the camshaft cover of each cylinder bank. Each ignition module assembly contains an ignition control module and four ignition coils. Each ignition coil connects directly to a spark plug using a boot. This arrangement eliminates the need for secondary ignition wires. The ignition module assemblies receive power from a fused ignition feed. Both ignition module assemblies connect to chassis ground. A Reference Low and four ignition control (IC) circuits connect each ignition module assembly to the PCM. The PCM uses the individual IC circuits to control coil sequencing and spark timing for each ignition coil. The IC circuits transmit timing pulses from the PCM to the ignition control module to trigger the ignition coil and fire the spark plug. The PCM monitors each IC circuit for improper voltage levels. The PCM also monitors the IC circuits in two groups. The groups consist of every other cylinder in the cylinder firing order (i.e., 1/7/4/6; 2/3/5/8). The PCM monitors the IC circuit group to detect improper voltage levels that occur randomly. If the PCM detects an improper voltage condition in the IC circuit group for #1, #4, #6, and/or #7 cylinders, DTC P1359 will set.
Conditions for Running the DTC
The ignition is ON.
Conditions for Setting the DTC
| • | During PCM power-up, the PCM detects an open circuit condition in the IC circuit group for #1, #4, #6 and/or #7 cylinders. |
| OR |
| • | The PCM detects a short to voltage condition in the IC circuit group for #1, #4, #6 and/or #7 cylinders. |
| • | The condition is present for less than 1 second. |
Action Taken When the DTC Sets
| • | The PCM illuminates the malfunction indicator lamp (MIL) during the second consecutive trip in which the diagnostic test runs and fails. |
| • | The PCM stores the conditions present when the DTC set as Freeze Frame/Failure Records data. |
Conditions for Clearing the MIL/DTC
| • | The PCM will turn the MIL OFF after the third consecutive trip in which the diagnostic runs and passes. |
| • | The history DTC will clear after 40 consecutive warm-up cycles have occurred without a malfunction. |
| • | The DTC can be cleared by using the scan tool Clear DTC Information function. |
Diagnostic Aids
The Misfire Current Cyl # / Misfire History Cyl # displays on the scan tool provides information that may be useful in diagnosing DTC P1359. The Misfire Current Cyl # counter may normally display a small amount of activity (0-10 counts). However, the display should not increment steadily. If the Misfire Current Cyl # increments steadily for a single cylinder within the IC circuit group, the condition is isolated to the IC circuit for the specific cylinder. However, if the Misfire Current Cyl # increments randomly within the IC circuit group, the condition may be due to poor connections at the PCM or a faulty PCM. Also, if the Misfire Current Cyl # increments steadily for a cylinder bank, DTC P1360 may set. The condition may be the result of the following conditions:
| • | Loss of power or ground at the module assembly for the cylinder bank. |
| • | Poor or disconnected module assembly connector for the cylinder bank. |
| • | Faulty ignition control module. |
If the condition is intermittent, refer to Intermittent Conditions in Symptoms.
Step | Action | Value(s) | Yes | No | ||||||
|---|---|---|---|---|---|---|---|---|---|---|
1 | Did you perform the Powertrain On Board Diagnostic (OBD) System Check? | -- | ||||||||
2 | Is DTC P1360 also set? | -- | ||||||||
3 | With the engine idling, observe the Misfire Bar Graph display on the scan tool. Is the Misfire Bar Graph incrementing for an even cylinder(s)? | -- | ||||||||
4 | Is the Misfire Bar Graph Bar Graph incrementing for an odd cylinder(s)? | -- | ||||||||
5 | With the engine idling, observe the Misfire Bar Graph display on the scan tool. Is the Misfire Bar Graph incrementing for two cylinders? | -- | ||||||||
6 |
Did you find and correct the condition? | -- | ||||||||
7 |
Did you find and correct the condition? | -- | ||||||||
8 | Are the incrementing cylinders even (cylinders 4 and 6)? | -- | ||||||||
9 |
Did you find and correct the condition? | -- | ||||||||
10 |
Did you find and correct the condition? | -- | ||||||||
11 |
Does the DMM display a frequency within the specified values? | 1-2 Hz | ||||||||
12 |
Did you find and correct the condition? | -- | ||||||||
13 |
Did you find and correct the condition? | -- | ||||||||
14 | Replace the appropriate ignition module. Refer to Ignition Control Module Replacement - Bank 1 or Ignition Control Module Replacement - Bank 2 . Did you complete the replacement? | -- | -- | |||||||
15 |
Important: The replacement PCM must be programmed. Replace the PCM. Refer to Powertrain Control Module Replacement/Programming . Did you complete the replacement? | -- | -- | |||||||
16 |
Does the scan tool indicate that DTC P1359 passed? | -- | System OK |
