For 1990-2009 cars only
Removal Procedure
- Turn ON the radio.
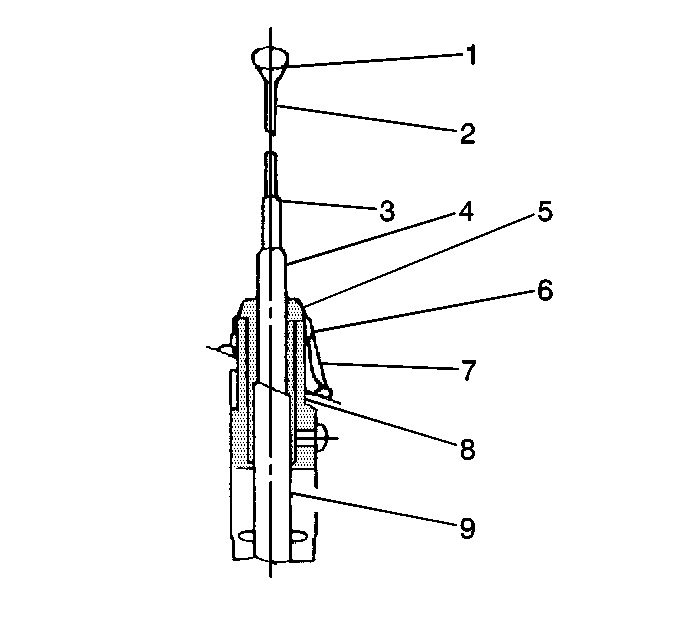
- When the thinnest rod section(100 rod) (2) is extended approximately 26 mm (1 in) above the other sections, immediately disconnect the power using one of the following methods:
- Remove the finial (1) using a wrench (or suitable pliers) on the flat portions of the finial (1).
- Remove the insulator stop (5).
- Using your fingers or long nose pliers, pull up and slide the sections (3,4) over the 100 rod (2).
- Remove the sections (3,4).

| • | Disconnect the battery. |
| • | Unplug the power lead from the radio. |
| • | Unplug the power lead from the antenna. |
Prevent the 100 rod section (2) from turning by gripping the 100 rod using pliers. Pad the pliers using cloth or rubber in order to prevent damage to the 100 rod surface.
The 100 rod (2) is not removable. Do not bend the rod.
Installation Procedure
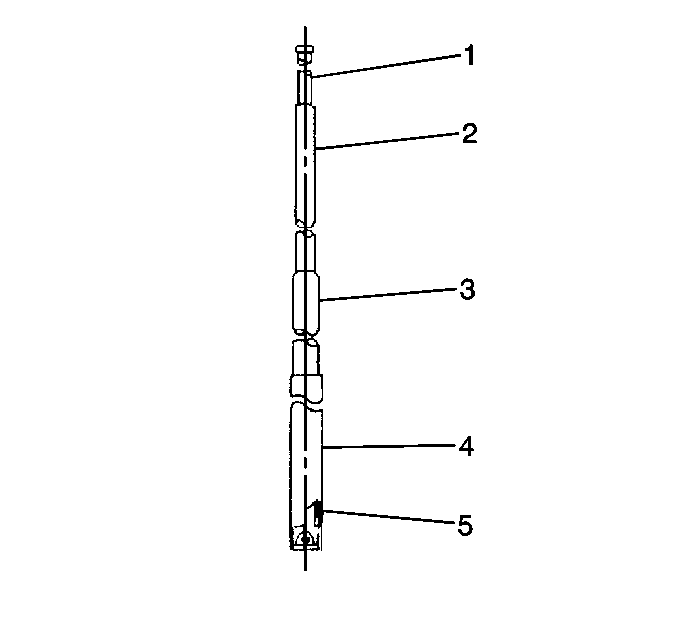
- Lubricate the contractor (5) using the supplied package of grease.
- Slide the assembly tool (brass tube) (4) over the contractor (5) in order to compress the contractor fingers. The assembly tool is included in the replacement parts package.
- Slide the mast assemblies (3,4) over the 100 rod section (2) and down into the mast stationary tube (9) past the contractor fingers.
- Remove the assembly tool.
- Install the bottom mast (4) into the stationary tube (9).
- Install the insulator stop (5).
- Install the finial (1).
- Reconnect the power source.
- Cycle the antenna mast.


Ensure that the threaded top of the 100 rod section (2) is above the top of the other tubes.
