For 1990-2009 cars only
Removal Procedure
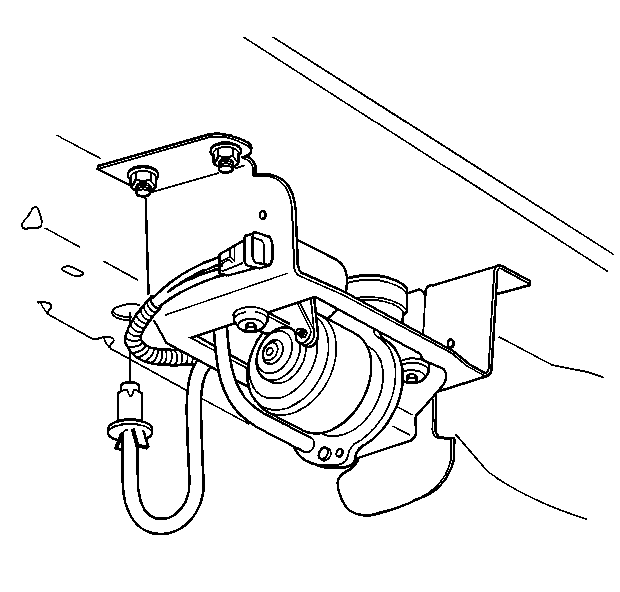
- Raise the vehicle and suitably support. Refer to Lifting and Jacking the Vehicle in General Information.
- Disconnect the air tube from the pressure limiter valve.
- Remove the air tube from the air compressor bracket.
- Remove the intake air filter from the vehicle.
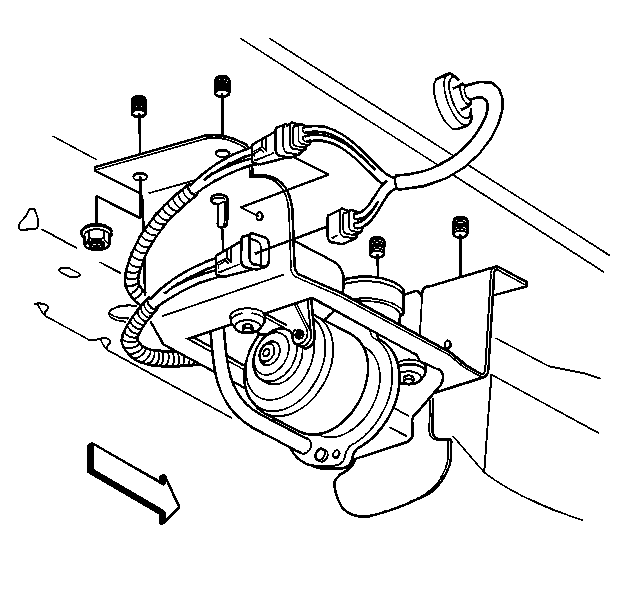
- Remove the height sensor harness from the air compressor bracket.
- Disconnect the vehicle harness connector from the air compressor connector.
- Remove the four nuts and the air compressor assembly from the vehicle.
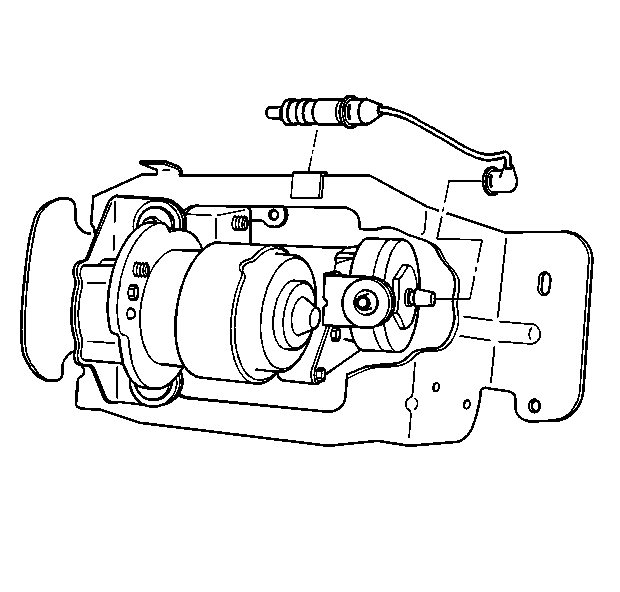
- Disconnect the pressure limiter valve air tube from the air dryer.
- Remove the pressure limiter valve from the clip.
- Remove the air compressor harness from the air compressor bracket.
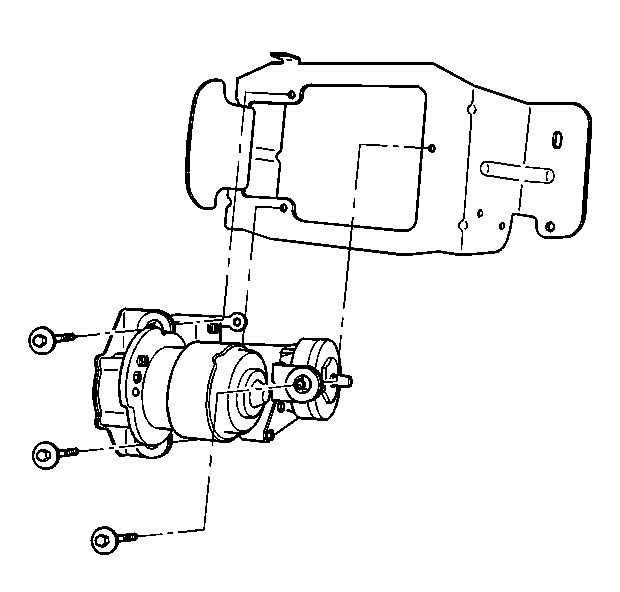
- Remove three bolts and the air compressor assembly from the bracket.
- Remove the air dryer from the air compressor. Refer to Automatic Level Control Air Dryer Replacement .
- Remove the air hose from the air compressor at two places.
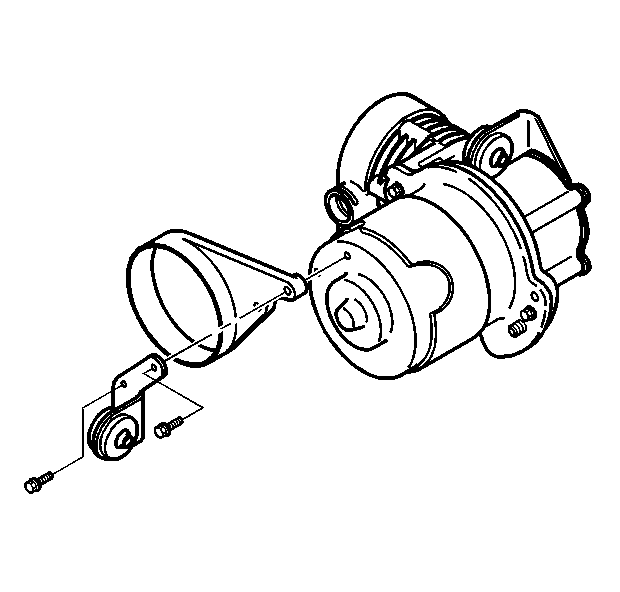
- Remove the two screws and the two brackets from the air compressor.
Important: Before disconnecting any air hose or air tube, clean the components and the surrounding area to prevent dirt and other foreign material from entering the ELC system.
Installation Procedure
- Install the two brackets on the air compressor with two screws.
- Connect the air hose to the air compressor at two places.
- Install the air dryer on the air compressor. Refer to Automatic Level Control Air Dryer Replacement .
- Install the air compressor assembly onto the bracket with three bolts.
- Connect the pressure limiter valve air tube to the air dryer.
- Install the pressure limiter valve in the clip.
- Install the air compressor harness onto the air compressor bracket.
- Install the air compressor assembly on the vehicle with four nuts.
- Connect the vehicle harness connector to the air compressor connector.
- Install the height sensor harness on the air compressor bracket.
- Install the intake air filter on the vehicle.
- Connect the air tube to the pressure limiter valve.
- Install the air tube on the air compressor bracket.
- Lower the vehicle.

Tighten
Tighten two screws to 7 N·m (62 lb in).

Tighten
Tighten three bolts to 4 N·m (36 lb in).


Tighten
Tight four nuts to 10 N·m (88 lb in).

Important: Before driving the vehicle, turn the ignition on and wait approximately 45 seconds. This will permit the ELC system to execute the ARC, ensuring that the air adjustable struts are filled with residual pressure.
