For 1990-2009 cars only
Caution: Valve Springs can be tightly compressed. Use care when removing retainers and plugs. Personal injury could result.
Important: The use of a honing stone, fine sandpaper or crocus cloth is not recommended for servicing stuck valves. All valve lands have sharply machined corners that are necessary to cleaning the bore. If these corners are rounded, foreign material could wedge between the valve and the bore causing the valve to stick. If it is found necessary to clean a valve, "micro fine" lapping compound 900 grit or finer should be used. Too much "lapping" of the valve will cause excessive clearances and increase the chance of a valve not operating.
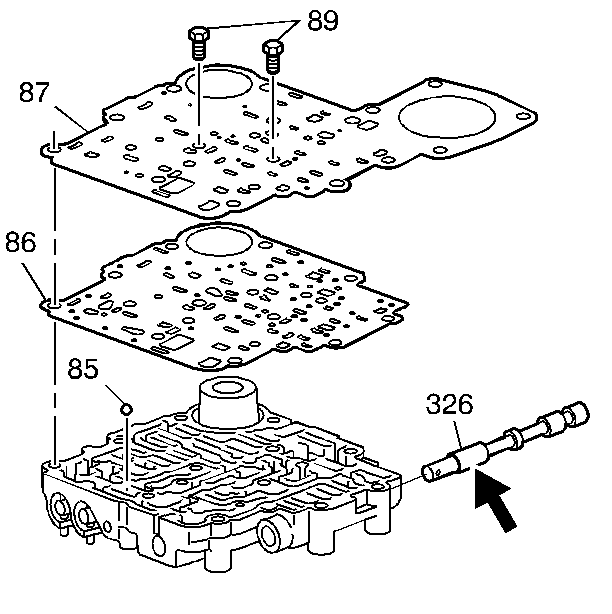
- Remove the manual valve (326).
- Inspect the manual valve for:
- Remove the spacer plate to the control valve assembly bolts (89).
- Remove the spacer plate (87) and gasket (86).
- Remove the check ball (85) from the fluid passage.
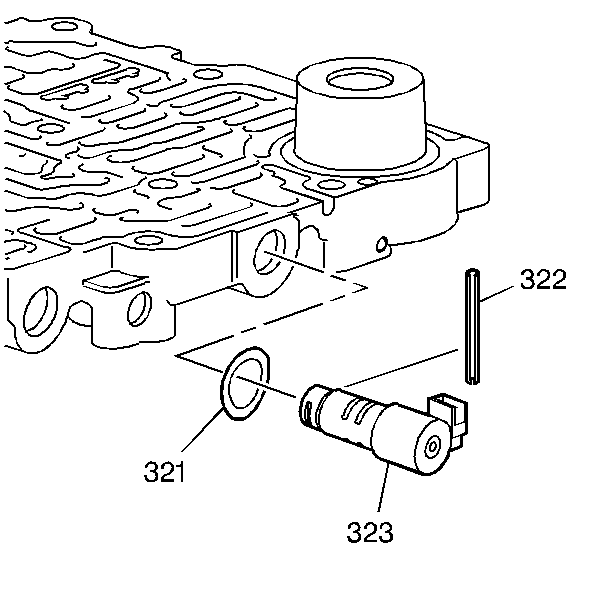
- Remove the Band Control solenoid retaining pin (322).
- Remove the Band Control solenoid (323).
- Remove the Band Control solenoid waved washer (321).
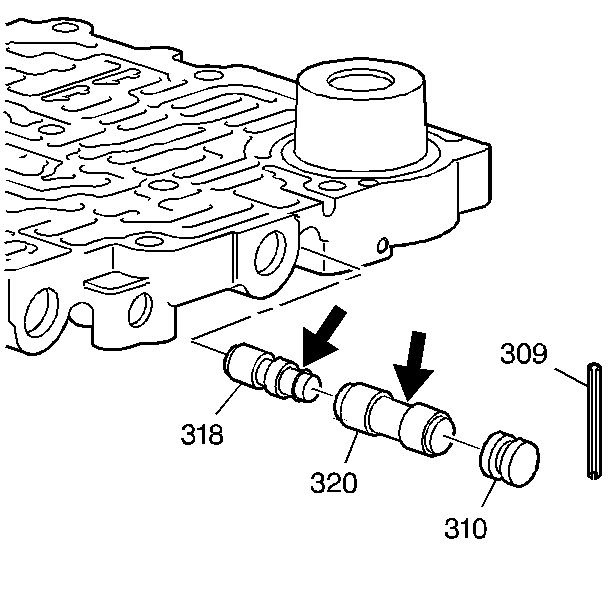
- Remove the 1-2 accumulator valve sleeve retainer pin (309).
- Remove the 1-2 accumulator valve bore plug (310).
- Remove the 1-2 accumulator valve (320).
- Remove the 1-2 accumulator control valve (318).
- Inspect the 1-2 accumulator control valve for:
- Inspect the 1-2 accumulator valve for:
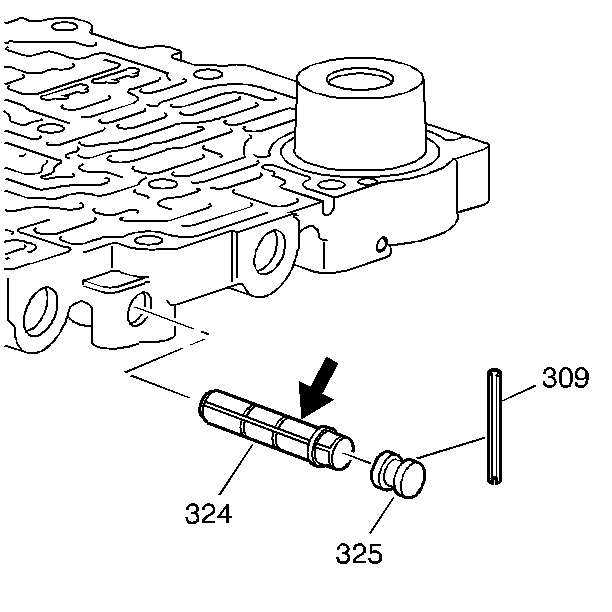
- Remove the Band Control solenoid screen plug retaining pin (309).
- Remove the Band Control solenoid screen plug (325).
- Remove the Band Control solenoid screen (324).
- Inspect the solenoid screen for damage.
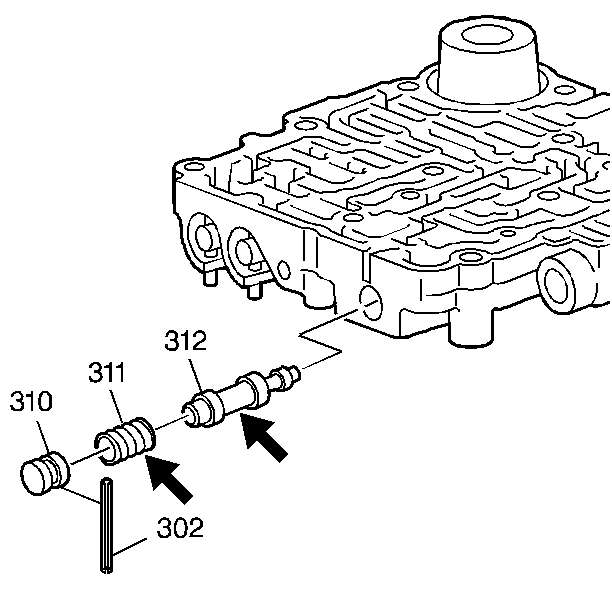
- Remove the low pressure control valve plug retainer pin (302).
- Remove the low pressure control valve plug (310).
- Remove the low pressure control valve spring (311).
- Remove the low pressure control valve (312).
- Inspect the low pressure control valve for:
- Inspect the low pressure control valve spring for distortion.
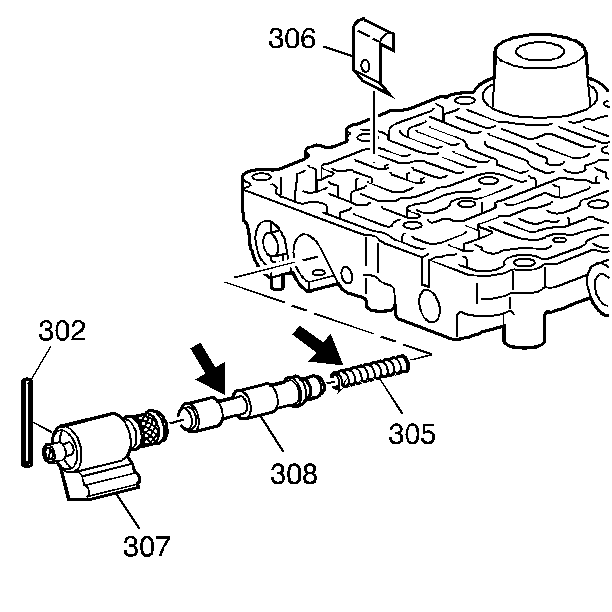
- Remove the 2-3 shift solenoid retainer pin (302).
- Remove the 2-3 shift solenoid (307) by grasping the metal tip. Do not grasp the connector housing.
- Remove the 2-3 shift valve retainer (306). Compress the shift valve spring to relieve tension against the retainer.
- Remove the 2-3 shift valve (308).
- Remove the 2-3 shift valve spring (305).
- Inspect the 2-3 shift valve for:
- Inspect the 2-3 shift valve spring for distortion.
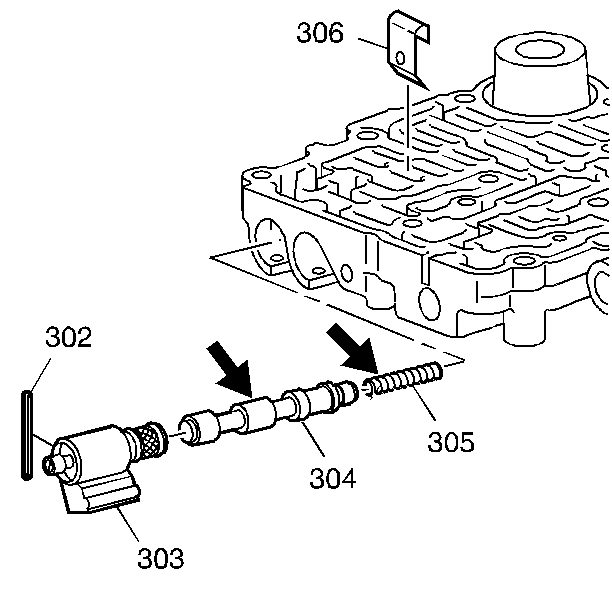
- Remove the 1-2 shift solenoid retainer pin (302).
- Remove the 1-2 shift solenoid (303). Remove the solenoid by grasping the metal tip. Do not grasp the connector housing.
- Remove the 1-2 shift valve retainer (306). Compress the shift valve spring to relieve tension against the retainer.
- Remove the 1-2 shift valve (304).
- Remove the 1-2 shift valve spring (305).
- Inspect the 1-2 shift valve for:
- Inspect the 1-2 shift valve spring for distortion.
- Clean the control valve body and components.
- Dry using compressed air only.
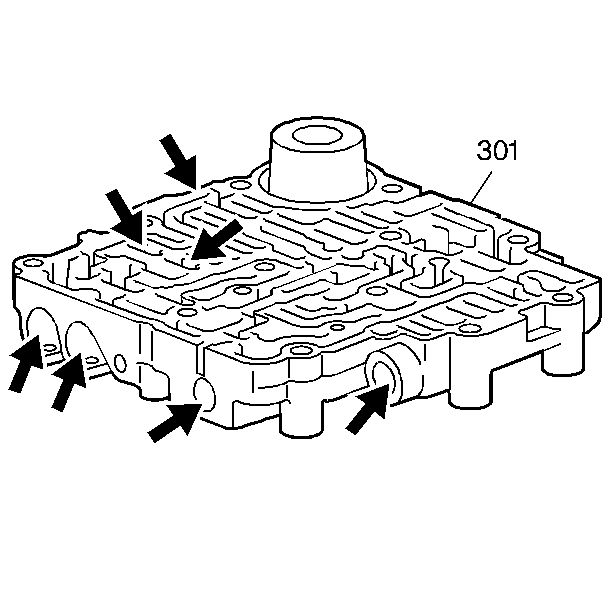
- Inspect the control valve body (301) for:
| • | porosity |
| • | scoring |
| • | nicks |
| • | scratches |
| • | porosity |
| • | scoring |
| • | nicks |
| • | scratches |
| • | porosity |
| • | scoring |
| • | nicks |
| • | scratches |
| • | porosity |
| • | scoring |
| • | nicks |
| • | scratches |
| • | porosity |
| • | scoring |
| • | nicks |
| • | scratches |
| • | porosity |
| • | scoring |
| • | nicks |
| • | scratches |
| • | porosity |
| • | scoring |
| • | interconnected fluid passages |
| • | damage to the machined surfaces |
