Removal Procedure
- Raise and support the vehicle. Refer to Lifting and Jacking the Vehicle in General Information.
- Remove the oil pan drain plug and allow the oil to drain.
- Remove the oil filter drain plug and allow the oil to drain.
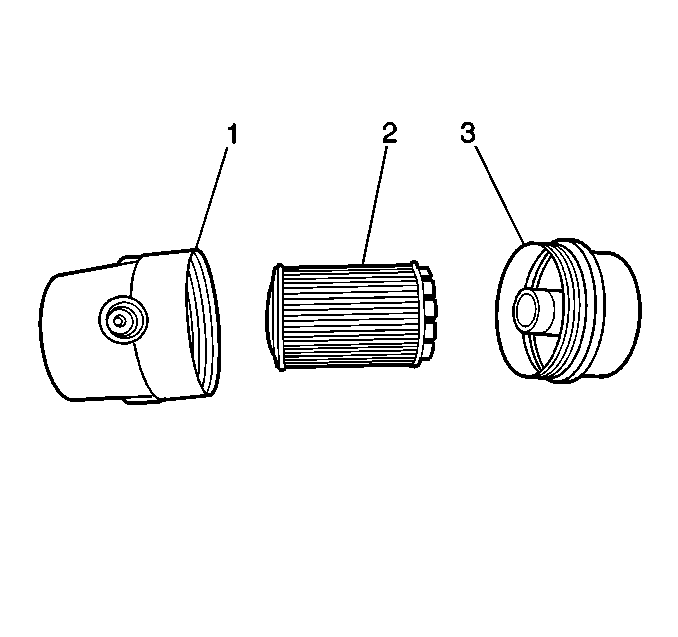
- Remove the plastic cap (3) from the oil filter cartridge housing (1).
- Remove the oil filter cartridge (2) from the plastic cap.
- Wipe the plastic cap and the oil filter cartridge housing dry.
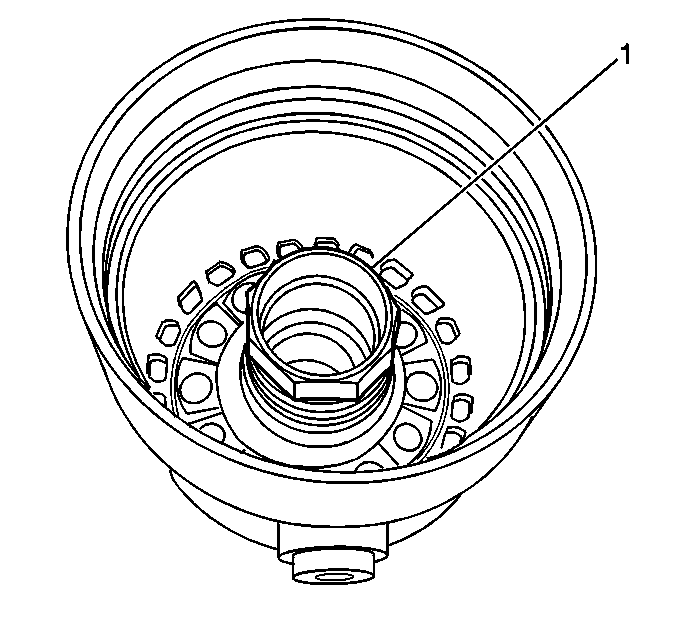
- If removing the oil filter cartridge housing from the engine block, use a socket on the sleeve (1) on the inside of the housing.
Important: Be sure the vehicle is level for this procedure.
Important: Due to the internal baffling in the oil pan, allow at least 5 minutes for sufficient oil drainage once the oil pan drain plug is removed.
Important: To minimize oil spillage when removing the oil filter cartridge, allow sufficient time for oil drainage once the oil filter drain plug is removed.


Installation Procedure
- If removed, install the oil filter housing to the engine block.
- Install the oil filter drain plug.
- Install the new oil filter cartridge into the plastic cap.
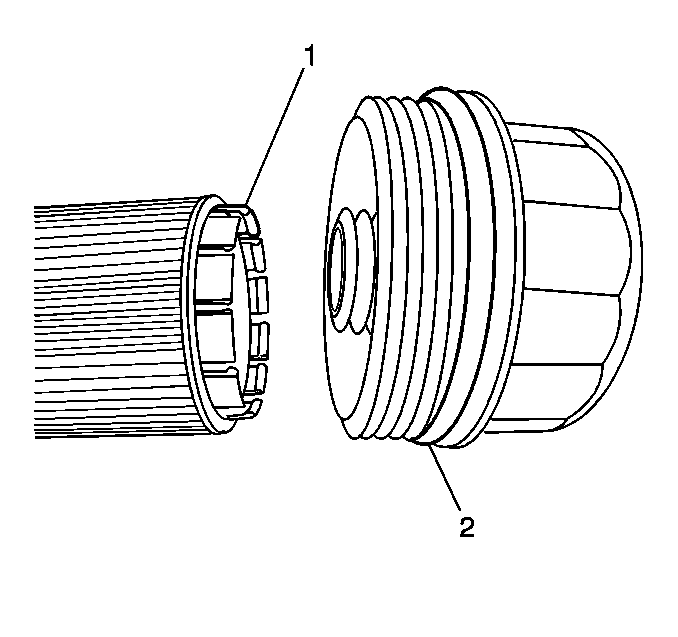
- Lightly coat the O-ring (2) around the plastic cap with clean oil.
- Install the plastic cap (3) onto the oil filter cartridge housing (1).
- Wipe the oil pan drain plug and surrounding area with a clean, dry cloth.
- Install the oil pan drain plug.
- Lower the vehicle.
- Fill the engine with the proper type and amount of engine oil. Refer to Fluid and Lubricant Recommendations and Approximate Fluid Capacities in Maintenance and Lubrication.
- Start the engine and inspect the oil pressure gauge for appropriate pressure build up.
- Inspect the oil filter and the oil pan drain plug areas for leaks.
- Shut the engine off.
- Check the engine oil level and adjust if necessary.

Notice: Use the correct fastener in the correct location. Replacement fasteners must be the correct part number for that application. Fasteners requiring replacement or fasteners requiring the use of thread locking compound or sealant are identified in the service procedure. Do not use paints, lubricants, or corrosion inhibitors on fasteners or fastener joint surfaces unless specified. These coatings affect fastener torque and joint clamping force and may damage the fastener. Use the correct tightening sequence and specifications when installing fasteners in order to avoid damage to parts and systems.
Tighten
Tighten the oil filter housing to the engine block (1) to 45 N·m
(33 lb ft).
Tighten
Tighten the oil filter drain plug to 10 N·m (89 lb in).

Important: Ensure the tabs (1) on the oil filter cartridge lock firmly into the plastic cap.
An audible snap will be heard when the oil filter cartridge is completely seated.
Tighten
Tighten the plastic cap (3) to 25 N·m (18 lb ft).
Tighten
Tighten the oil pan drain plug to 10 N·m (89 lb in).
