Removal Procedure
- Open the hood.
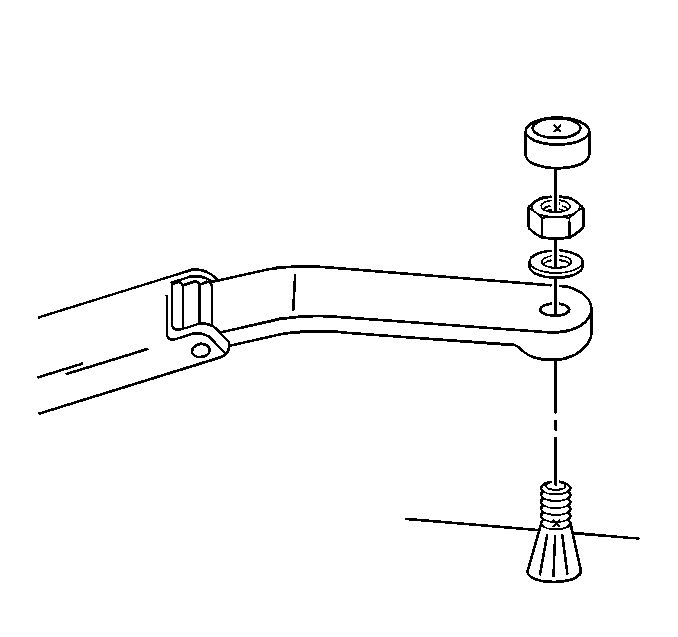
- Remove the windshield wiper arm stud cap that conceals the nut.
- Remove the windshield wiper arm nut and washer.
- Grasp the windshield wiper arm with both hands.
- Use a rocking motion to loosen the windshield wiper arm from the pivots.
- Remove the windshield wiper arm and blade.
- Repeat step 2 through step 5 to remove the remaining windshield wiper arm and blade.

Important: Do Not pry on the wiper arm to remove the wiper arm from the shaft.
Installation Procedure
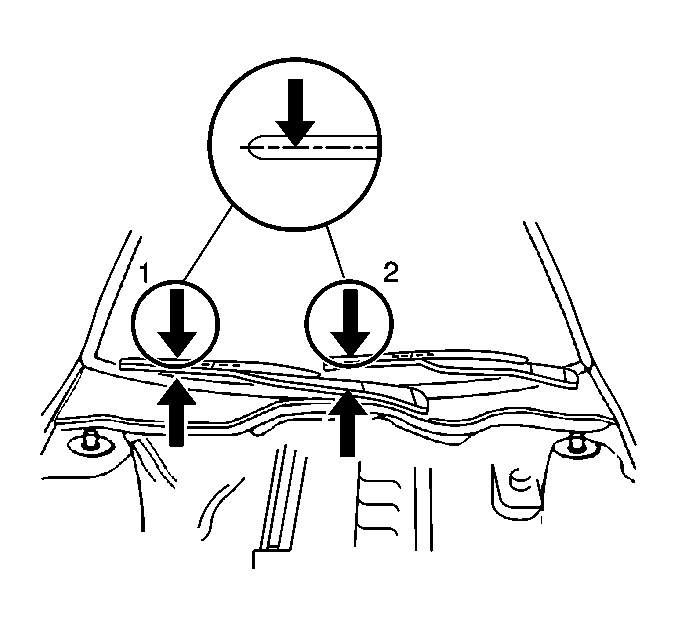
- Position the center of the left wiper arm (2) 60 mm (2 1/2 in) above the top of the air inlet grille panel to install the windshield wiper arm and blade.
- Position the center of the right wiper arm (1) 70 mm (2 3/4 in) above the top of the air inlet grille panel to install the windshield wiper arm and blade.
- Install the windshield wiper arm washers and nuts.
- Install the windshield wiper arm stud caps.
- Close the hood.


Notice: Use the correct fastener in the correct location. Replacement fasteners must be the correct part number for that application. Fasteners requiring replacement or fasteners requiring the use of thread locking compound or sealant are identified in the service procedure. Do not use paints, lubricants, or corrosion inhibitors on fasteners or fastener joint surfaces unless specified. These coatings affect fastener torque and joint clamping force and may damage the fastener. Use the correct tightening sequence and specifications when installing fasteners in order to avoid damage to parts and systems.
Tighten
Tighten the windshield wiper arm nuts to 14 N·m (11 lb ft).
