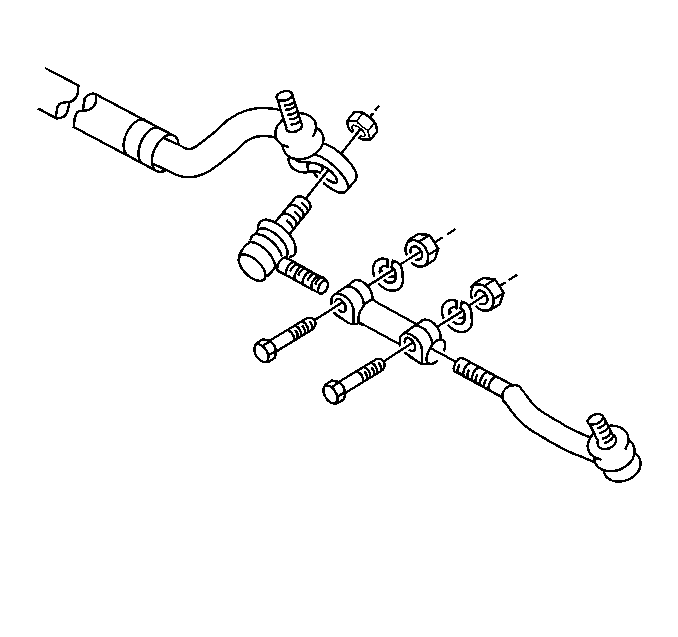
Removal Procedure
Tools Required
| • | J 6627-A Tie Rod/Wheel Stud Remover |
| • | J 42089 Linkage Installer |
Notice: Do not attempt to disconnect a steering linkage joint by driving a wedge between the joint and the attached part. Seal damage may result which will cause premature failure of the joint.
Important: The tie rod adjuster parts often become rusted in service. Discard the rusted nuts and bolts if the torque to remove the tie rod clamp nut from the bolt after the breakaway exceeds 9 N·m (80 lb ft). Apply penetrating oil between the tie rod clamp and the adjuster. Rotate the clamps until they move freely. Install the new bolts and nuts that are the same part number to ensure proper clamp at the specified torque.
- Raise and support the vehicle. Refer to Lifting and Jacking the Vehicle in General Information.
- Loosen the tie rod clamp bolt at the end of the tie rod adjuster.
- Remove the tie rod ball stud nut.
- Use the J 6627-A to remove the tie rod ball stud from the relay rod.
- Remove the tie rod from the tie rod adjuster.
- Inspect the threads on the ball stud. The ball stud may turn inside the inner tie rod when attempting to tighten the nut during the installation procedure if the threads are not clean if the threads are not smooth.
- Inspect the ball stud taper for nicks.

Important: Count the number of turns required to remove the tie rod from the tie rod adjuster.
Installation Procedure
- Use EP Chassis Lubricant, GM P/N 1052356 or equivalent, to lubricate the tie rod adjuster threads.
- Use the same number of turns counted in the removal procedure to thread the end of the inner tie rod into the tie rod adjuster.
- Install the tie rod ball stud into the relay rod.
- Install the J 42089 to tie rod ball stud.
- Remove the J 42089 from the tie rod ball stud.
- Install a new self-locking tie rod ball stud nut.
- Tighten the tie rod adjuster clamp bolt.
- Lower the vehicle.
- Adjust the toe to the proper specification. Refer to Wheel Alignment Measurement in Wheel Alignment.

Tighten
Tighten the J 42089
to
30 N·m (22 lb ft) to allow the tie rod ball stud
taper to seat.
Notice: Use the correct fastener in the correct location. Replacement fasteners must be the correct part number for that application. Fasteners requiring replacement or fasteners requiring the use of thread locking compound or sealant are identified in the service procedure. Do not use paints, lubricants, or corrosion inhibitors on fasteners or fastener joint surfaces unless specified. These coatings affect fastener torque and joint clamping force and may damage the fastener. Use the correct tightening sequence and specifications when installing fasteners in order to avoid damage to parts and systems.
Tighten
Tighten the ball stud nut to 60 N·m (44 lb ft).
Important: Ensure that the adjuster and the clamp are properly positioned before tightening the tie rod adjuster clamp bolt. Refer to Tie Rod Adjuster Replacement for the proper adjuster and the proper clamps adjustment.
Tighten
Tighten the tie rod adjuster clamp bolt to 15 N·m (11 lb ft).
