Tools Required
| • | J 6627-A Tie Rod/Wheel Stud Puller |
| • | J 42089 Linkage Installer |
Removal Procedure
- Raise and support the vehicle. Refer to Lifting and Jacking the Vehicle in General Information.
- Remove the front tire and wheel. Refer to Tire and Wheel Removal and Installation in Tires and Wheels.
- Remove the wheel hub. Refer to Front Wheel Hub, Bearing, and Seal Replacement .
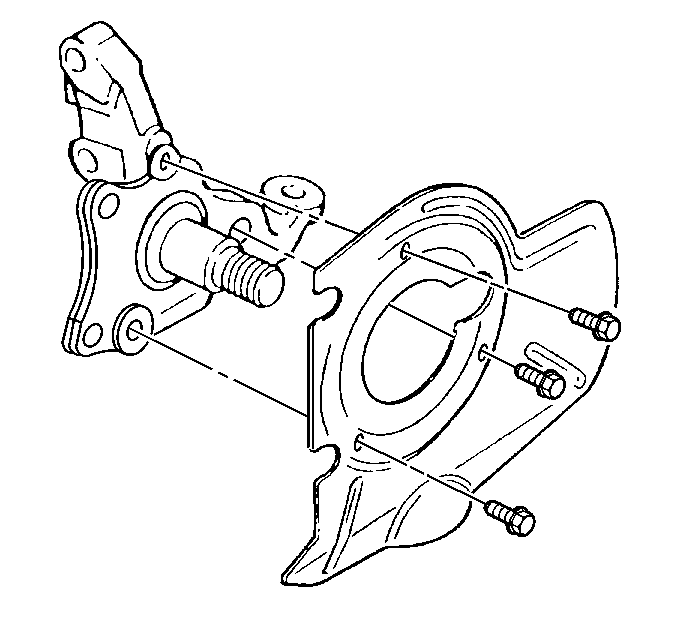
- Remove the brake disc rotor splash shield bolts.
- Remove the brake disc rotor splash shield.
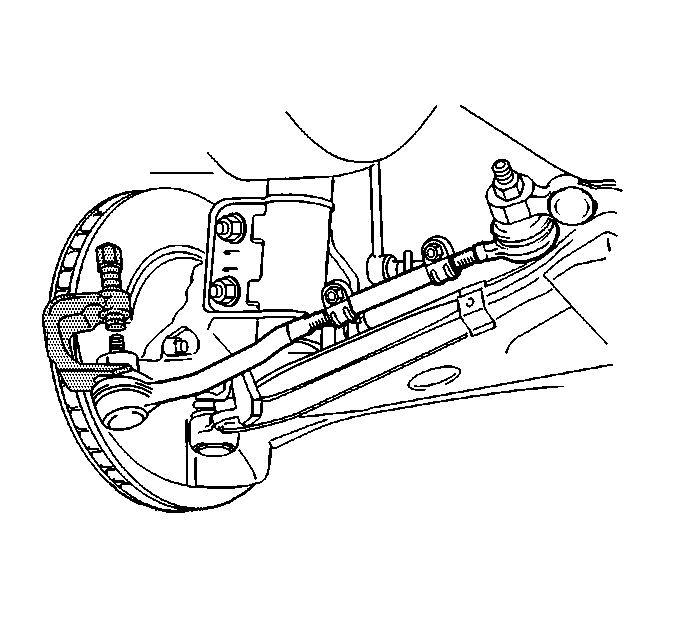
- Remove the ball stud nut from the outer tie rod.
- Use the J 6627-A to remove the outer tie rod from the steering knuckle.
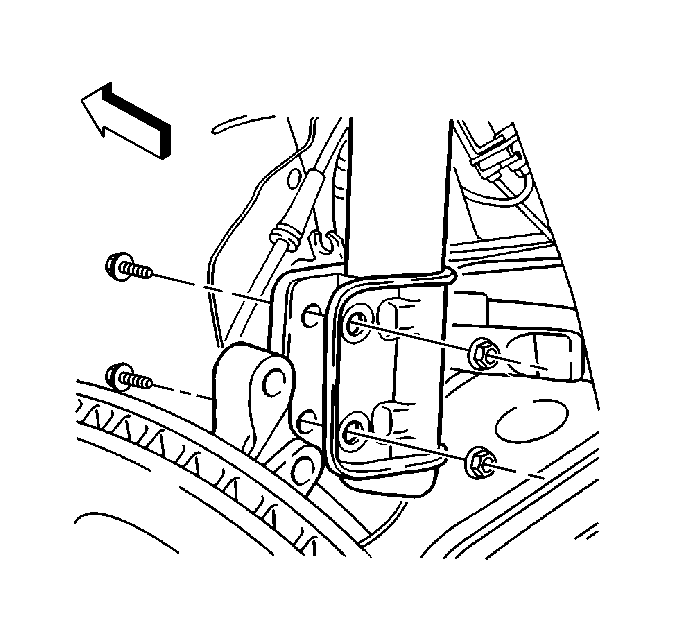
- Remove the steering knuckle bolts from the strut.
- Remove the steering knuckle from the strut.
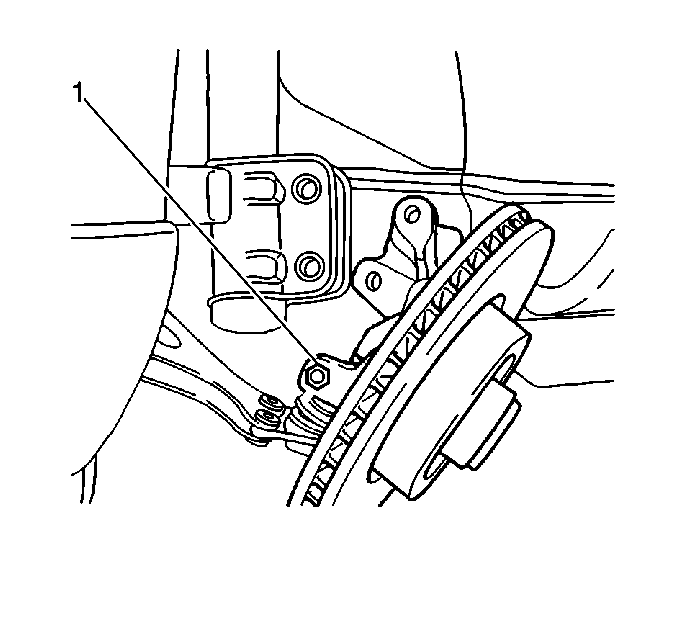
- Remove the lower control arm ball stud pinch bolt (1).
- Remove the steering knuckle from the lower control arm ball stud.


Installation Procedure
- Install the steering knuckle to the lower control arm ball stud.
- Install the pinch bolt (1) for the lower control arm ball stud.
- Install the steering knuckle to the strut.
- Install the steering knuckle to the strut bolts.
- Install the outer tie rod to the steering knuckle.
- Install the outer tie rod into the steering knuckle.
- Install the J 42089 to the tie rod ball stud.
- Remove the J 42089 from the tie rod ball stud.
- Install the outer tie rod nut.
- Install the brake disc rotor splash shield.
- Install the brake disc rotor splash bolts.
- Install the wheel hub. Refer to Front Wheel Hub, Bearing, and Seal Replacement .
- Install the front tire and wheel. Refer to Tire and Wheel Removal and Installation in Tires and Wheels.
- Lower the vehicle.
- Adjust the wheel alignment. Refer Wheel Alignment Measurement in Wheel Alignment.

Notice: Use the correct fastener in the correct location. Replacement fasteners must be the correct part number for that application. Fasteners requiring replacement or fasteners requiring the use of thread locking compound or sealant are identified in the service procedure. Do not use paints, lubricants, or corrosion inhibitors on fasteners or fastener joint surfaces unless specified. These coatings affect fastener torque and joint clamping force and may damage the fastener. Use the correct tightening sequence and specifications when installing fasteners in order to avoid damage to parts and systems.
Important:
• Use a new lower control arm ball stud pinch bolt. • Insert the pinch bolt from the rear toward the front of the vehicle.
Tighten
Tighten the pinch bolt for the lower control arm ball stud to 100 N·m
(74 lb ft).

Important:
• Use new bolts for the steering knuckle to the strut attachment. • Install the bolts from the front toward the rear of the vehicle.
Tighten
Tighten the steering knuckle to the strut bolts until snug. The bolt
will not be tightened to specifications until the final camber corrections
have been made.
| • | Inspect the threads on the ball stud. If the threads are not clean and if the threads are not smooth, the ball stud may turn inside the inner tie rod when attempting to tighten the nut during installation. If the threads are damaged and repair is possible, use an appropriate size die to clean the threads. |
| • | Inspect the ball stud taper for nicks. Lightly file or sand to remove any nicks. |
Tighten
Tighten the J 42089
to
30 N·m (22 lb ft) to allow the ball stud taper
seat.
Important: Use a new self locking tie rod nut.
Tighten
Tighten the outer tie rod nut to 60 N·m (44 lb ft).

Tighten
Tighten the brake disc rotor splash shield bolts to 4 N·m
(35 lb in).
