Removal Procedure
Notice: Use of harsh chemicals when cleaning can damage exterior lamps. Suggested cleaners are a mild soap and water, or Varnish Makers and Painters (VM&P) Naptha. VM&P Naptha is a specific type of naptha and should not be substituted by any other naptha.
- Open the rear compartment.
- Remove the rear compartment lid trim Refer to Rear Compartment Lid Inner Panel Trim Replacement .
- Remove the nuts from the rear end spoiler studs.
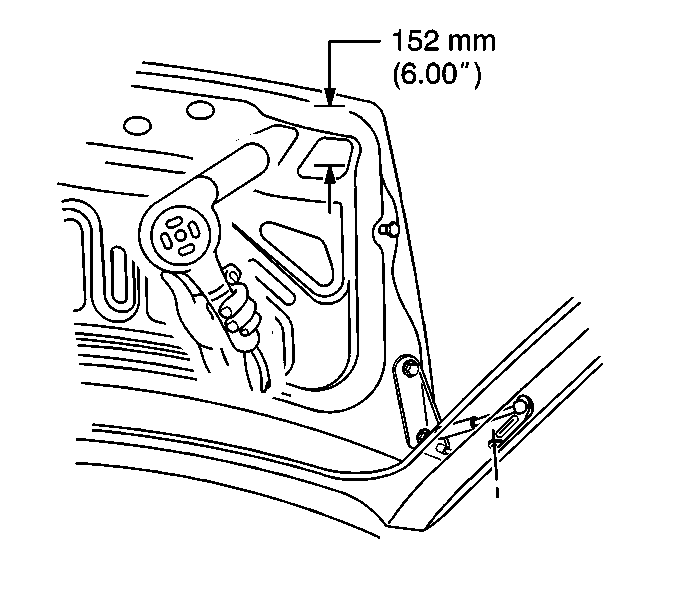
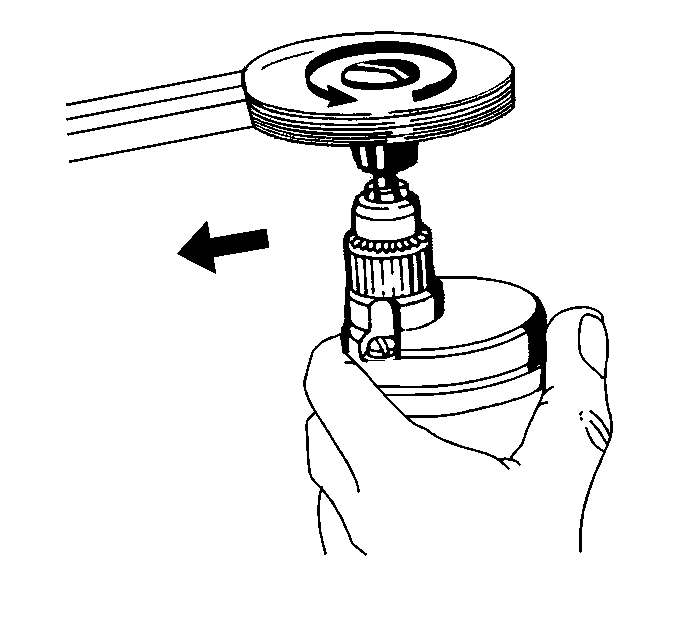
- Heat the rear end spoiler mounting points from the inside, using a heat gun 152 mm (6 in) from surface.
- Remove the rear end spoiler from the rear compartment lid surface using a small wood or plastic flat-bladed tool, being careful not to damage paint.
- Remove the rear end spoiler from the rear compartment lid.
- Clean the rear end spoiler adhesive from the rear compartment lid and/or the rear end spoiler using 3M™ scotch brite molding adhesive remover disk 3M™ P/N 07501 (or equivalent).
- Clean the body panel using Varnish Makers and Painters (VMP) naphtha or equivalent in order to remove any adhesive. Wipe the surface dry with a clean, lint-free cloth.

Apply the heat using a circular motion for about 3 seconds.
Installation Procedure
- Warm the rear compartment lid with a heat gun from the outside, to a minimum of 21°C (70°F).
- Peel backing from the mounting surfaces of the rear end spoiler.
- Align rear end spoiler studs to the holes in the rear compartment lid.
- Install the rear end spoiler to the rear compartment lid, pressing into place until the adhesive is fully seated.
- Open the rear compartment.
- Install the nuts to the rear end spoiler.
- Install rear compartment lid trim Refer to Rear Compartment Lid Inner Panel Trim Replacement .
- Close the rear compartment.
Important: Do not touch the adhesive backing.
Notice: Use the correct fastener in the correct location. Replacement fasteners must be the correct part number for that application. Fasteners requiring replacement or fasteners requiring the use of thread locking compound or sealant are identified in the service procedure. Do not use paints, lubricants, or corrosion inhibitors on fasteners or fastener joint surfaces unless specified. These coatings affect fastener torque and joint clamping force and may damage the fastener. Use the correct tightening sequence and specifications when installing fasteners in order to avoid damage to parts and systems.
Important: New nuts (mastic washers) must be used to avoid a possible water leak.
Tighten
Tighten the rear end spoiler nuts to 6 N·m (53 lb in).
