Removal Procedure
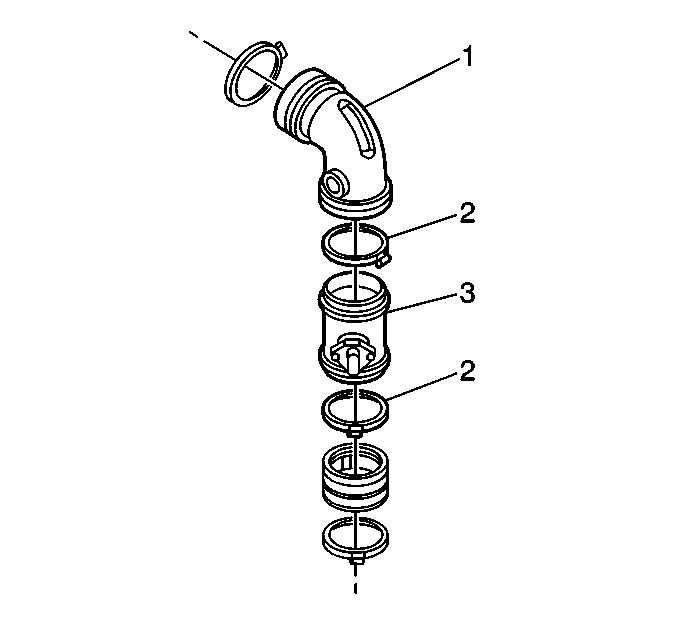
- Loosen the clamps on the air duct (1) from the air cleaner.
- Disconnect the wiring harness from the mass air flow/intake air temperature (MAF/IAT) sensor (3).
- Loosen the hose clamps (2) at the bottom and top of the MAF/IAT sensor.
- Remove the air duct (1) from the air cleaner to the MAF/IAT sensor.
- Remove the MAF/IAT sensor from the intake duct. Note the installation position.

Important: Do not disassemble the MAF sensor. Remove and install as a complete unit only. If there is external deformation, e.g., deformation of grid, replace the MAF sensor.
Installation Procedure
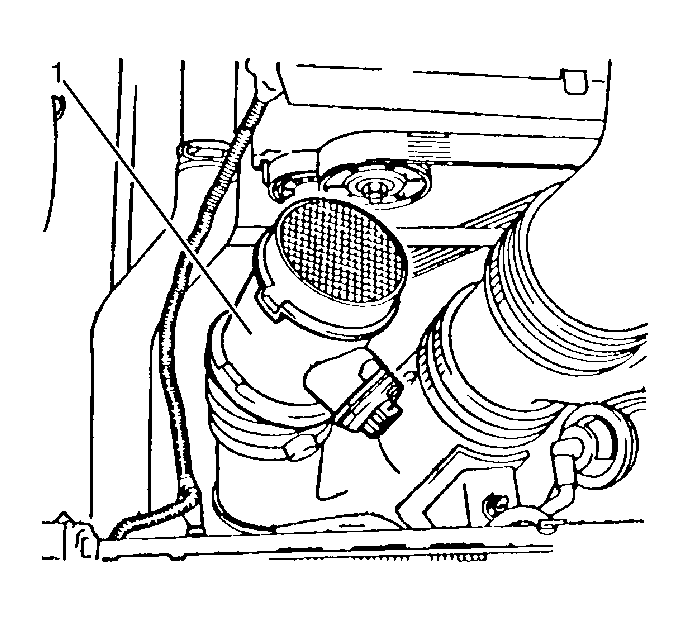
- Install the MAF/IAT sensor (1) into the lower air intake duct.
- Install the air intake duct onto the MAF/IAT sensor and to the air cleaner housing.
- Install all of the hose clamps to the air intake ducts.
- Connect the wiring harness to the MAF/IAT sensor assembly .
- Inspect for leaks.

An arrow on the MAF/IAT sensor shows the proper flow direction.
Notice: Use the correct fastener in the correct location. Replacement fasteners must be the correct part number for that application. Fasteners requiring replacement or fasteners requiring the use of thread locking compound or sealant are identified in the service procedure. Do not use paints, lubricants, or corrosion inhibitors on fasteners or fastener joint surfaces unless specified. These coatings affect fastener torque and joint clamping force and may damage the fastener. Use the correct tightening sequence and specifications when installing fasteners in order to avoid damage to parts and systems.
Important: Ensure that all of the hose connections are in good condition and are correctly seated.
Tighten
Tighten the hose clamps to 3 N·m (27 lb in).
