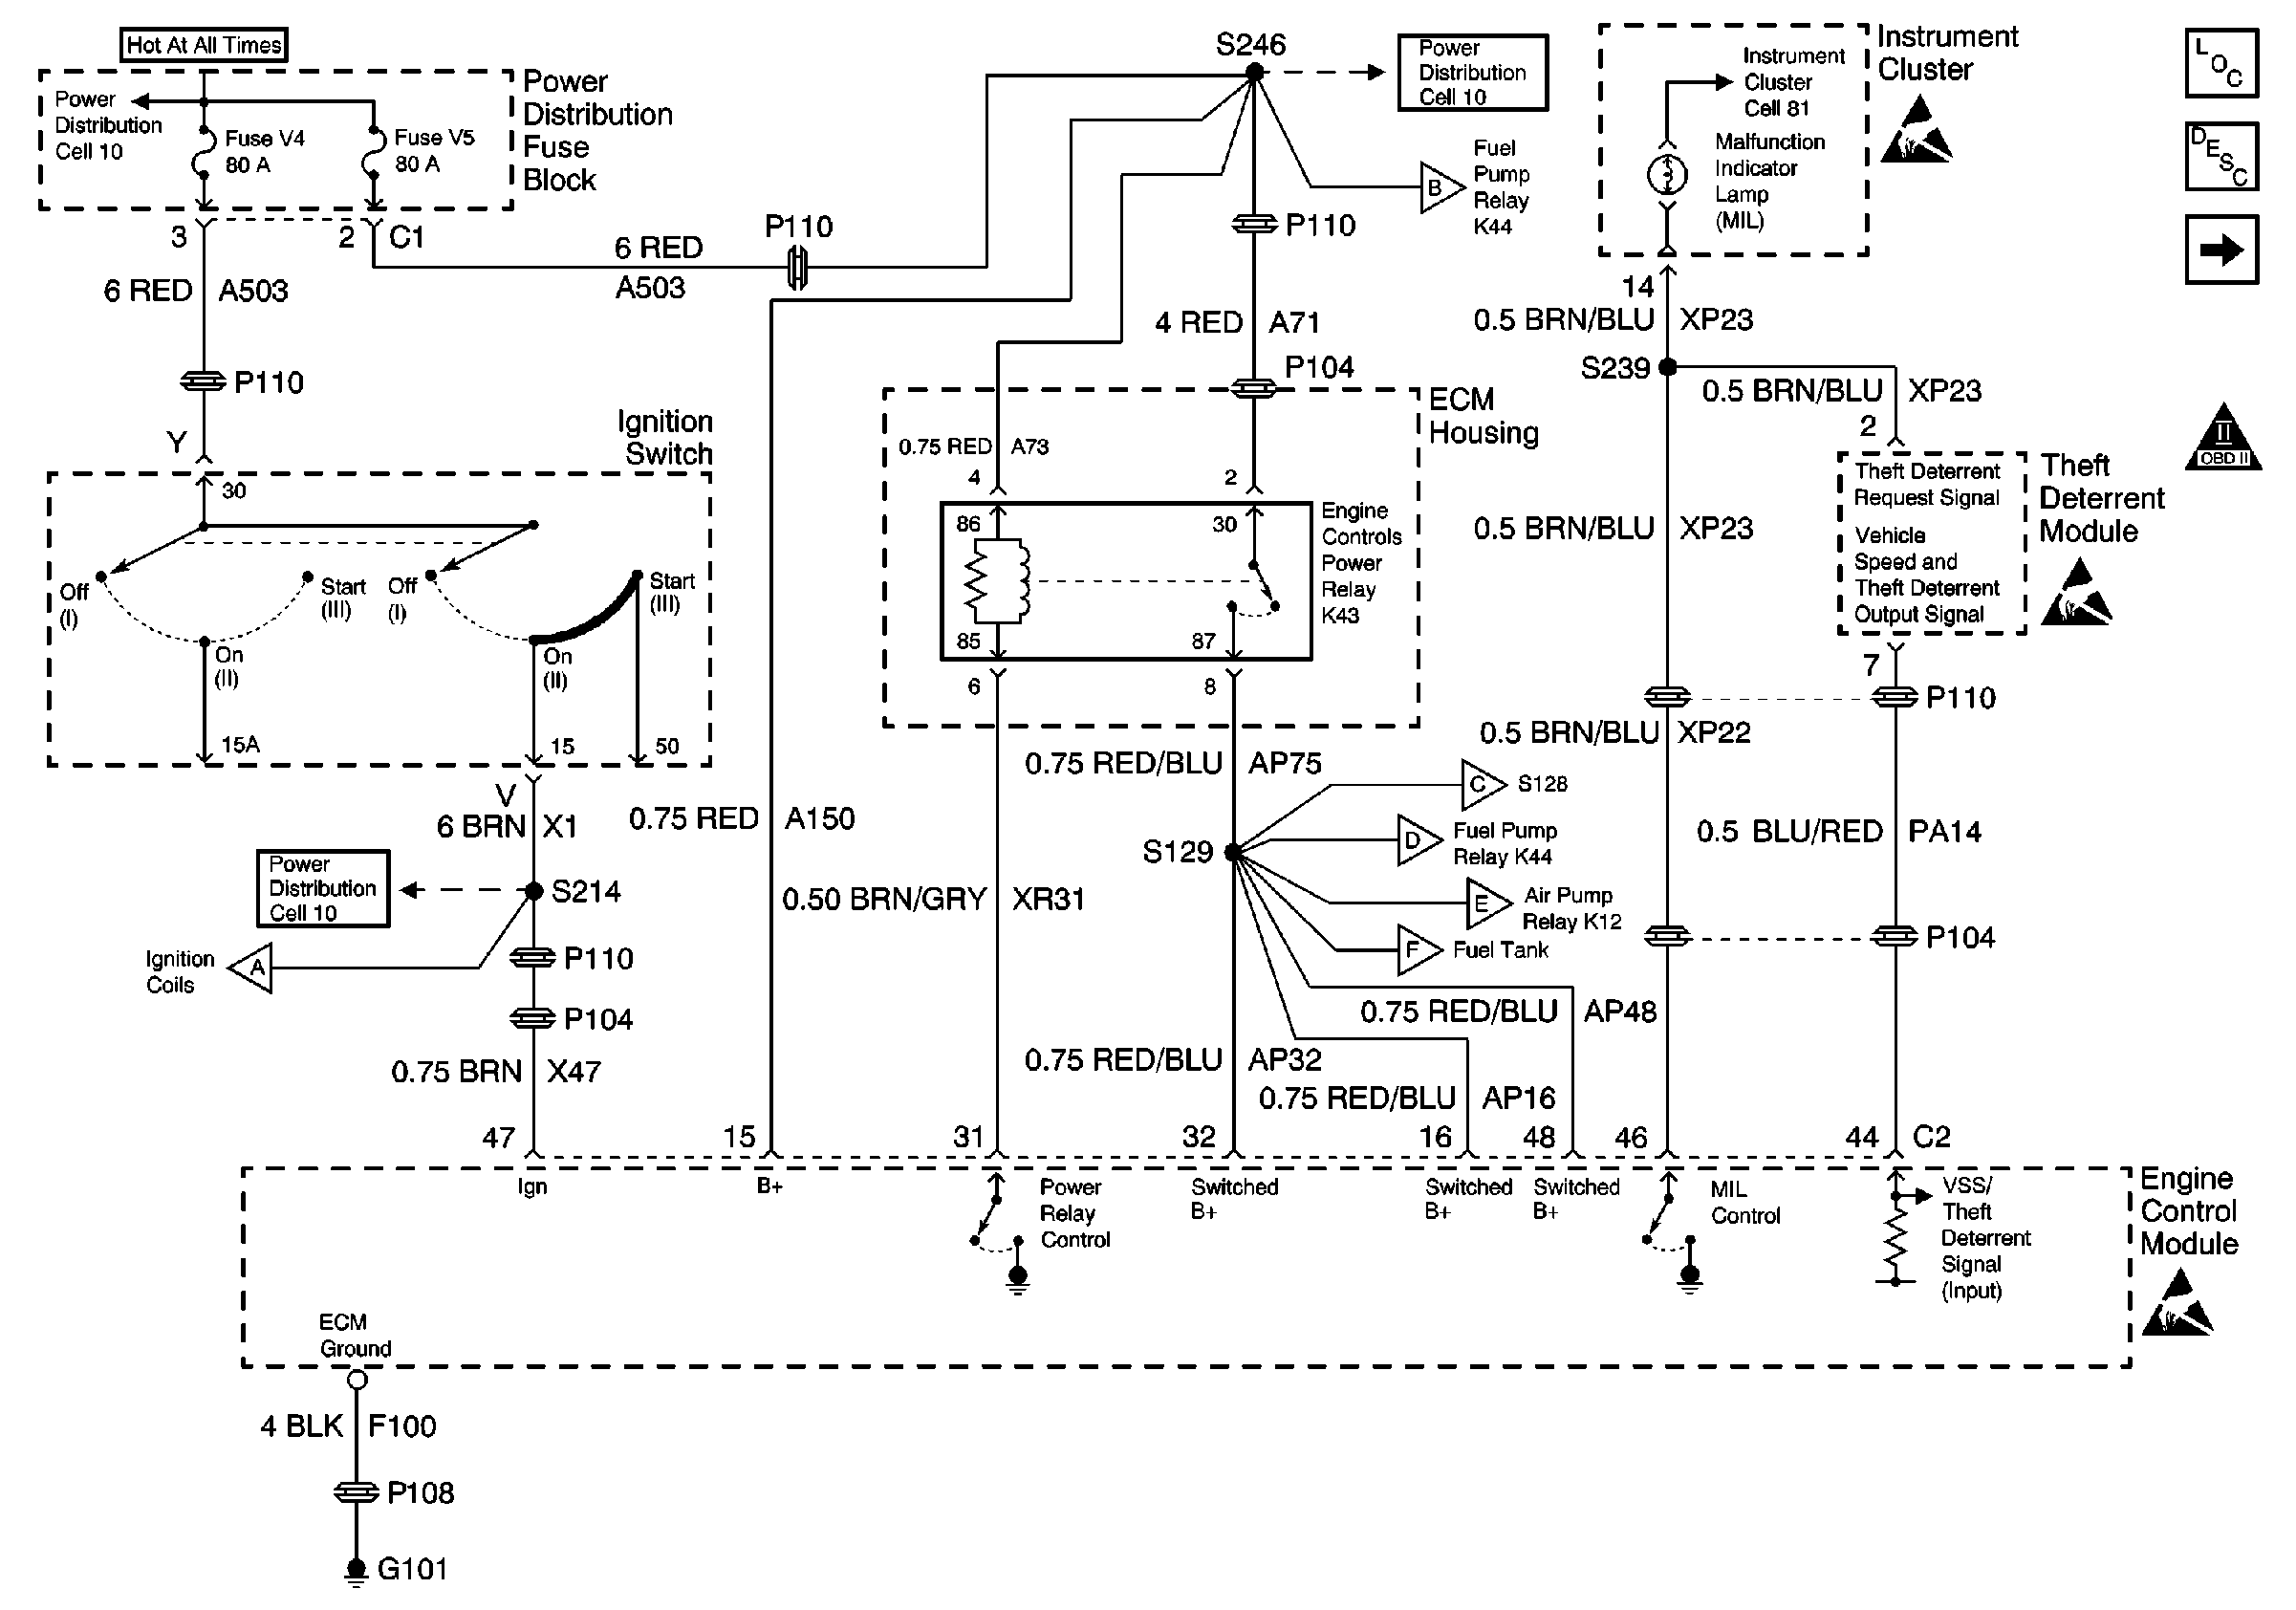
Refer to
Cell 20: Power, Ground, and MIL

for schematic.
Circuit Description
The engine controls power relay's coil and contacts are connected directly to the battery positive voltage (B+). The engine control module (ECM) controls the relay by grounding the control circuit through an internal solid state device called a driver. When the ECM detects a voltage on the ignition feed circuit, the ECM enables the engine controls power relay. The engine controls power relay controls the switched B+ circuit to the fuel pump relay coil, the fuel injectors, the HO2S heaters and the other engine control components that use a switched B+ supply. The ECM also uses the switched B+ circuit to power up a portion of itself, including the circuitry which controls the MIL operation.
Diagnostic Aids
Notice: Using the J 35616-A Connector Test Adapter Kit will prevent damage to the harness connector terminals.
Use the J 35616 connector test adapter kit for any test that requires probing the ECM harness connector or a component harness connector.
Intermittent connections may cause the engine to stall or an intermittent loss of communication. Loss of the switched B+ voltage may cause multiple DTCs to set.
Check for faulty connections at the ECM or at the component. Check all other circuits that are spliced to the engine controls power relay for the proper operation. Inspect the harness connectors for any of the following conditions:
| • | Backed out terminals |
| • | Improper mating |
| • | Broken locks |
| • | Improperly formed or damaged terminals |
| • | Poor terminal to wire connection |
Refer to Engine Control Module Diagnosis , Checking Terminal Contact, for the proper procedure.
Refer to Symptoms for the Intermittents.
Test Description
The numbers below refer to the step numbers on the diagnostic table.
Step | Action | Value(s) | Yes | No | ||||||||||||||
|---|---|---|---|---|---|---|---|---|---|---|---|---|---|---|---|---|---|---|
1 | Did you perform the Powertrain On-Board Diagnostic (OBD) System check? | -- | ||||||||||||||||
2 |
Does the test lamp illuminate on both circuits? | -- | ||||||||||||||||
3 |
Does the test lamp illuminate? | -- | ||||||||||||||||
4 |
Does the test lamp illuminate? | -- | ||||||||||||||||
5 |
Does the test lamp illuminate? | -- | ||||||||||||||||
6 |
Does the current draw measure within the specified range? | 100-200 mA | ||||||||||||||||
7 |
Does the test lamp illuminate on all three circuits? | -- | ||||||||||||||||
8 |
Did you find and repair a problem? | -- | ||||||||||||||||
9 |
Did you find and repair a problem? | -- | ||||||||||||||||
10 | Repair the short to voltage in the engine controls power relay control circuit. Refer to Wiring Repairs in Wiring Systems. Is the repair complete? | -- | -- | |||||||||||||||
11 | Repair the short to ground in the engine controls power relay control circuit. Refer to Wiring Repairs in Wiring Systems. Is the repair complete? | -- | -- | |||||||||||||||
12 | Repair the battery feed circuit. Refer to Wiring Repairs in Wiring Systems. Is the repair complete? | -- | -- | |||||||||||||||
13 |
Did you find and repair a problem? | -- | ||||||||||||||||
14 | Replace the relay. Is the action complete? | -- | -- | |||||||||||||||
Did you find and repair a problem? | -- | |||||||||||||||||
16 | Inspect the ECM harness connector for a faulty connection or faulty terminal tension. Refer to Intermittents and Poor Connections Diagnosis in Wiring Systems. Did you find and repair a problem? | -- | ||||||||||||||||
17 |
Important: This vehicle is equipped with a theft deterrent system which interfaces with the engine control module (ECM). Program the new ECM with the frequency code of the theft deterrent module that is currently on the vehicle. Replace the ECM. Refer to Engine Control Module Replacement/Programming . Did you complete the repair? | -- | -- | |||||||||||||||
18 |
Can communication be established with the ECM? | -- | System OK |
