For 1990-2009 cars only
Removal Procedure
- Remove all related panels and components.
- Visually inspect the damaged area.
- Restore as much of the damage as possible to factory specifications.
- Remove the sealers, sound deadeners and anti-corrosion materials as necessary.
- Measure the right rear rail 100 mm (4 in) rearward of the number 5 crossbar.
- Completely cut around the rear rail through the reinforcement.
- Remove the damaged portion of the rail.
- Measure 50 mm (2 in) forward of the cut.
- Cut the outer rail only, this should leave the rail 50 mm (2 in) shorter than the reinforcement.
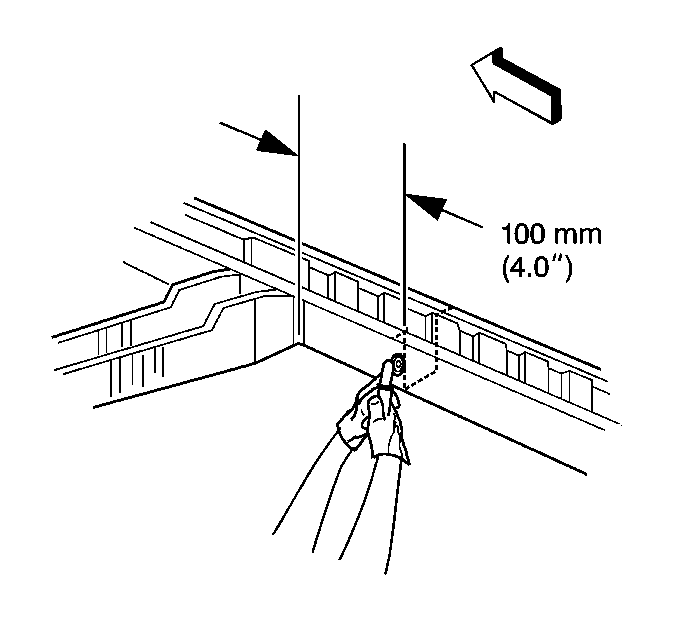
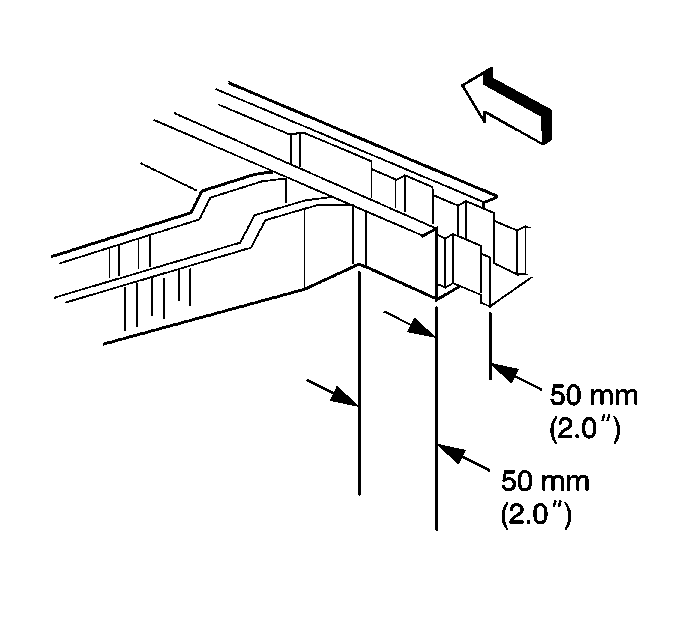
Important: Do not cut the inner reinforcement.
Installation Procedure
- Measure approximately 622 mm (25.5 in) from the rear edge of the service rail.
- Mark the service rail.
- Cut the service rail.
- Drill the welds attaching the reinforcement to the outer rail.
- Remove the reinforcement from the outer rail.
- Measure rearward 50 mm (2 in) from the cut end of the reinforcement.
- Cut the reinforcement.
- Install the reinforcement in the original location.
- Plug weld the reinforcement as necessary.
- Prepare the mating surfaces.
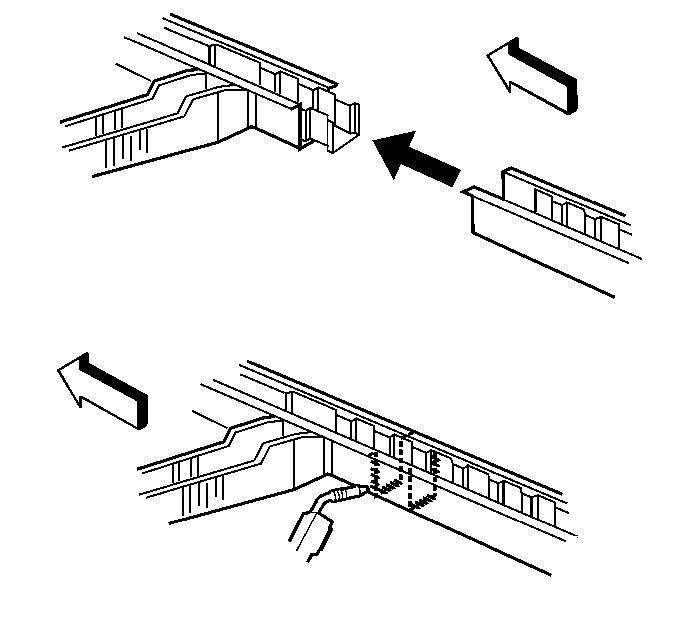
- Position the service rail, allowing it to slide over the inner reinforcement extending from the original rail section.
- Check the position of the service rear rail section using three-dimensional measuring equipment.
- Plug weld the service rear rail section accordingly with frequent measurements to ensure proper fit.
- Stitch weld along the entire joint of the outer rail and to the inner reinforcement.
- Make 25 mm (1 in) welds along the seam, with 25 mm (1 in) gaps between.
- Complete the stitch weld. This should create a solid joint with minimal heat distortion
- Clean and prepare welded surfaces.
- Prime with two-part catalyzed primer.
- Apply sealers and anti-corrosion materials as necessary.
- Install all related panels and components.
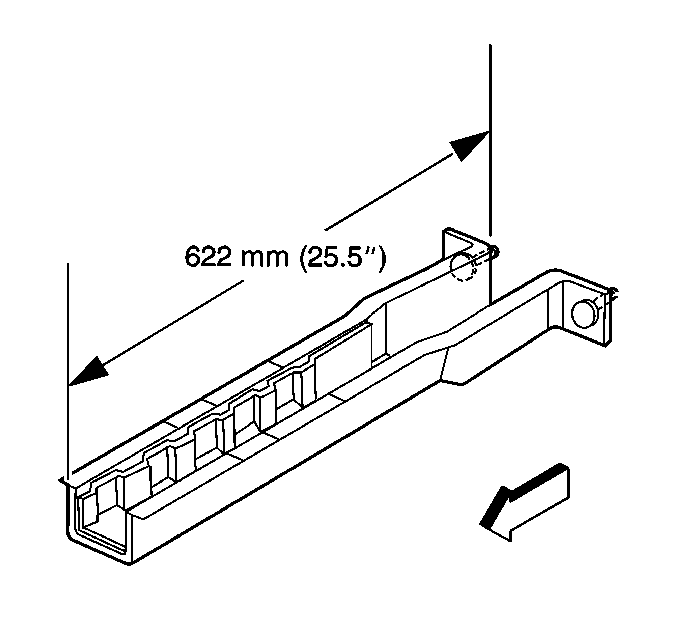
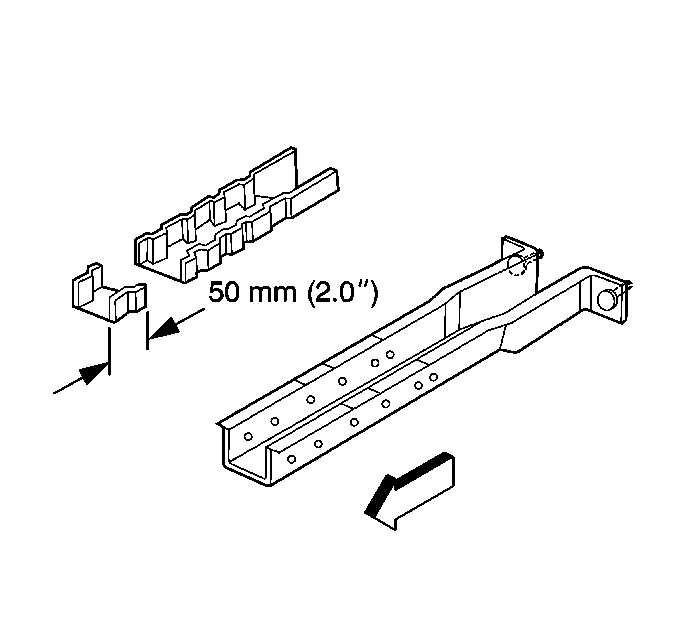
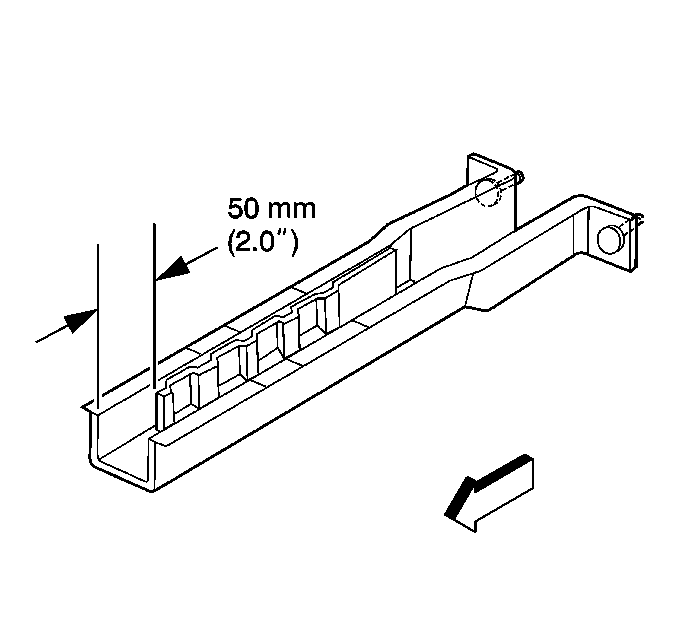
Important: The following step should create a staggered joint for welding. The staggered joint for welding maintains the structural performance of the rail.
Important: Be sure to plug weld the inner reinforcement to the new rail section. This may require drawing the reinforcement flat against the rail with a screw to temporarily secure the joint for welding. Sectioning joints should have a gap approximately 1½ times the thickness of the metal to ensure a secure weld, trim the part as necessary to achieve the gap.
Important: Do not combine paint systems. Refer to paint manufacturer's recommendations.
