Repair Procedure
Tools Required
| • | Rear Window Defogger Repair Kit GM P/N 12346001, or equivalent. |
Caution: To avoid personal injury:
| • | Do not allow the repair material to come in contact with skin
or eyes and avoid breathing vapors. |
| • | Do not use near sparks or open flame. |
- Remove the rear window defogger fuse.
- Prep the area to be repaired:
| • | Buff the grid line to about 6.0 mm (0.25 in) beyond
each side of the break with fine steel wool. |
| • | Wipe the area clean using a cloth dampened with alcohol. |

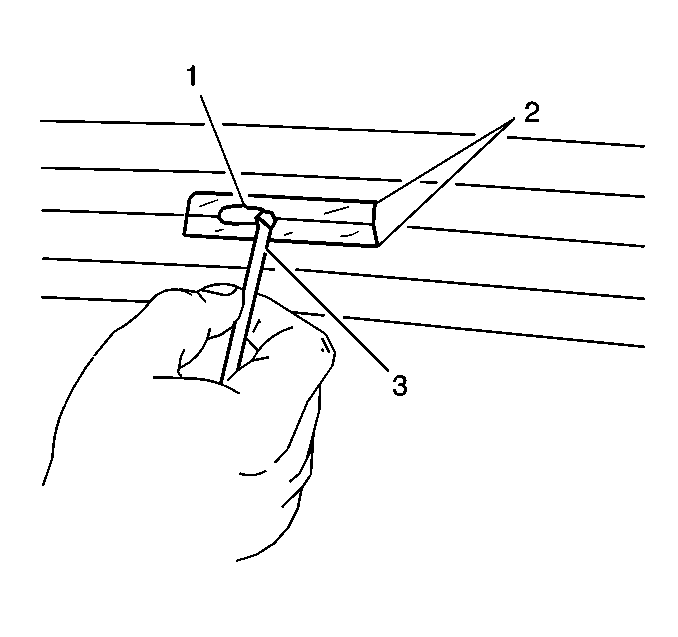
- Install a grid line repair
decal, or install two strips of tape one positioned above and one below the
repair area
| • | A repair decal, or tape strips (2), must be used to control width
of repair. |
| • | If a decal is used, be sure the die-cut metering slot is the same
width as the grid line. |
| • | If tape strips are used space them the width of the grid line
apart. |
- Mix the grid line repair material per manufacturers instructions
or until a uniform silver color appears.
- Insure that the window is at room temperature, 22°C (72°F).
- Apply the grid repair material (1) to the repair area using a
small plastic paddle (3) (or equivalent).
- Remove the decal or tape.

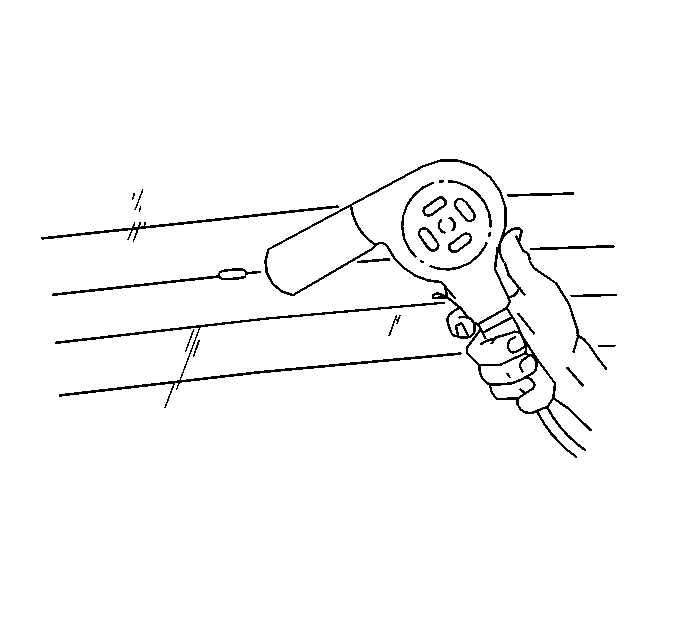
Important: Protect Trim From Heat Damage.
- Using a heat gun apply heat to the repair area.
| • | Hold the heat gun nozzle 25 mm (1 in) from the repair
surface. |
| • | Use a minimum temperature of 50°C (200°F). |
| • | Apply heat for 2 to 3 minutes. |
- Replace the rear defogger fuse.
- Test the defogger operation to verify the grid line is repaired.
- Inspect the grid line repair for appearance.
| 11.1. | Apply tincture of iodine to the grid line using a pipe cleaner
or a fine brush if the grid line appears discolored. |
| 11.2. | Allow the iodine to dry for at least 30 seconds. |
| 11.3. | Wipe off any excess iodine using a lint free cloth. |
- Allow the repair area to cure undisturbed for at least 24 hours.


