Key Identification and Usage
This vehicle contains lock cylinders for the ignition, driver's side door, and instrument panel compartment. The rear compartment lid does not contain a lock cylinder and relies on the Remote Keyless Entry (RKE) System and/or the manual release cable for actuation. All lock cylinders are operated with the vehicle's one double-cut key. If replacing the vehicle key, no key type blank identification is needed as there is only one key blank type.
Cutting Keys
For key cutting procedures, refer to the information provided by the key cutting equipment manufacturer.
Replacement Lock Cylinders
Lock cylinders are available from service parts warehouses uncoded only. The lock cylinders of the Catera have no locking bar and rely on the insertion of the key to keep the tumblers in place when reassembling the lock cylinder assemblies. An assortment of tumblers and springs are also available through service parts for coding existing lock cylinders.
Assembling and Coding Lock Cylinders
Tumblers for all locks are shaped exactly alike, with the exception of the notch position on one side. There are four tumblers in the instrument panel compartment lock cylinder, seven tumblers in the door lock cylinder and ten tumblers in the ignition lock cylinder. As the key is inserted into the lock cylinder, tumblers are lowered to the correct height so that the notches on each tumbler are the same level. When the notches on all six tumblers line up, the side bar is pushed into the notches by two small springs. This allows the lock cylinder to turn in the bore. Four types of tumblers are used to make the various lock combinations. Tumblers can be identified according to a number, one through four, which is stamped on the side of the tumbler.
Ignition Lock Cylinder
- Remove the lock cylinder. Refer to Ignition Lock Cylinder Replacement - On Vehicle in Steering Wheel and Column-Tilt.
- Remove the key from the cylinder (the tumblers are spring loaded, hold them in place with your finger).
- Slowly release finger pressure and remove the tumblers and the springs. Note the tumbler orientation (the tumblers are numbered) before disassembly unless recoding and replacing the key.
- Determine the tumbler numbers and the appropriate arrangement as previously described.
- Lightly coat the tumbler cavities of the cylinder with multipurpose grease.
- Install the springs and the tumblers into the lock cylinder holding the tumblers in place until a key can be inserted.
- Insert the key into the lock cylinder to ensure that the tumblers stay in place. If the cylinder is coded correctly, the tumblers will appear flush with the cylinder housing.
- Reinstall the lock cylinder. Refer to Ignition Lock Cylinder Replacement - On Vehicle in Steering Wheel and Column-Tilt.
Driver's Side Door Latch Lock Cylinder
- Remove the lock cylinder. Refer to Door Lock Cylinder Replacement in Doors.
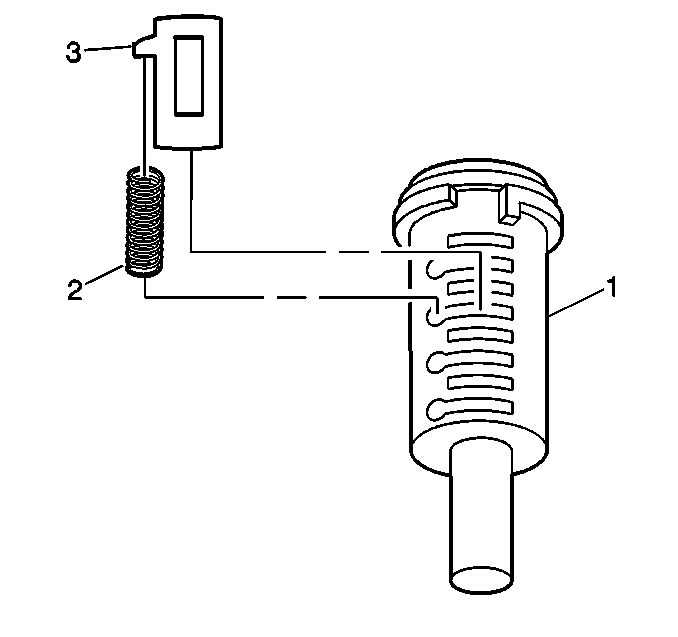
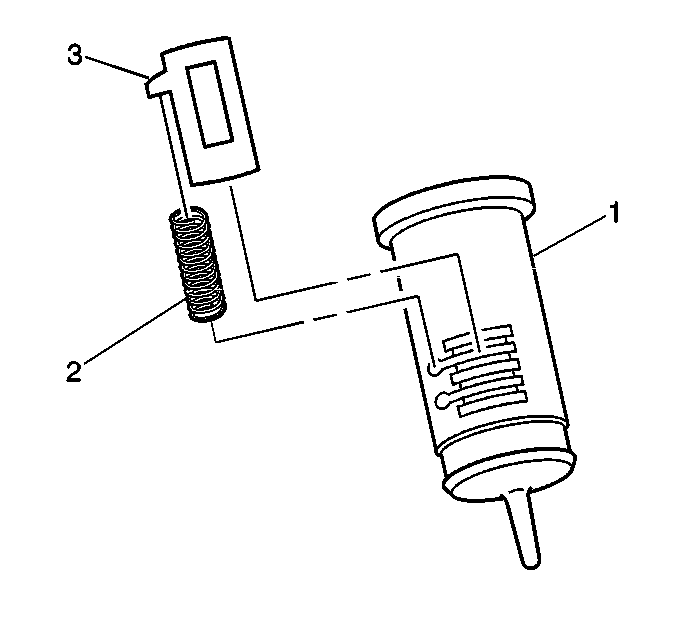
- Remove the key from the cylinder (1) (the tumblers are spring loaded, hold them in place with your finger).
- Slowly release finger pressure and remove the tumblers (3) and the springs (2). Note the tumbler orientation (the tumblers are numbered) before disassembly unless recoding and replacing the key.
- Determine the tumbler numbers and the appropriate arrangement as previously described.
- Lightly coat the tumbler cavities of the cylinder with multipurpose grease.
- Install the springs and the tumblers into the lock cylinder holding the tumblers in place until a key can be inserted.
- Insert the key into the lock cylinder to ensure that the tumblers stay in place. If the cylinder is coded correctly, the tumblers will appear flush with the cylinder housing.
- Reinstall the lock cylinder. Refer to Door Lock Cylinder Replacement in Doors.

Instrument Panel Compartment Lock
- Remove the lock cylinder.
- Remove the key from the cylinder (1) (the tumblers are spring loaded, hold them in place with your finger).
- Slowly release finger pressure and remove the tumblers (3) and the springs (2). Note the tumbler orientation (the tumblers are numbered) before disassembly unless recoding and replacing the key.
- Determine the tumbler numbers and the appropriate arrangement as previously described.
- Lightly coat the tumbler cavities of the cylinder with multipurpose grease.
- Install the springs and the tumblers into the lock cylinder holding the tumblers in place until a key can be inserted.
- Insert the key into the lock cylinder to ensure that the tumblers stay in place. If the cylinder is coded correctly, the tumblers will appear flush with the cylinder housing.
- Reinstall the lock cylinder.

