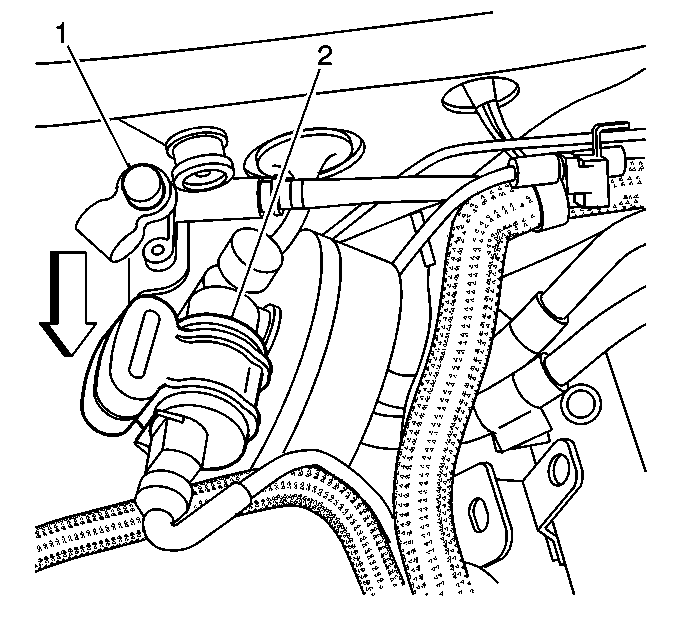
For 1990-2009 cars only
Removal Procedure
- Disconnect the Negative battery cable.
- Loosen the fuel filler cap in order to relieve the system pressure.
- Remove the mounting bolts.
- Remove the EVAP vent valve (2) with the rubber mounting bracket.
- Disconnect the harness connector.
- Disconnect the vent line and the fresh air supply hose from the valve. Observe which hose goes to which port.
- Remove the EVAP vent valve from the rubber mounting bracket.
- Raise and support the vehicle. Refer to Lifting and Jacking the Vehicle .
- Remove the hardware retaining the vent line.
- Remove the right front inner fender well.
- Disconnect the EVAP vent line quick connect fitting from the EVAP canister.
- Lower the vehicle.
- Pull the EVAP vent line out through the engine compartment.
Caution: Unless directed otherwise, the ignition and start switch must be in the OFF or LOCK position, and all electrical loads must be OFF before servicing any electrical component. Disconnect the negative battery cable to prevent an electrical spark should a tool or equipment come in contact with an exposed electrical terminal. Failure to follow these precautions may result in personal injury and/or damage to the vehicle or its components.

If you are replacing the EVAP vent line, proceed to step 7.
Installation Procedure
If you are not replacing the EVAP vent line, proceed to step 6.
- Install the EVAP vent line through to the canister from the engine compartment.
- Raise and support the vehicle. Refer to Lifting and Jacking the Vehicle .
- Connect the vent line quick connect fitting to the EVAP canister.
- Install the inner fender well.
- Lower the vehicle.
- Mount the EVAP vent valve (2) to the rubber mounting bracket.
- Connect the vent line and the fresh air supply hose to the valve.
- Connect the harness connector to the valve.
- Put the valve/bracket assembly into position and install/tighten the mounting bolts.
- Reconnect the Negative battery cable.
- Tighten the fuel filler cap.

