For 1990-2009 cars only
Tools Required
| • | J 28410 Gasket Remover |
| • | J 36660-A Torque Angle Meter |
Removal Procedure
- Drain the cooling system. Refer to Cooling System Draining and Filling in Engine Cooling.
- Remove the intake manifold flange. Refer to Intake Manifold Flange Replacement .
- Remove the water crossover. Refer to Engine Coolant Crossover Pipe Replacement in Engine Cooling.
- Disconnect the engine wiring harness from the engine rear lift bracket.
- Remove the left camshafts. Refer to Camshaft Replacement - Left Side .
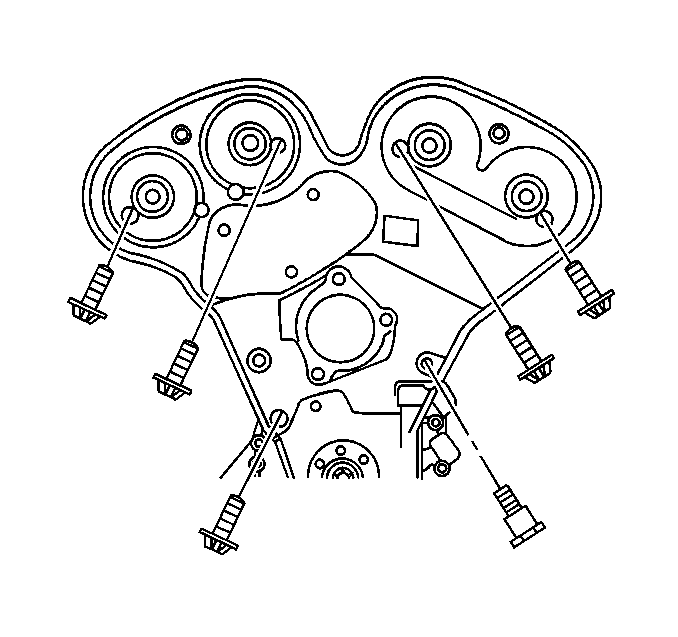
- Remove ONLY the 2 bolts securing the rear timing belt cover to the left cylinder head.
- Remove the left exhaust manifold. Refer to Exhaust Manifold Replacement - Left Side in Engine Exhaust.
- Remove the coolant outlet pipe. Refer to Engine Coolant Outlet Pipe Replacement in Engine Cooling.
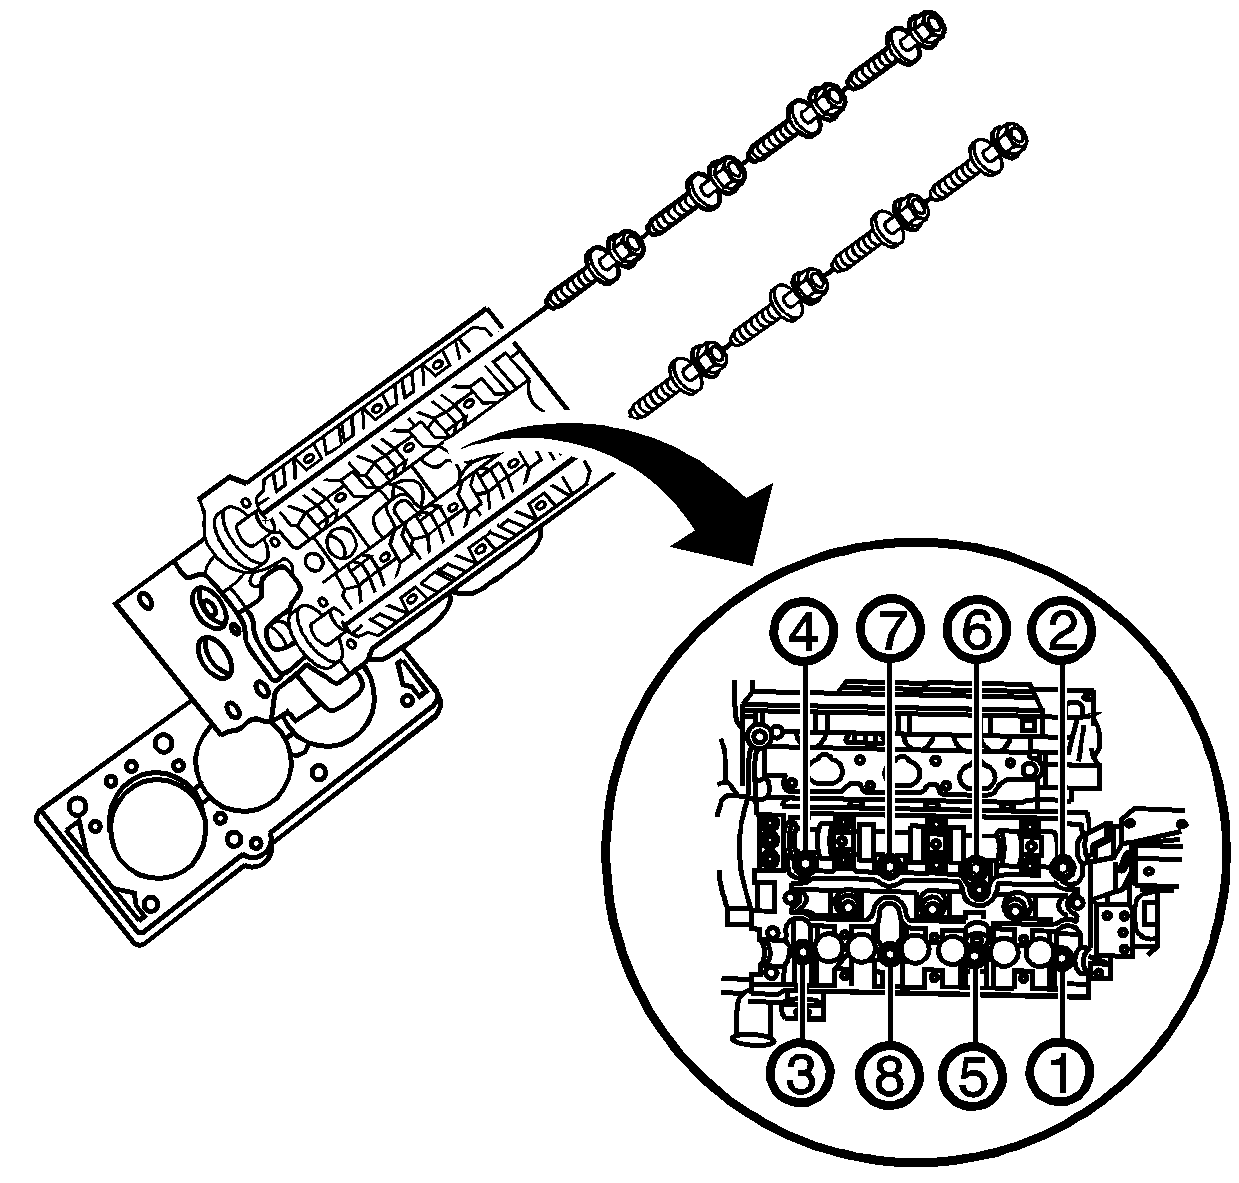
- Remove the left cylinder head bolts (1 thru 8) in the sequence shown.
- Remove the left cylinder head from the engine block.
- Place the cylinder head on a flat, clean surface with the combustion chambers face-up in order to prevent damage to the deck face.
- Remove the left cylinder head gasket.
- Remove all remaining gasket material from the engine block using the J 28410 .
- Inspect the cylinder head gasket mating surface on the engine block.
- Clean and inspect the left cylinder head. Refer to Cylinder Head Cleaning and Inspection .
- Disassemble the left cylinder head if necessary. Refer to Cylinder Head Disassemble .
Important: Remove ONLY the exhaust camshaft if the cylinder head is NOT going to be replaced.


Discard the cylinder head bolts.
Important: DO NOT reuse the cylinder head gasket.
Installation Procedure
- Assemble the left cylinder head if necessary. Refer to Cylinder Head Assemble .
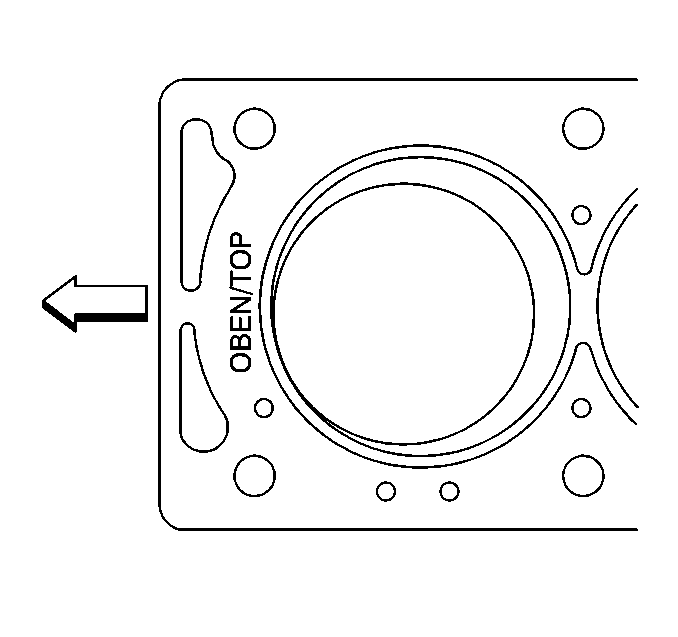
- Install the new left cylinder head gasket with OBEN/TOP imprint facing upward.
- Position the cylinder head to the engine block.
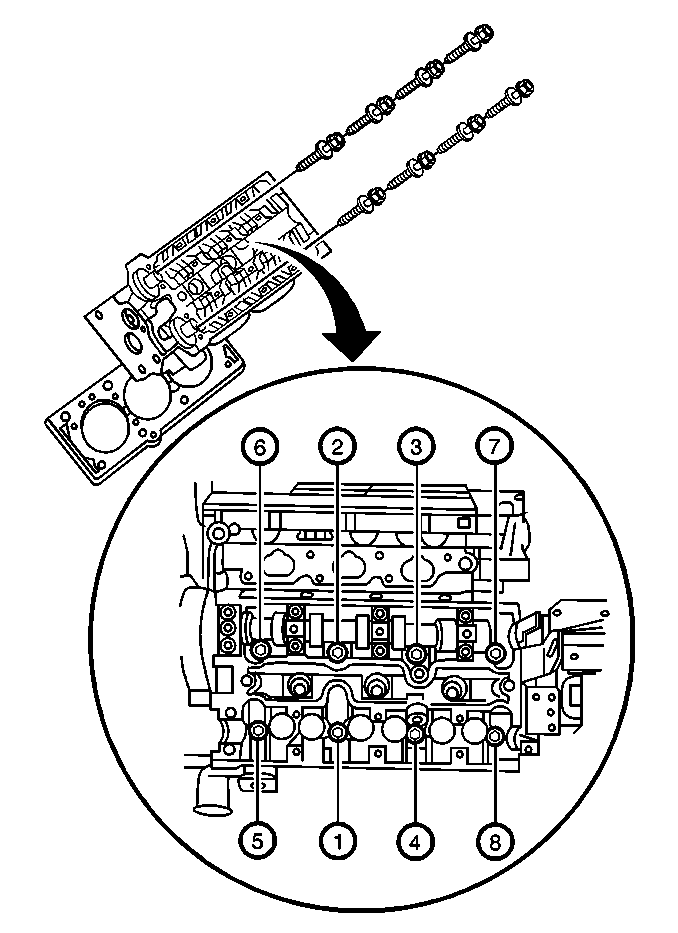
- Install the new cylinder head bolts.
- Following the tightening sequence use the J 36660-A to rotate the cylinder head bolts as described in the following steps:
- Rotate the cylinder head bolts 90 degrees.
- Rotate the cylinder head bolts an additional 90 degrees.
- Rotate the cylinder head bolts an additional 90 degrees.
- Rotate the cylinder head bolts an additional 15 degrees.
- Install the coolant outlet pipe. Refer to Engine Coolant Outlet Pipe Replacement in Engine Cooling.
- Install the left exhaust manifold. Refer to Exhaust Manifold Replacement - Left Side in Engine Exhaust.
- Install the 2 bolts securing the rear timing belt cover to the left cylinder head.
- Install the left camshafts. Refer to Camshaft Replacement - Left Side .
- Connect the engine wiring harness from the engine rear lift bracket.
- Install the water crossover. Refer to Engine Coolant Crossover Pipe Replacement in Engine Cooling.
- Install the intake manifold flange. Refer to Intake Manifold Flange Replacement .
- Fill the cooling system. Refer to Cooling System Draining and Filling in Engine Cooling.

Important: Ensure all wires, components, etc. are out of the way when installing the cylinder head.
Notice: Refer to Fastener Notice in the Preface section.
Notice: Refer to Torque to Yield Bolts Notice in the Preface section.

Tighten
Tighten the cylinder head bolts in sequence to 25 N·m (18 lb ft).
Tighten

Tighten
Tighten the rear timing belt cover bolts to 8 N·m (71 lb in).
