Engine Coolant Fan Replacement LY7
Tools Required
J 38185 Hose Clamp Pliers
Removal Procedure
- Disconnect the battery negative cable. Refer to Battery Negative Cable Disconnection and Connection in Engine Electrical.
- Drain the cooling system. Refer to Cooling System Draining and Filling .
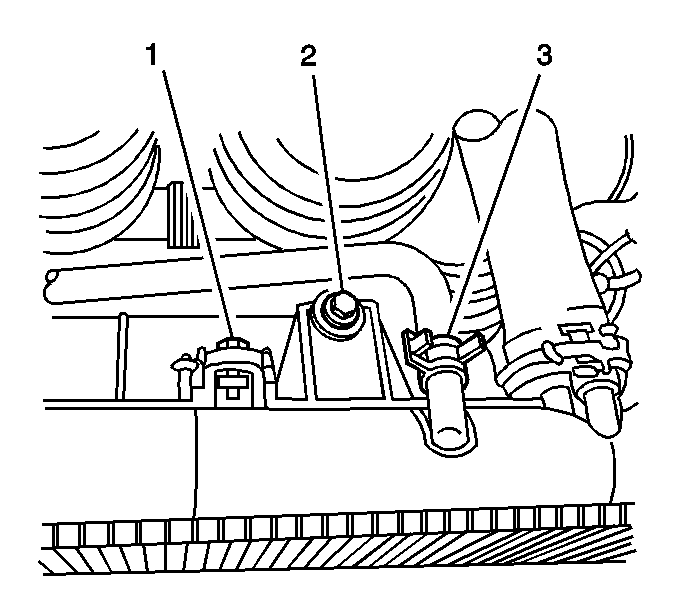
- Disconnect the surge tank hose (3).
- Remove the fan shroud to radiator bolt (1).
- Remove the fan shroud to air plenum bolt (2).
- Remove remaining fan shroud to radiator bolts.
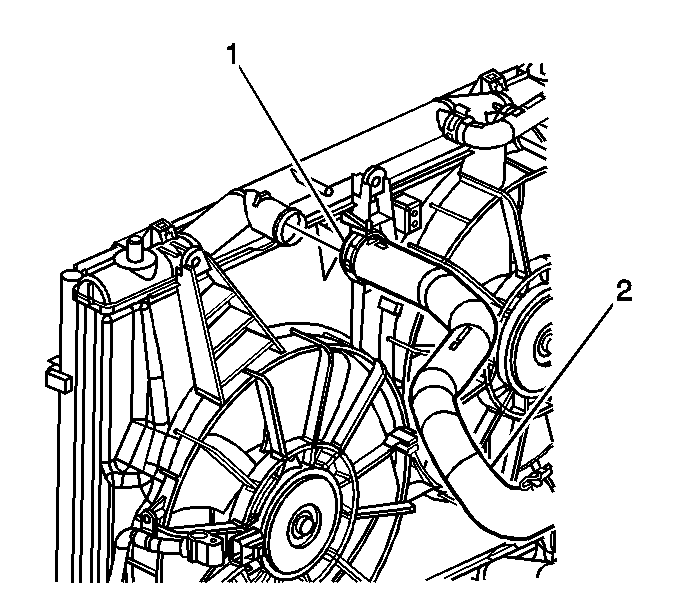
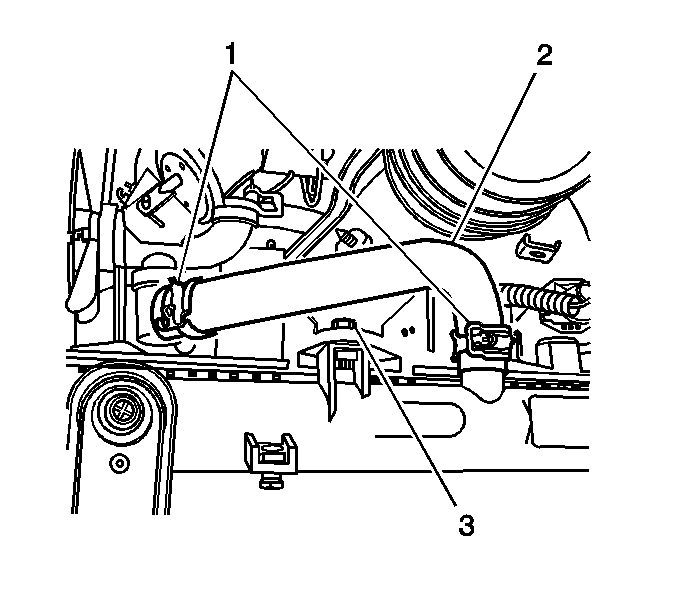
- Using J 38185 disconnect the upper radiator hose at the radiator (1).
- Remove the coolant bypass valve bolt.
- Reposition the coolant bypass valve.
- Release the coolant bypass solenoid from the fan shroud.
- Remove the air cleaner assembly. Refer to Air Cleaner Assembly Replacement in Engine Controls - 2.6L and 3.2L or to Air Cleaner Assembly Replacement in Engine Controls - 3.6L.
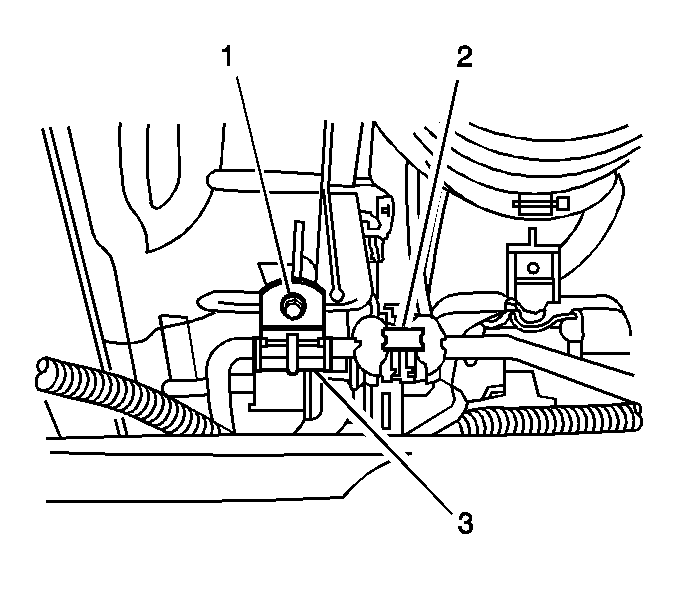
- Remove the screw (1) from the A/C line retaining clip (3).
- Rotate the retaining clip.
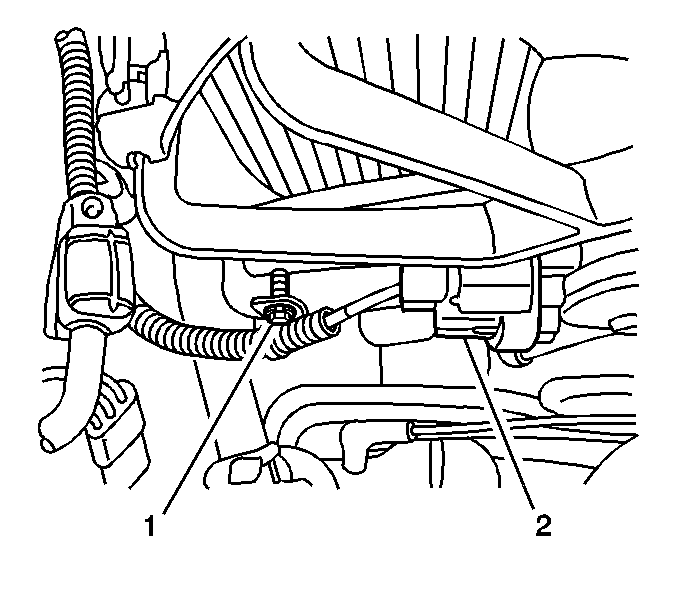
- Remove the electric fan harness clip (1).
- Disconnect the fan motor electrical connectors (2).
- Separate the wiring harness from the fan shroud.
- Using J 38185 remove the coolant bypass hose (2) from the radiator.
- Remove the right fan shroud bolt (3).
- Remove the left fan shroud bolt.
- Pull upward on the fan assembly, removing the assembly from the vehicle.
Caution: An electric fan under the hood can start up even when the engine is not running and can injure you. Keep hands, clothing and tools away from any underhood electric fan.
Caution: To help avoid personal injury or damage to the vehicle, a bent, cracked, or damaged fan blade or housing should always be replaced.
Important: Carefully remove the electric cooling fan assembly from the vehicle, to protect the radiator core.
Installation Procedure
- Install the cooling fan assembly to the vehicle.
- Ensure that the electric cooling fan is in the lower attaching points.
- Install the upper fan shroud to radiator mounting bolts.
- Install the electric cooling fan shroud to plenum mounting bolt (2).
- Connect the surge tank hose to radiator (3).
- Connect the wiring harness electrical connectors to the cooling fan motors.
- Connect the fan electrical harness retainers (1) to the fan assembly.
- Attach the remaining wiring harness retaining clips to the fan shroud.
- Install the A/C line retaining clip screw (1) to the fan shroud.
- Position the radiator hose with the mark facing up.
- Position J 38185 to the clamp (1) and position the clamp on the radiator hose.
- Using J 38185 install the coolant bypass hose (2) at the radiator.
- Fill the cooling system. Refer to Cooling System Draining and Filling .
- Install the air cleaner assembly. Refer to Air Cleaner Assembly Replacement in Engine Controls - 2.6L and 3.2L or to Air Cleaner Assembly Replacement in Engine Controls - 3.6L.
- Connect the battery negative cable. Refer to Battery Negative Cable Disconnection and Connection in Engine Electrical.
Important: Carefully install the electric cooling fan assembly into the vehicle, to protect the radiator core.
Notice: Refer to Fastener Notice in the Preface section.
Tighten
Tighten the bolt to 6.5 N·m (58 lb in).

Tighten
Tighten the bolt to 6.5 N·m (58 lb in).
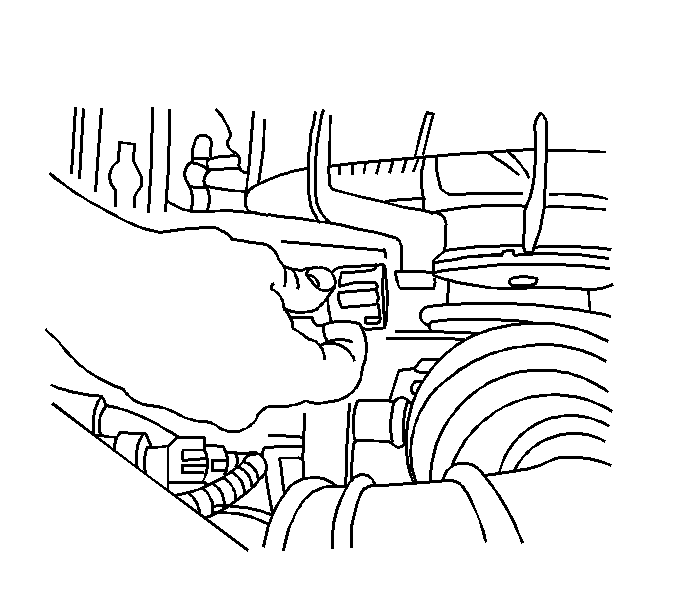


Tighten
Tighten the screw to 1 N·m (9 lb in).


Engine Coolant Fan Replacement LS6
Tools Required
J 38185 Hose Clamp Pliers
Removal Procedure
- Disconnect the battery negative cable. Refer to Battery Negative Cable Disconnection and Connection in Engine Electrical.
- Drain the cooling system. Refer to Cooling System Draining and Filling .
- Disconnect the surge tank hose (3).
- Remove the fan shroud to radiator bolts.
- Using J 38185 disconnect the upper radiator hose at the radiator (1).
- Remove the air cleaner assembly. Refer to Air Cleaner Assembly Replacement in Engine Controls - 5.7L (LS6).
- Remove the screw (1) from the A/C line retaining clip (3).
- Rotate the retaining clip.
- Remove the electric fan harness clip (1).
- Disconnect the fan motor electrical connectors (2).
- Separate the wiring harness from the fan shroud.
- Pull upward on the fan assembly, removing the assembly from the vehicle.
Caution: An electric fan under the hood can start up even when the engine is not running and can injure you. Keep hands, clothing and tools away from any underhood electric fan.
Caution: To help avoid personal injury or damage to the vehicle, a bent, cracked, or damaged fan blade or housing should always be replaced.


Important: Carefully remove the electric cooling fan assembly from the vehicle, to protect the radiator core.
Installation Procedure
- Install the cooling fan assembly to the vehicle.
- Ensure that the electric cooling fan is in the lower attaching points.
- Install the upper fan shroud to radiator mounting bolts.
- Connect the surge tank hose to radiator.
- Connect the wiring harness electrical connectors to the cooling fan motors.
- Connect the fan electrical harness retainers (1) to the fan assembly.
- Install the A/C line retaining clip screw (1) to the fan shroud.
- Position the radiator hose with the mark facing up.
- Position J 38185 to the clamp (1) and position the clamp on the radiator hose.
- Fill the cooling system. Refer to Cooling System Draining and Filling .
- Install the air cleaner assembly. Refer to Air Cleaner Assembly Replacement in Engine Controls - 5.7L (LS6).
- Connect the battery negative cable. Refer to Battery Negative Cable Disconnection and Connection in Engine Electrical.

Important: Carefully install the electric cooling fan assembly into the vehicle, to protect the radiator core.
Notice: Refer to Fastener Notice in the Preface section.
Tighten
Tighten the bolt to 6.5 N·m (58 lb in).


Tighten
Tighten the screw to 1 N·m (9 lb in).

