For 1990-2009 cars only
Removal Procedure
- Drain the engine oil. Refer to Engine Oil and Oil Filter Replacement .
- Remove the front frame. Refer to Front Frame Replacement .
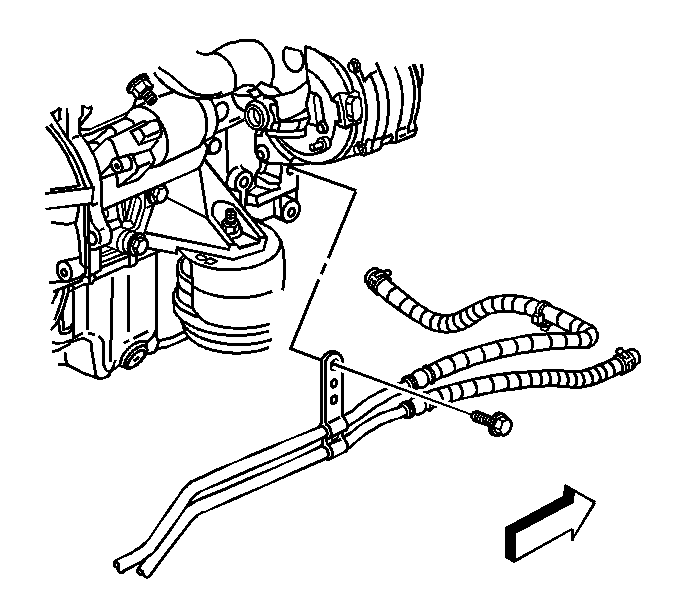
- Remove the bolt securing transmission fluid cooler pipes brace to the engine.
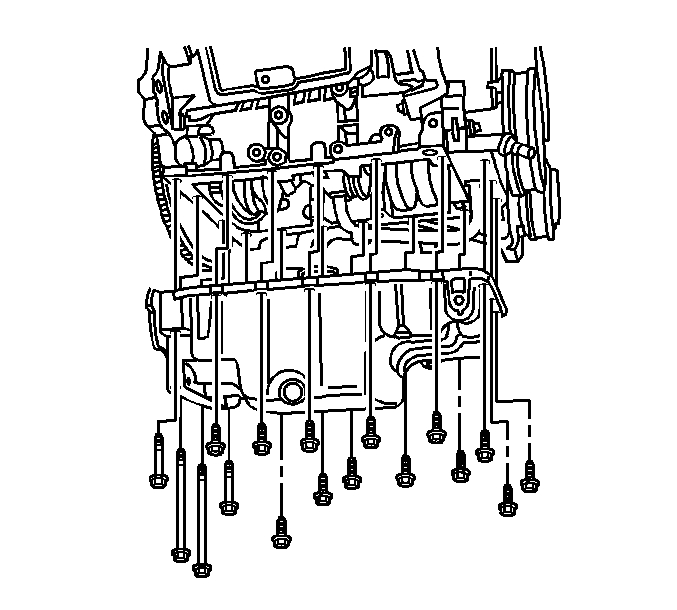
- Remove the 3 lower transmission mounting bolts.
- Remove the oil pan bolts.
- Carefully pry the oil pan away from the engine block.
- Clean the cylinder block mating surfaces.
- Clean and inspect the oil pan. Refer to Oil Pan Cleaning and Inspection .


Remove the oil pan from the engine block.
Installation Procedure
- Apply a bead of silicone sealing compound, GM P/N 12346286 (Canadian P/N 10953472), or equivalent, to the oil pan mating surface.
- Position the oil pan to the engine block.
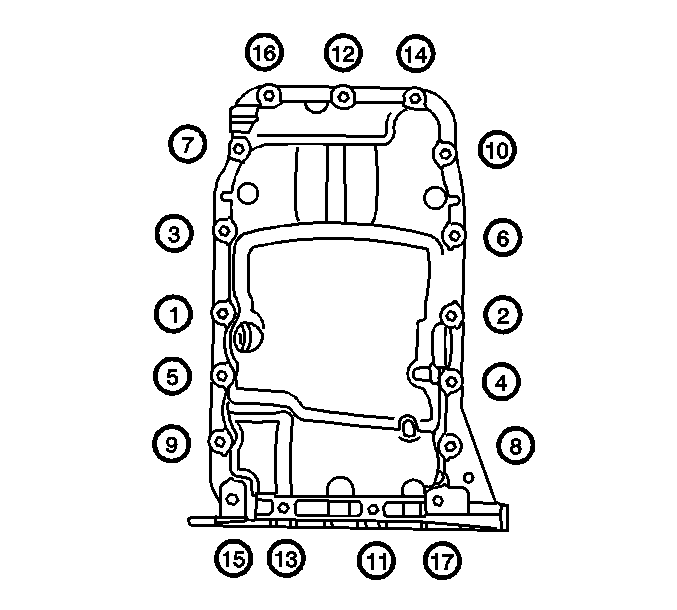
- Install the oil pan bolts.
- Install the 3 lower transmission mounting bolts.
- Install the bolt securing transmission fluid cooler pipes brace to the engine.
- Install the front frame. Refer to Front Frame Replacement .
- Fill the engine oil. Refer to Engine Oil and Oil Filter Replacement .
- Inspect for oil leaks after engine start up.

Notice: Refer to Fastener Notice in the Preface section.

Important: Position the oil pan fully rearward while tightening.
Tighten
Tighten the oil pan bolts in sequence to 15 N·m (11 lb ft).
Tighten
Tighten the transmission mounting bolts to 50 N·m (37 lb ft).

Tighten
Tighten the transmission fluid cooler pipes brace bolt to 25 N·m (18 lb ft).
