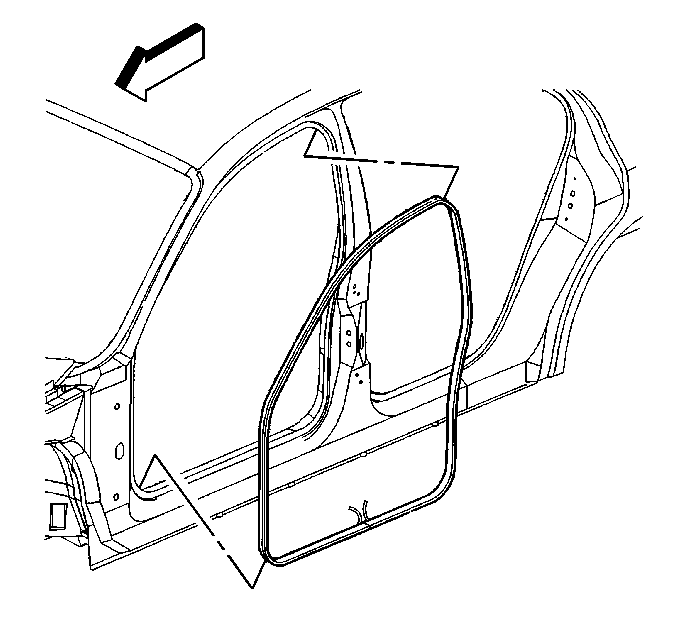
For 1990-2009 cars only
Removal Procedure
- Remove the carpet retainer. Refer to Carpet Retainer Replacement in Interior Trim.
- Remove the windshield pillar garnish molding. Refer to Windshield Pillar Garnish Molding Replacement in Interior Trim.
- Remove the lower B pillar trim garnish molding. Refer to Lower Pillar Garnish Molding Replacement in Interior Trim.
- Remove the top half of the weatherstrip from the retainer.
- Remove the bottom half of the weatherstrip from the body flange.
- Clean off any residue from the 2 patches.

Important: If you reinstall the original weatherstrip, replace the 2 sealer patches.
Installation Procedure
- Install the upper rear corner in order to hold the weatherstrip.
- Align the weatherstrip to the door opening.
- Peel the backing tape from the patch on the weatherstrip.
- Press on the weatherstrip in order to adhere the patch to the body.
- Install the weatherstrip into the metal retainer from the front to the upper rear corner.
- Peel the backing from the patch on the weatherstrip.
- Press on the weatherstrip in order to adhere the patch to the body.
- Install the weatherstrip in to the metal retainer from the lower transition to the upper corner.
- Install the lower portion of the weatherstrip onto the flange.
- Install the lower B pillar garnish molding. Refer to Lower Pillar Garnish Molding Replacement in Interior Trim.
- Install the windshield pillar garnish molding trim cover. Refer to Windshield Pillar Garnish Molding Replacement in Interior Trim.
- Install the carpet retainers. Refer to Carpet Retainer Replacement in Interior Trim.

Butt the top of the transition to the bottom of the metal retainer.
Join the top of the transition to the bottom of the metal retainer.
Start at the middle and brush the excess to the bottom.
