For 1990-2009 cars only
Air Conditioning Clutch Coil Installation HT6/HD6/HU6
Tools Required
| • | J 33024 Clutch Coil Installer Adapter |
| • | J 8433-1 Puller Bar |
| • | J 34992 Holding Fixture |
| • | J 33017 Pulley and Bearing Assembly Installer |
| • | J 33023-A Puller Pilot |
| • | J 6083 Snap Ring Pliers |
- Place the clutch coil assembly (1) on the front head. Position the terminals at the marked location.
- Place the J 33024 over the internal opening of the clutch coil housing.
- Align the J 33024 with the compressor front head.
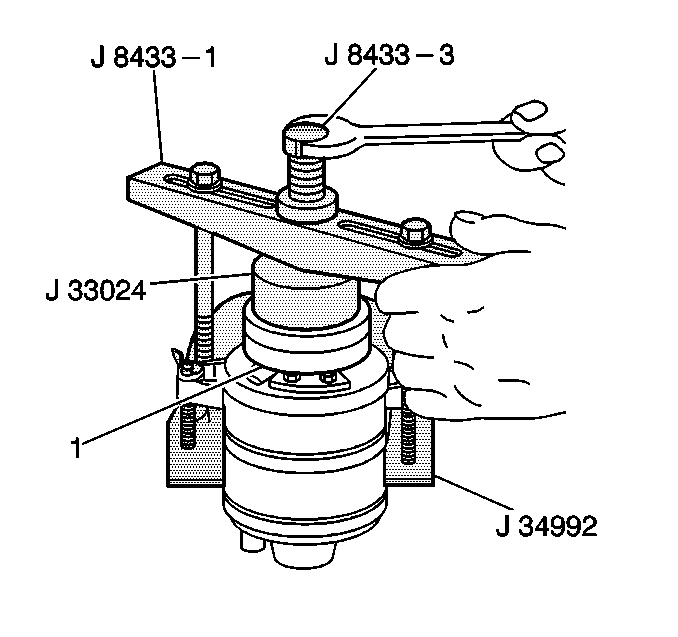
- Center the J 8433-1 in the counter-sunk center hole of the J 33024 .
- Install the 2 through bolts and washers through the crossbar slots.
- Thread the bolts into the J 34992 in order to achieve full fixture thickness.
- Turn the center forcing screw of the J 8433-1 in order to force the clutch coil onto the front head. Ensure that the clutch coil and the J 33024 remain aligned during installation.
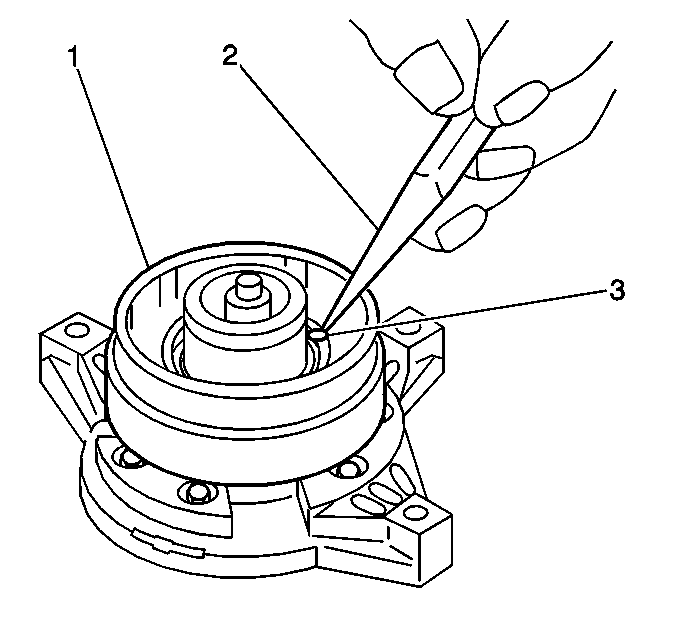
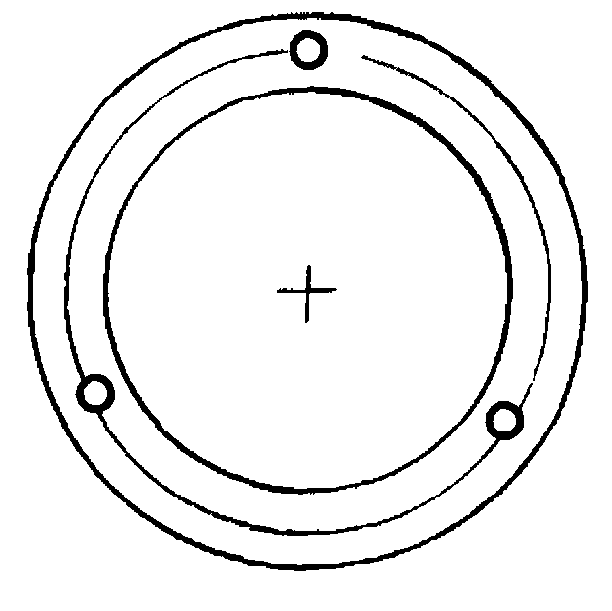
- When the coil is fully seated on the front head, use a 1/8 inch diameter drift punch (2) in order to stake the front head at 3 places 120 degrees apart (3), in order to ensure that the clutch coil (1) remains in position.
- Ensure that the stake size is only one-half the area of the punch tip. Ensure that the stake is only approximately 0.28-0.35 mm (0.010-0.015 in) deep.
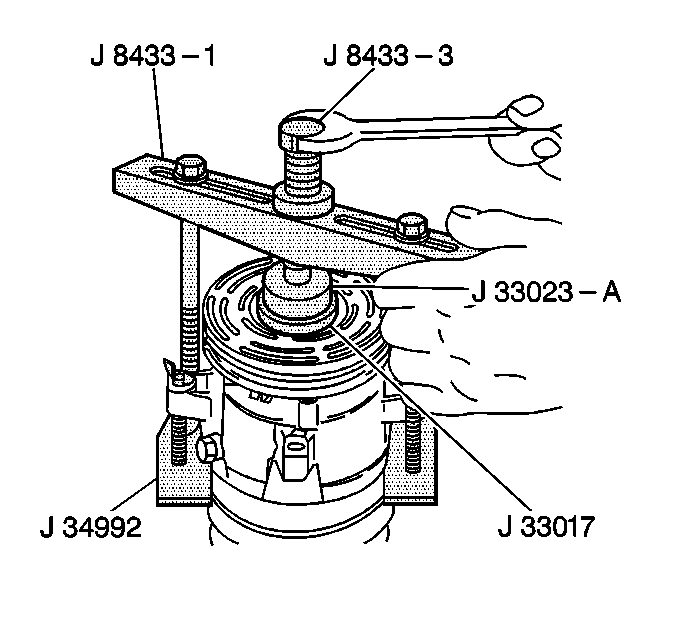
- With the compressor mounted to the J 34992 , position the pulley rotor (1) and bearing assembly on the front head.
- Position the J 33017 and the J 33023-A directly over the inner race of the bearing.
- Position the J 8433-1 on the J 33023-A .
- Assemble the 2 through bolts and washers through the puller bar slots.
- Thread the bolts into the J 34992 . Ensure that the thread of the through bolts engages the full thickness of the J 34992 .
- Tighten the center screw in the J 8433-1 in order to force the pulley rotor and bearing assembly onto the compressor front head.
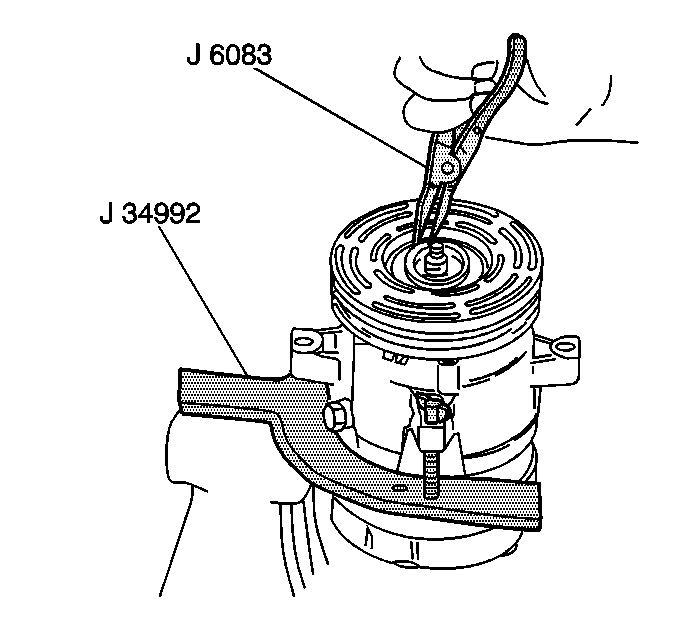
- Use the J 6083 in order to install the following components:
- Install the clutch plate and hub assembly. Refer to Compressor Clutch Plate/Hub Assembly Install (HT6/HD6) .
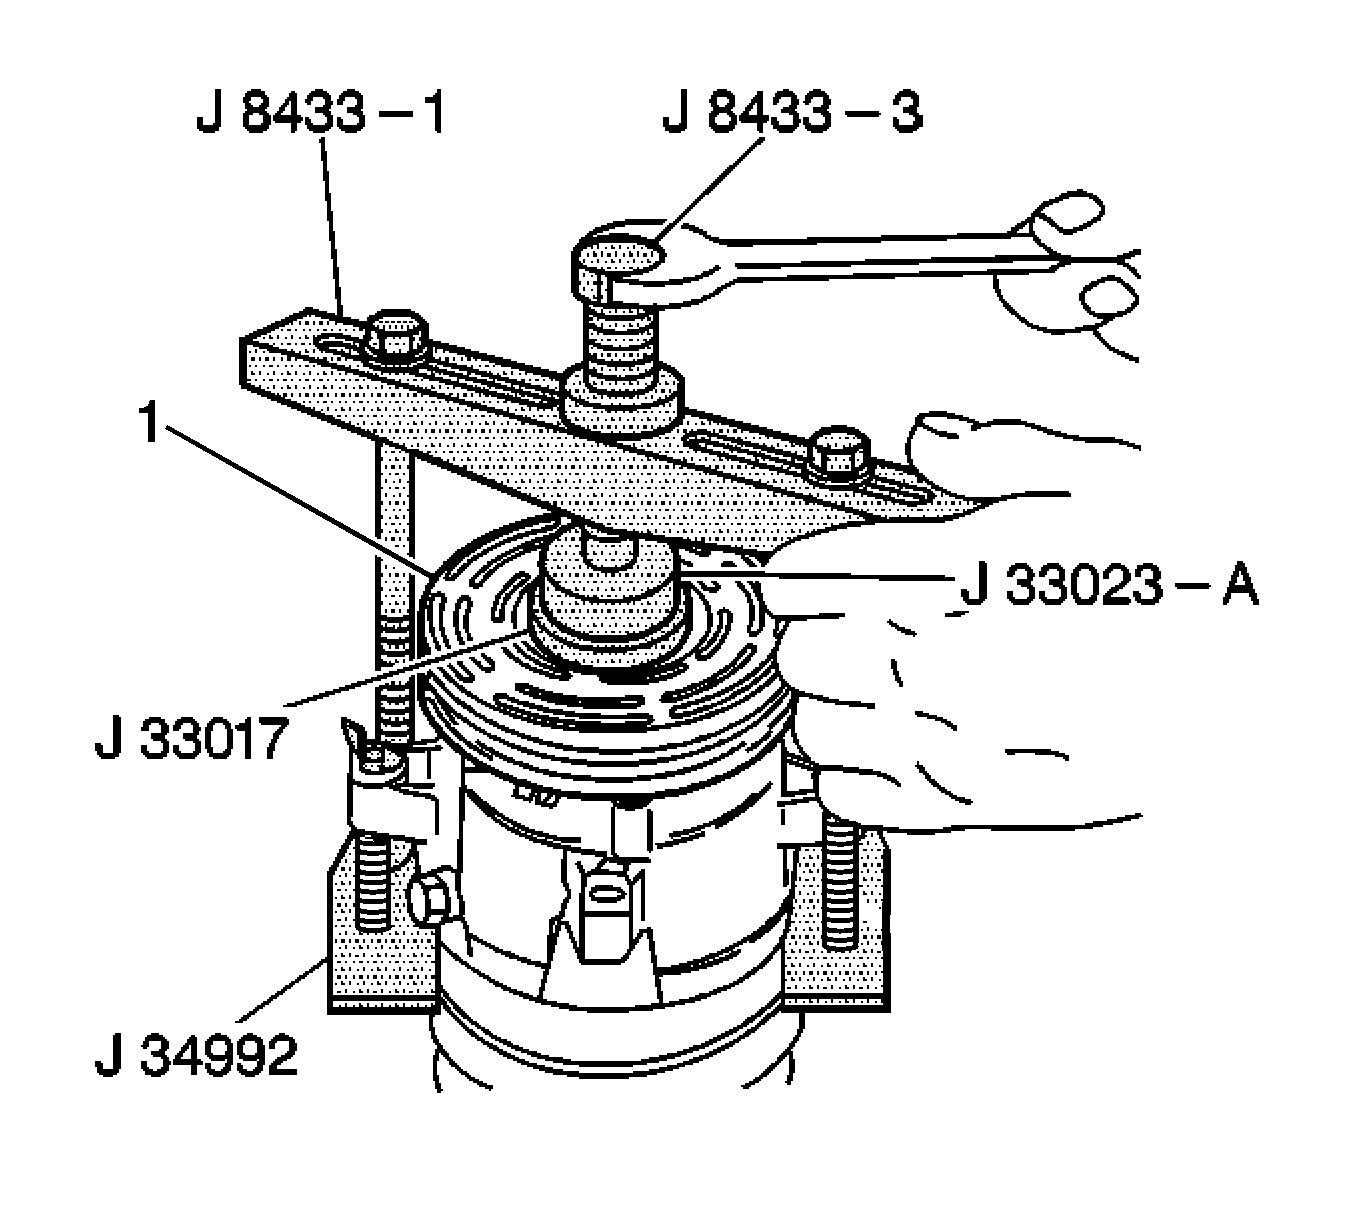
If the J 33017 slips off direct in-line contact with the inner race and bearing, perform the following steps:
| 15.1. | Loosen the J 8433-3 . |
| 15.2. | Realign the installer and the pilot in order to ensure that the J 33017 properly clears the front head. |
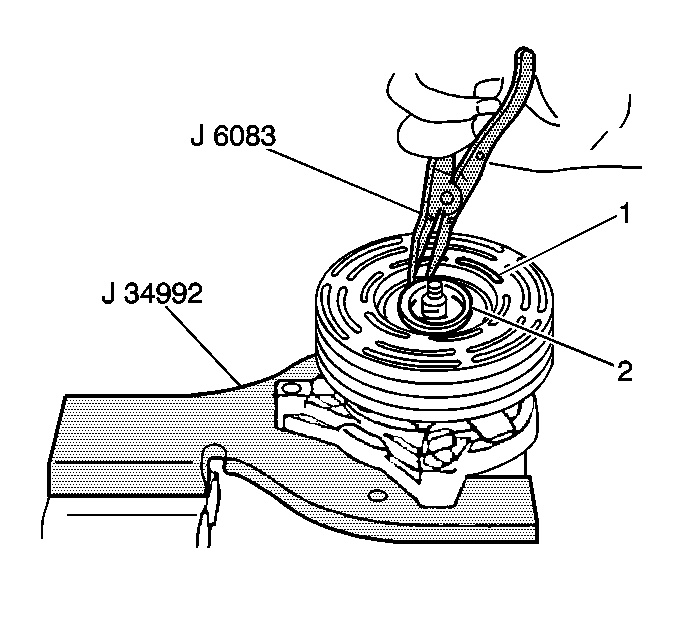
| • | The pulley rotor (1) |
| • | The retainer ring (2) |
Air Conditioning Clutch Coil Installation V5 - Conventional Mount
Tools Required
| • | J 8433-1 Puller Bar |
| • | J 8433-3 Forcing Screw |
| • | J 33024 Clutch Coil Installer Adapter |
| • | J 34992 Compressor Holding Fixture |
| • | J 33025 Clutch Coil Puller Legs |
- Place the clutch coil assembly on the front head with the terminals positioned at the marked location.
- Place the J 33024 over the internal opening of the clutch coil housing.
- Align the J 33024 with the compressor front head.
- Center the J 8433-1 on the countersunk center hole of the J 33024 .
- Install the through bolts and the washers of the J 34992 through the slots in the J 8433-1 .
- Thread the through bolts into the J 33025 in order to achieve full fixture thickness.
- Turn the J 8433-3 of the J 8433-1 in order to force the clutch coil onto the head.
- With the compressor still mounted to the J 34992 and the coil seated on the front head, stake the front head using a drift punch with a diameter of 3.175 mm (0.125 in).
- Stake the front head at 3 places 120 degrees apart in order to ensure that the clutch coil remains in position.
- Ensure that the stake size is only one half of the area of the punch tip and only 0.28-0.35 mm (0.010-0.015 in) in depth.
- With the compressor mounted to the J 34992 , position the rotor and bearing assembly on the front head.
- Position the J 33017 and the J 33023-A directly over the inner race of the bearing.
- Position the J 8433-1 on the J 33023-A .
- Assemble the 2 through bolts and the washers of the J 34992 through the slots of the J 8433-1 .
- Thread the 2 through bolts into the J 34992 .
- Tighten the J 8433-3 in the J 8433-1 in order to force the pulley rotor and bearing assembly onto the front head of the compressor.
- If the J 33017 slips off direct, in-line contact with inner face of the bearing, use the following steps:
- Install the rotor and bearing assembly retainer ring using the J 6083 .
- Install the clutch plate and hub assembly. Refer to Compressor Clutch Plate and Hub Assembly Removal (V5 -- Conventional Mount) .
- Install the shaft nut.
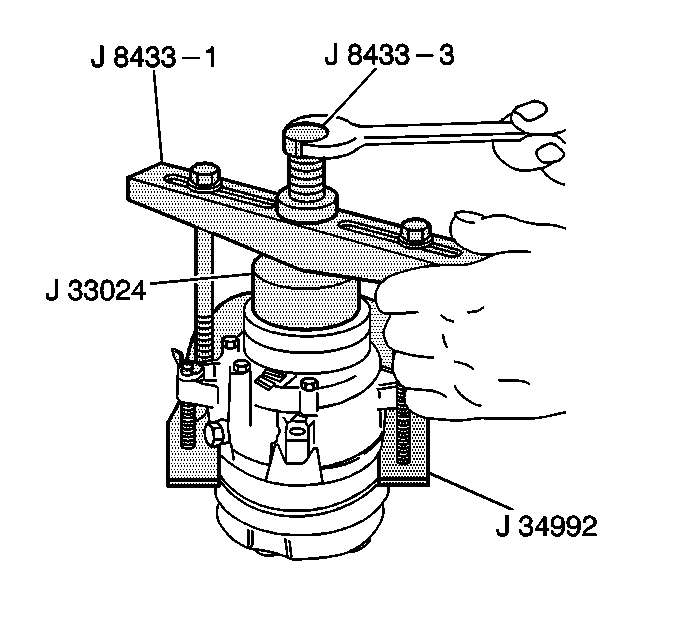
Important: Ensure that the clutch coil and the J 33024 stay in-line during the installation.
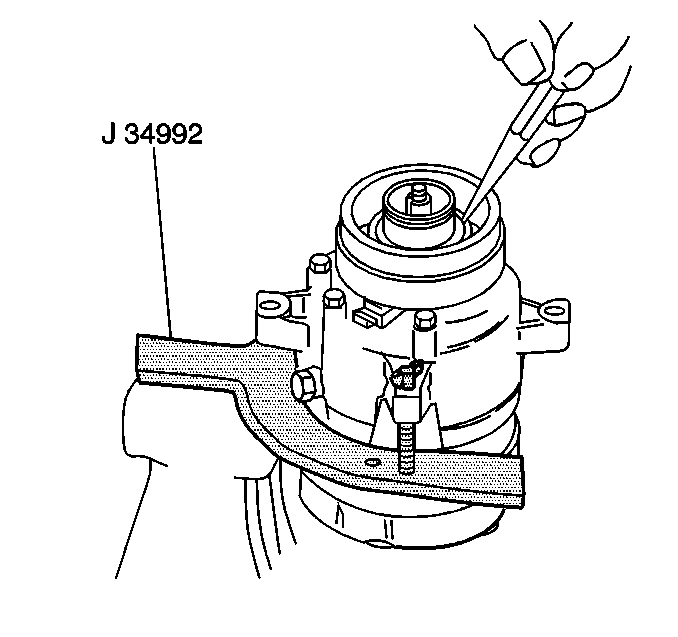

Ensure that the thread of the through bolts engages the full thickness of the J 34992 .
| 17.1. | Loosen the J 8433-3 . |
| 17.2. | Realign the J 33017 and the J 33023-A in order to ensure that the installer clears the front head. |
