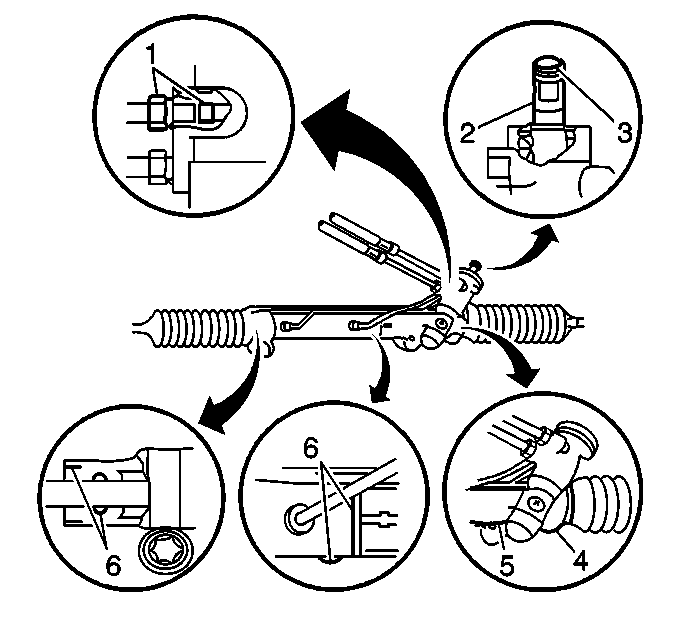
Symptoms
The following symptoms indicate that the power steering system may be
leaking:
| • | Fluid leakage is on the floor. |
| • | Fluid leaks are visible on the steering gear or the pump. |
| • | A growling noise is heard either during parking or while the engine
is cold. |
| • | Power steering is lost during parking. |
| • | Steering effort is heavy. |
Inspection Procedure
Complete the following steps in order to inspect the power steering
system for an external leak.
- Wipe the suspected area dry.
- Inspect the reservoir for overfill.
- Inspect the power steering system for the following conditions:
| • | Power steering fluid aeration |
- Inspect the following components:
- Verify the exact point of the leakage. The point from which the
fluid is dripping is not necessarily the point where the system is leaking.
In order to locate the seepage type leaks use the following method:
| 5.1. | Turn the engine off. |
| 5.2. | Wipe the entire power steering system dry. |
| 5.3. | Inspect the pump reservoir fluid level. |
Add fluid as necessary.
| | Important: Do not hold the steering wheel at a stop for any length of time. Damage
to the power steering pump may result.
|
| 5.5. | Turn the steering wheel from stop to stop several times, with the aid
of an assistant. |
| 5.6. | Perform the Rack and Pinion Leak Diagnosis in order to locate
and repair the exact area of the leak. |
- Use the following procedure when service is required.
| 6.1. | Clean the leakage area prior to the disassembly procedure. |
| 6.2. | Replace the leaking seal. |
| 6.3. | Inspect the component sealing surfaces for damage. |
| 6.5. | Bleed the power streering system. |
Refer to
Power Steering System Bleeding
.
Diagnostic Procedure

Notice: Use the correct fastener in the correct location. Replacement fasteners
must be the correct part number for that application. Fasteners requiring
replacement or fasteners requiring the use of thread locking compound or sealant
are identified in the service procedure. Do not use paints, lubricants, or
corrosion inhibitors on fasteners or fastener joint surfaces unless specified.
These coatings affect fastener torque and joint clamping force and may damage
the fastener. Use the correct tightening sequence and specifications when
installing fasteners in order to avoid damage to parts and systems.
- Install the fitting.
Tighten
Tighten the fitting to 27 N·m (20 lb ft).
- If the leakage persists, complete the following steps:
| 2.1. | Replace the O-ring seal. |
| 2.2. | Repair the fitting nut or replace the line if the leakage is due
to damaged threads. |
| 2.3. | Replace the housing if the housing threads are badly damaged. |
- Replace the following components:
- Perform a steering gear replacement if a leak is observed between
the following components:
- Perform a power steering gear replacement if a leak is observed
at the drivers side and is not affected by the direction of the turn.
Refer to
Steering Gear Replacement
.
- Perform a power steering gear replacement if a leak is observed
at the housing end and spurts when bottomed in a left turn.
Refer to
Steering Gear Replacement
.
- Perform a power steering gear replacement if a leak is observed
at the passengers side.
Refer to
Steering Gear Replacement
.

