For 1990-2009 cars only
Removal Procedure
Important: Front wheelhouse sectioning procedures can be used when damage is limited to the front portion of the wheelhouse assemblies. In such a situation, the technician does not need to replace the entire wheelhouse.
- Remove all related panels and components.
- Visually inspect and restore as much of the damage as possible to factory specifications.
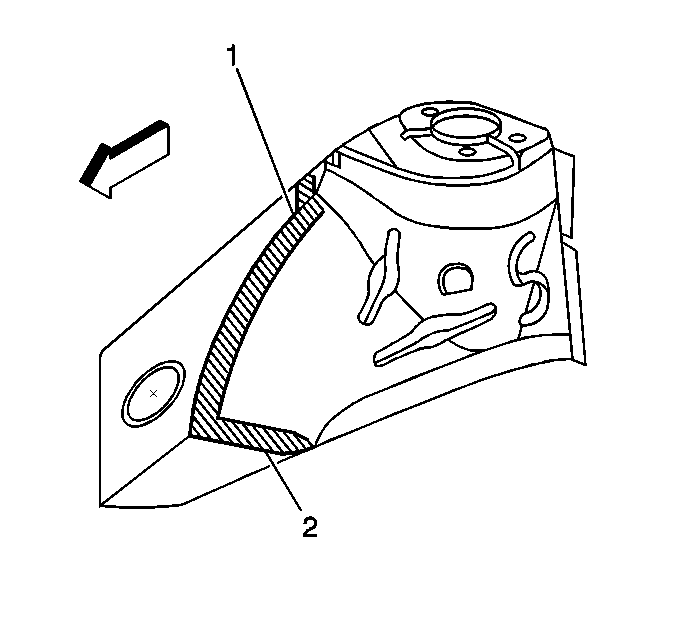
- Place 25 mm (1 in) wide masking tape following the forward contour of the strut tower (1).
- Cut the wheelhouse along the outside edge of the masking tape (2).
- Locate, mark and drill out the factory welds attaching the wheelhouse to the radiator support and the upper and lower front rails.
- Remove the damaged section of the wheelhouse.

Installation Procedure
- When preparing the service part, cut the forward apron well beyond the 25 mm (1 in) overlap needed for sectioning.
- Temporarily position the new wheelhouse section on the vehicle.
- Mark a line on the new wheelhouse section by tracing along the cut line of the original wheelhouse.
- Remove the new wheelhouse section.
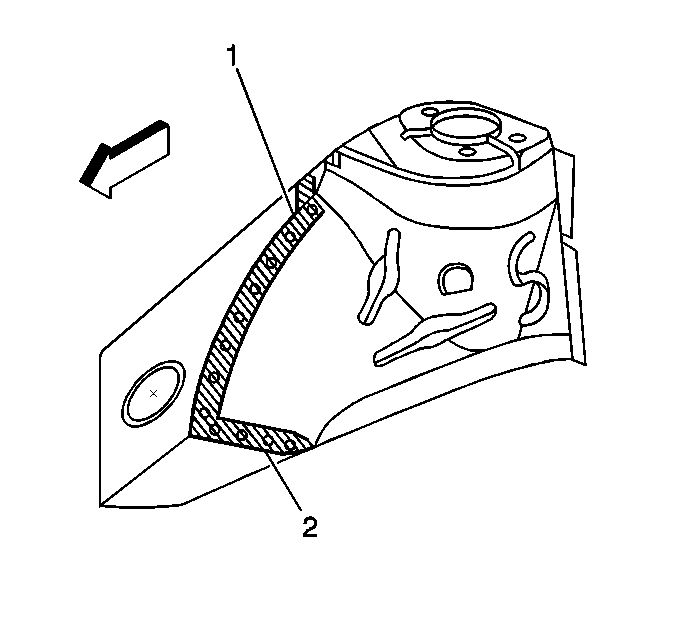
- Measure and cut 25 mm (1 in) inboard along the traced line to create an overlap (1). The original wheelhouse will overlap the modified service part.
- Drill 8 mm (5/16 in) holes every 35 mm along the overlap on the new wheelhouse section.
- Position the new wheelhouse section.
- Check the fit and plug weld accordingly on the outboard side of the panel (2).
- Clean and prepare welded surfaces
- Apply sealers and anti-corrosion materials as necessary.
- Install all related panels and components.

Important: Do not combine paint systems. Prior to refinishing, refer to GM 4901MD-99 Refinish Manual for recommended products.
