For 1990-2009 cars only
Removal Procedure
- Raise and suitably support the vehicle. Refer to Lifting and Jacking the Vehicle
- Remove the transmission.
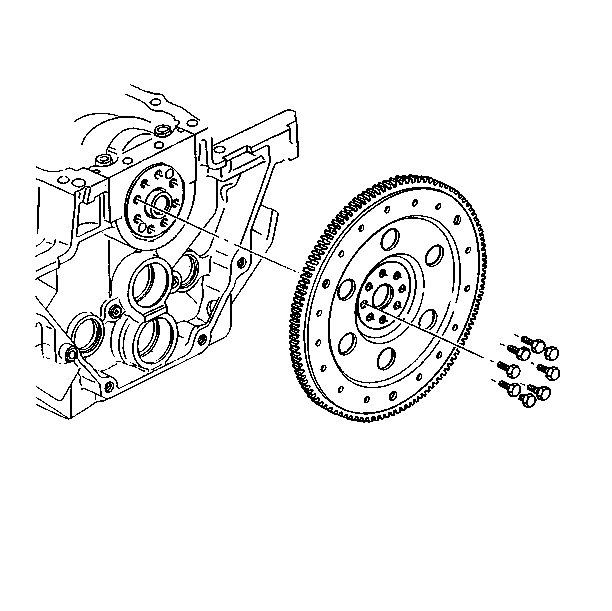
- Remove the eight bolts attaching the flywheel to the crankshaft flange. Discard the bolts.
- Remove the flywheel.
- Inspect the flywheel for worn or broken teeth, and cracks. Replace if necessary.
- Inspect the crankshaft and flywheel mating surfaces for burrs.

Installation Procedure
Tools Required
| • | J 36660-A Torque Angle Meter |
| • | J 8001 Dial Indicator Set |
- Install the flywheel.
- Install the flywheel bolts.
- Install the J 8001 to the engine block.
- Check the flywheel runout at the three attaching bosses. Ensure that the crankshaft end-play is held in one direction when checking flywheel runout. Flywheel runout should not exceed 0.381 mm (0.015 in).
- If flywheel runout is out of specification, tap on the high side with a mallet in order to correct runout.
- Replace the flywheel if runout cannot be corrected.
- Install the transmission.
- Lower the vehicle.

Notice: Use the correct fastener in the correct location. Replacement fasteners must be the correct part number for that application. Fasteners requiring replacement or fasteners requiring the use of thread locking compound or sealant are identified in the service procedure. Do not use paints, lubricants, or corrosion inhibitors on fasteners or fastener joint surfaces unless specified. These coatings affect fastener torque and joint clamping force and may damage the fastener. Use the correct tightening sequence and specifications when installing fasteners in order to avoid damage to parts and systems.
Tighten
Tighten the new bolts to 15 N·m (11 lb ft).
Use the J 36660-A
in order
to tighten the bolts an additional 50 degrees.
