Headlining Trim Panel Replacement Buick
Removal Procedure
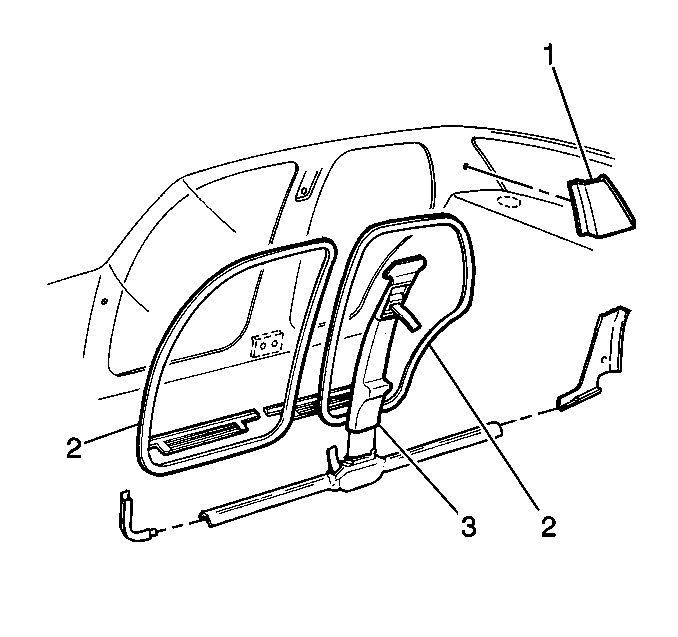
- Remove the front door weather-strips.
- Remove the rear door weather-strips (3).
- Remove the center pillar trim (4).
- Remove the upper rear quarter panel trim (1).
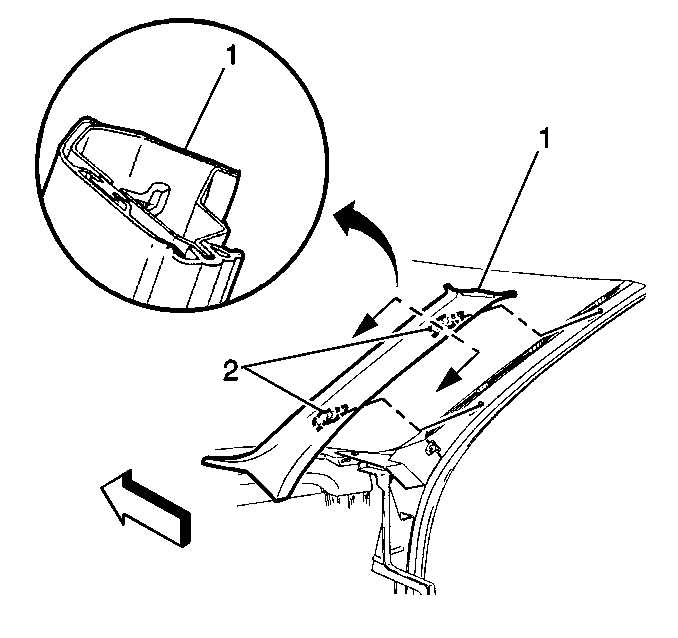
- Remove the windshield garnish molding (1).
- Remove the sunroof opening closeout lace, if equipped.
- Remove the sunshades (1). Refer to Sunshade Replacement .
- Remove the assist handles, if equipped. Refer to Assist Handle Replacement .
- Remove the coat hooks, if equipped.
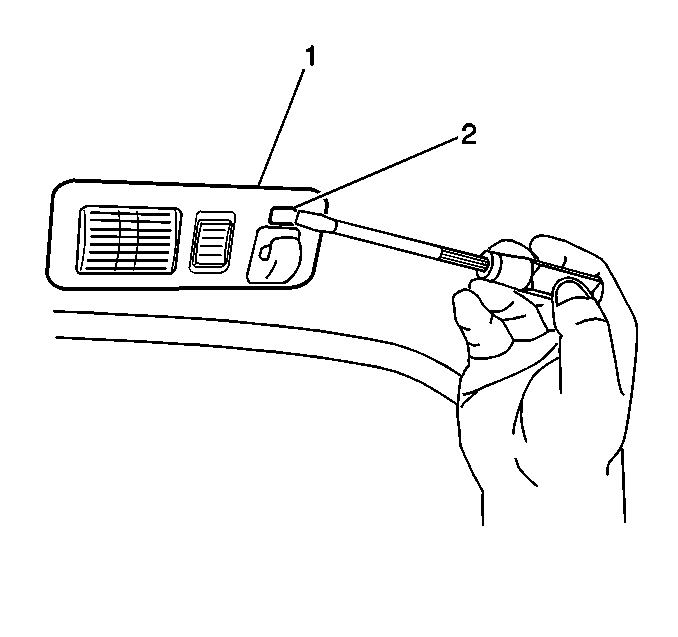
- Remove the interior lamps (1).
- Remove the fiber optic cover, if equipped.
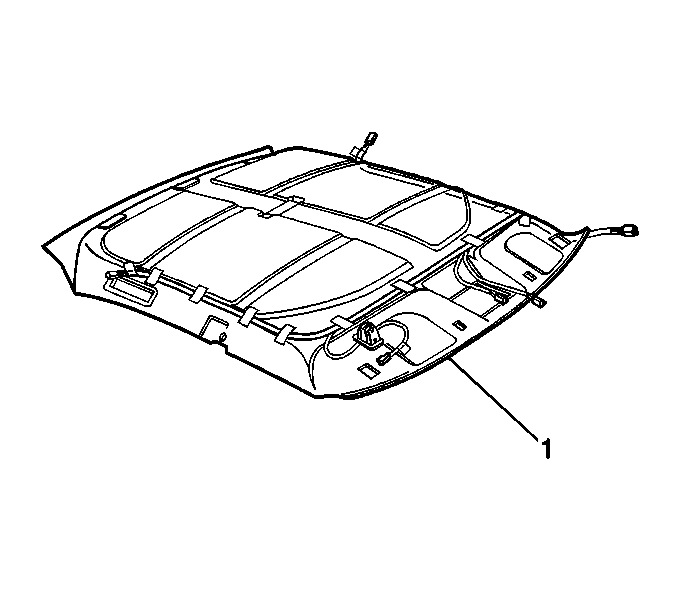
- Remove the headliner (1) through the right front door.

Notice: Use care when removing and installing the headliner. If reusing the headliner lay the headliner down flat on a clean surface. Excessive bending will damage the headliner.
Important: Five to six patches of hook and loop material secure the headliner to the roof. In order to avoid tearing the fiberglass substrate, carefully separate them. Recline the seat back and position the seat as far rearward as possible.
Installation Procedure
- Install the headliner (1) through the right front door, with the aid from an assistant.
- Install the coat hooks (1), if equipped.
- Install the assist handles, if equipped. Refer to Assist Handle Replacement .
- Install the sunshades (1). Refer to Sunshade Replacement .
- Install the interior lamps.
- Install the fiber optic cover, if equipped.
- Install the windshield garnish molding (1).
- Install the sunroof opening closeout lace, if equipped.
- Install the upper rear quarter panel trim (1).
- Install the center pillar molding (3).
- Install the rear door weather-strips (2).
- Install the front door weather-strips.
Notice: Use care when removing and installing the headliner. If reusing the headliner lay the headliner down flat on a clean surface. Excessive bending will damage the headliner.


Headlining Trim Panel Replacement Pontiac/Oldsmobile
Removal Procedure
- Remove the front and rear door weather-strips (2). Refer to Door Weatherstrip Replacement .
- Remove the center pillar trim (3). Refer to Center Pillar Garnish Molding Replacement .
- Remove the upper rear quarter trim panels (1). Refer to Rear Quarter Trim Panel Replacement .
- Remove the windshield pillar garnish molding (1). Refer to Windshield Pillar Garnish Molding Replacement .
- Remove the sunroof opening closeout lace, (if equipped).
- Remove the sunshades (1). Refer to Sunshade Replacement .
- Remove the sunshade supports.
- Remove the front and rear assist handles (8,9). Refer to Assist Handle Replacement .
- Remove the coat hooks, if equipped.
- Disconnect the electrical connectors.
- Remove the interior lamps.
- Remove the fiber optic cover, if equipped.
- With the aid from an assistant, remove the headliner (1) through the right rear door.


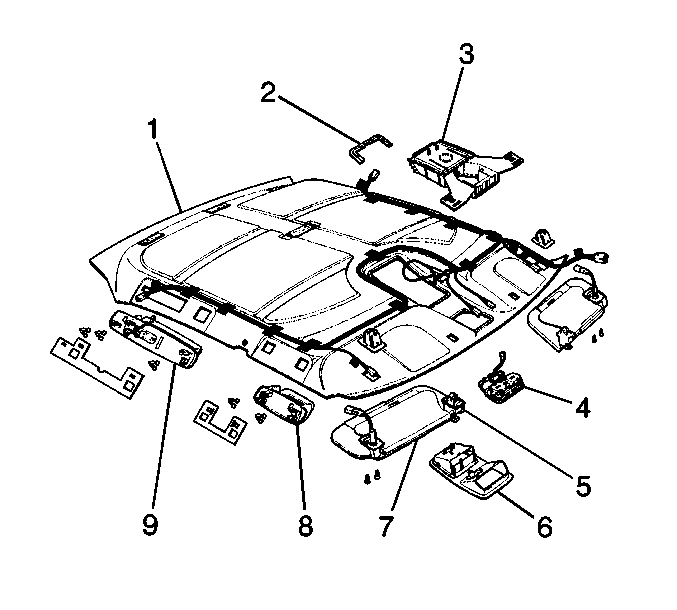
Notice: Use care when removing and installing the headliner. If reusing the headliner lay the headliner down flat on a clean surface. Excessive bending will damage the headliner.
Important: Five to six patches of hook and loop material secure the headliner to the roof. In order to avoid tearing the fiberglass substrate, carefully separate the hook and loop material. Recline the seat back and position the seat as far rearward as possible.
Installation Procedure
- With the aid from an assistant, install the headliner (1) through the right rear door
- Install the coat hooks, if equipped.
- Install the front and rear assist handles (8,9). Refer to Assist Handle Replacement .
- Install the sunshades (1). Refer to Sunshade Replacement .
- Connect the electrical connectors.
- Install the sunshade fasteners (2).
- Install the sunshade supports and fasteners.
- Install the interior lamps.
- Install the fiber optic cover, if equipped.
- Install the windshield pillar garnish moldings (1). Refer to Windshield Pillar Garnish Molding Replacement .
- Install the sunroof opening closeout lace, if equipped.
- Install the upper rear quarter trim panels (1). Refer to Rear Quarter Trim Panel Replacement .
- Install the center pillar molding (3). Refer to Center Pillar Garnish Molding Replacement .
- Install the front and rear door weather-strips (2). Refer to Door Weatherstrip Replacement .
Notice: Use care when removing and installing the headliner. If reusing the headliner lay the headliner down flat on a clean surface. Excessive bending will damage the headliner.
Important: Five to six patches of hook and loop material secure the headliner to the roof. In order to secure the headliner to the roof, align the hook and loop patches before securing.


