Rear Window Replacement Long Method
Removal Procedure
Tools Required
J 24402-A Cold Knife Glass Sealant Remover
- Mark the center of the window.
- Remove the upper interior quarter trim. Refer to Rear Quarter Trim Panel Replacement in Interior Trim.
- Disconnect the rear window defogger connectors (1,2,3).
- Pull the reveal molding (1) from the rear window. Refer to Rear Window Reveal Molding Replacement .
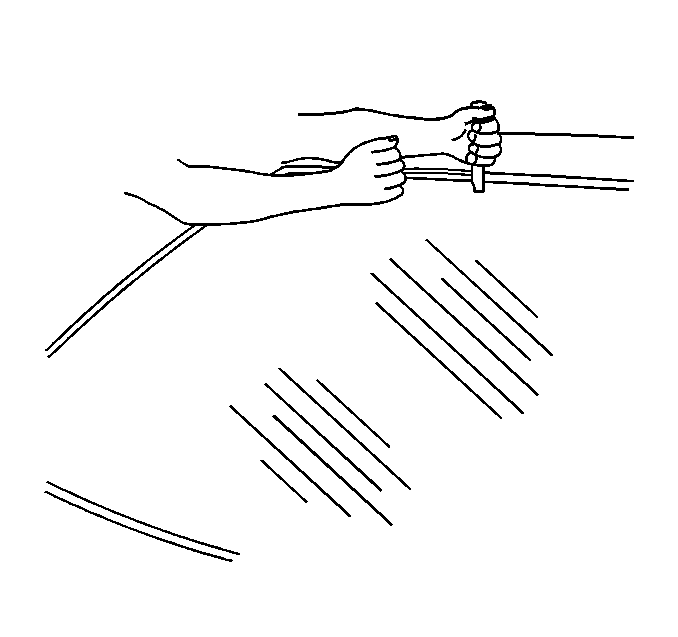
- Working outside of the vehicle, cut out the window.
- With the aid of an assistant, remove the rear window.
- If you reuse the original window, use a razor knife in order to remove any existing urethane adhesive from the window edge and from the body surface.
- Clean the surface of the window which new urethane adhesive contacts. Clean around the edge of the inside surface of the window.
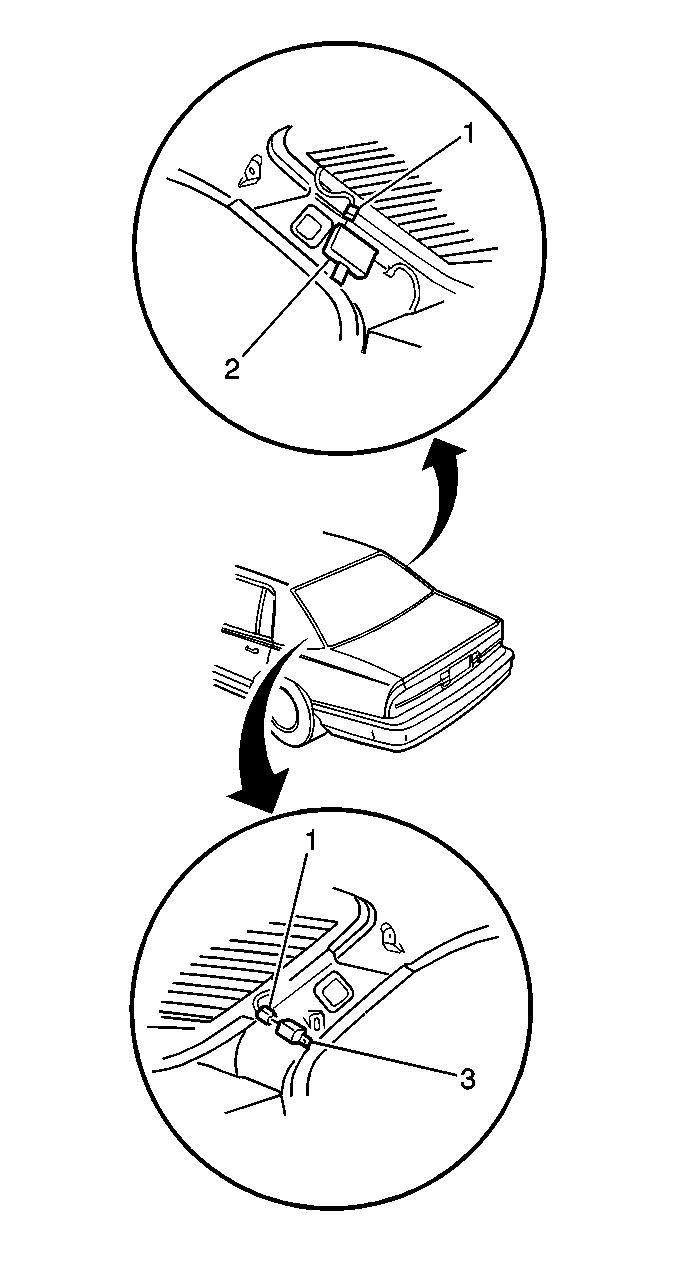
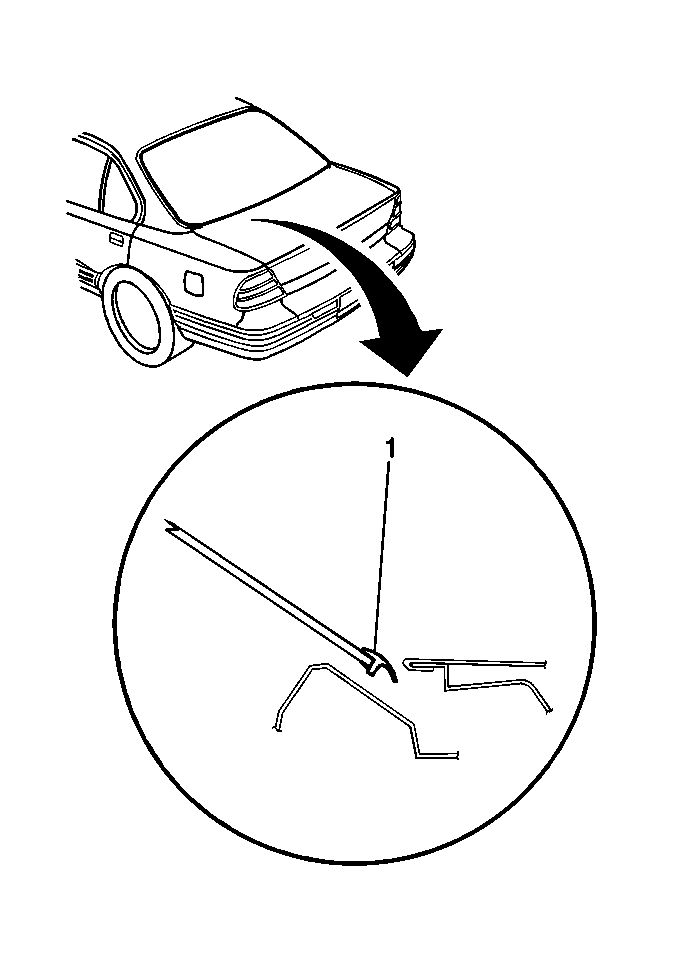
Caution: When working with any type of glass or sheet metal with exposed or rough edges, wear approved safety glasses and gloves in order to reduce the chance of personal injury.
Important: Use a short blade on the cold knife to avoid cutting the defroster wires.
Use a J 24402-A .
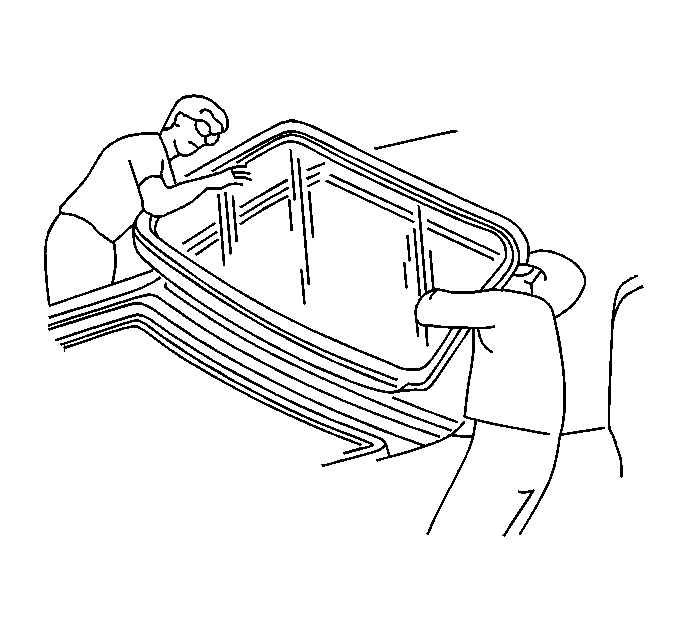
Caution: Failure to prep the area prior to the application of primer may cause insufficient bonding of urethane adhesive. Insufficient bonding of urethane adhesive may allow unrestrained occupants to be ejected from the vehicle resulting in personal injury.
Use one of the following cleaners:
| • | A clean isopropyl alcohol dampened cloth |
| • | GM Window Cleaner P/M 1050427 or the equivalent |
Inspection Procedure
- The following components may reveal the causes of a broken window:
- Inspect for any of the following conditions in order to prevent future breakage of the window:
- Inspect the condition of the window opening and the adhesive bead. Refer to Adhesive Service Kit Description .
| • | The flange of the window opening |
| • | The window reveal molding |
| • | The window |
| • | High welds |
| • | Solder spots |
| • | Hardened spot weld sealer |
| • | Any obstruction or irregularity in the pinchweld flange. |
Installation Procedure
Tools Required
J 24811 Urethane Adhesive Dispensing Gun
- With the aid of an assistant, dry fit the window (2) in the opening in order to determine the correct position. Fit the window by completing the following steps:
- Position the reveal molding (1) to the edge of the window.
- Press the reveal molding onto the window.
- Use a new dauber in order to apply Window Prep 1 (clear) to the edges of the window.
- Immediately wipe the primed area with a clean cloth.
- Shake the Window Primer 2 (black) well.
- Use a new dauber in order to apply the primer 2 (black) over the previously applied clear primer.
- Apply a 14 mm (5/16 in) high and 8 mm (5/16 in) wide bead of urethane adhesive (3) to the window.
- With the aid of a helper, install the window (1) in the opening.
- Align the tape lines on the window and the body surface.
- Press firmly the window into place.
- Tape the window to the body in order to minimize movement.
- Clean any excess urethane from the body with a lint free cloth.
- Watertest the window immediately using a soft spray.
- If you find a leak, use a plastic paddle in order to apply extra urethane adhesive at the leak point.
- Connect the rear window defogger connectors (1,2,3).
- Install the upper interior quarter trim. Refer to Rear Quarter Trim Panel Replacement
- Allow 6 hours at room temperature, 22°C (72°F), at 30 percent relative humidity for curing the urethane adhesive.

Caution: When working with any type of glass or sheet metal with exposed or rough edges, wear approved safety glasses and gloves in order to reduce the chance of personal injury.
| 1.1. | Position the window in the opening. |
| 1.2. | Use masking tape in order to mark the location of the window in the opening. |
| 1.3. | Slit the masking tape at the window edge. During installation, the tape on the window aligns with the tape on the body. |
| 1.4. | Remove the window from the opening. |
Place the window inside up on a clean protected surface.

Start at the center of the of the window.
Work outward.

Caution: Failure to prep the area prior to the application of primer may cause insufficient bonding of urethane adhesive. Insufficient bonding of urethane adhesive may allow unrestrained occupants to be ejected from the vehicle resulting in personal injury.
Important: Prevent the Window Prep 1 (clear) from running into the vision area of the window.
This primer dries almost instantly. This primer may stain the window if not applied evenly.Allow approximately 6-10 minutes the Window Primer to dry 2.
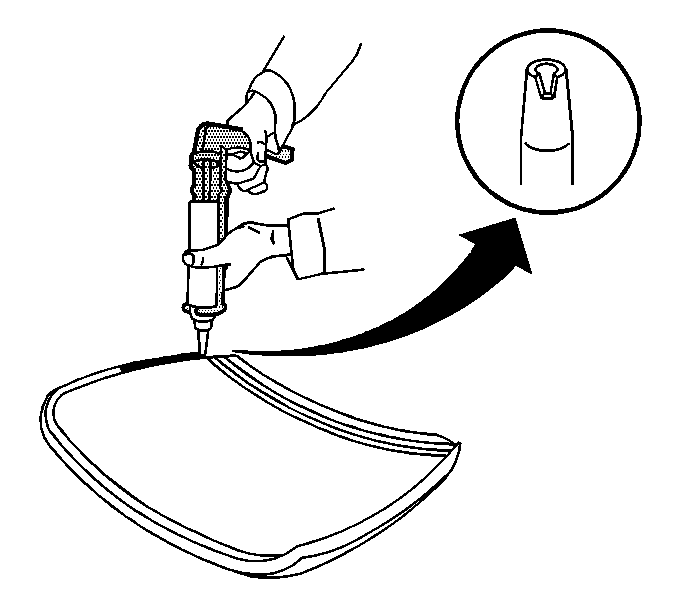
Caution: When replacing stationary windows, use Urethane Adhesive Kit GM P/N 12346392 (Canadian P/N 10952983), or a urethane adhesive system meeting GM Specification GM3651G, to maintain original installation integrity. Failure to use the urethane adhesive kit will result in poor retention of the window which may allow unrestrained occupants to be ejected from the vehicle resulting in personal injury.
Use a J 24811 .


Important: DO NOT direct a hard stream of high pressure water at the fresh urethane adhesive.
Use warm or hot water in order to accelerate the cure of the adhesive. Refer to Water Hose Test in Waterleaks.

Important:
• Partially lower a door window in order to prevent pressure build
up when closing the doors prior to the urethane adhesive cure. • DO NOT DRIVE THE VEHICLE until the urethane adhesive is cured. • DO NOT USE COMPRESSED AIR in order to dry the urethane adhesive.
Rear Window Replacement ShortMethod
Removal Procedure
- Use masking tape in order to protect the painted surface around the rear window.
- Remove the reveal molding. Refer to Rear Window Reveal Molding Replacement .
- Remove the rear quarter trim panels. Refer to Rear Quarter Trim Panel Replacement in Interior Trim.
- Disconnect the electrical connector to the rear defogger grid and antenna (if applicable).
- Cut the urethane with a cold knife from the exterior of the back glass.
- With the aid from an assistant, remove the back glass.
- Remove any excessive urethane from the pinch weld area.
- Clean the pinch weld area.
Caution: When replacing stationary windows, use Urethane Adhesive Kit GM P/N 12346392 (Canadian P/N 10952983), or a urethane adhesive system meeting GM Specification GM3651G, to maintain original installation integrity. Failure to use the urethane adhesive kit will result in poor retention of the window which may allow unrestrained occupants to be ejected from the vehicle resulting in personal injury.
Caution: When working with any type of glass or sheet metal with exposed or rough edges, wear approved safety glasses and gloves in order to reduce the chance of personal injury.

Installation Procedure
- Apply pinch weld primer.
- Clean the new rear window.
- Apply the two-part primer to the sealing edge of the new glass.
- Install the new reveal molding to the rear window.
- Apply urethane to the pinch weld area.
- With the aid from an assistant, install the new rear window.
- Apply masking tape in order to hold the rear window in place until the urethane has cured.
- Connect the electrical connector to the rear defogger grid and antenna (if applicable).
- Install the rear quarter trim panels. Rear Quarter Trim Panel Replacement in Interior Trim.
- Remove the masking tape from the painted surface.
- Clean the new rear window and surrounding area.
- Water test the urethane seal for leaks.


