Engine Coolant Thermostat Replacement LY7
Removal Procedure
- Partially drain the cooling system. Refer to Cooling System Draining and Filling .
- Remove the upper intake manifold with the lower intake manifold. Refer to Lower Intake Manifold Replacement .
- Disconnect the surge tank hose from the thermostat.
- Remove the coolant pipe/thermostat housing bolt (1).
- Remove the coolant pipe bolt (3).
- Remove the coolant inlet pipe from the thermostat housing.
- Remove and discard the coolant pipe O-ring seal (2).
- Remove the thermostat bolts.
- Remove the thermostat and discard the thermostat seal.
Important: Do NOT separate the upper and lower intake manifolds.


Installation Procedure
- Install the thermostat with a NEW thermostat seal.
- Install the thermostat bolts.
- Install the coolant pipe, NEW seal (2), and fasteners (1 and 3). Refer to Radiator Outlet Pipe Replacement .
- Install the surge tank hose to the thermostat.
- Install the upper intake manifold with the lower intake manifold. Refer to Lower Intake Manifold Replacement .
- Fill the cooling system. Refer to Cooling System Draining and Filling .

Notice: Refer to Fastener Notice in the Preface section.
Tighten
Tighten the thermostat bolts to 10 N·m (89 lb in).

Engine Coolant Thermostat Replacement LS4
Special Tools
J 38185 Hose Clamp Pliers
Removal Procedure
- Remove the radiator air lower baffle and deflector. Refer to Radiator Air Lower Baffle and Deflector Replacement .
- Reposition the radiator inlet hose. Refer to Radiator Inlet Hose Replacement .
- Partially drain the cooling system. Refer to Cooling System Draining and Filling .
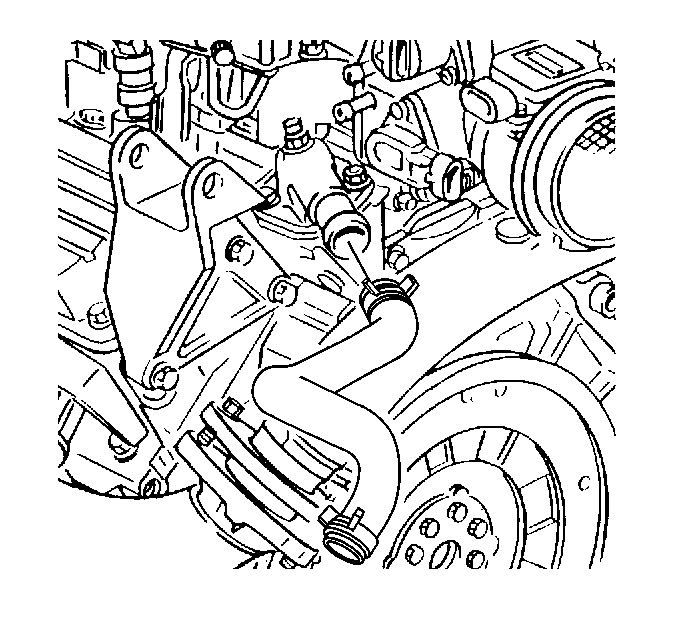
- Use the J 38185 in order to reposition the hose clamp from the water outlet housing.
- Remove the radiator inlet hose from the water outlet housing.
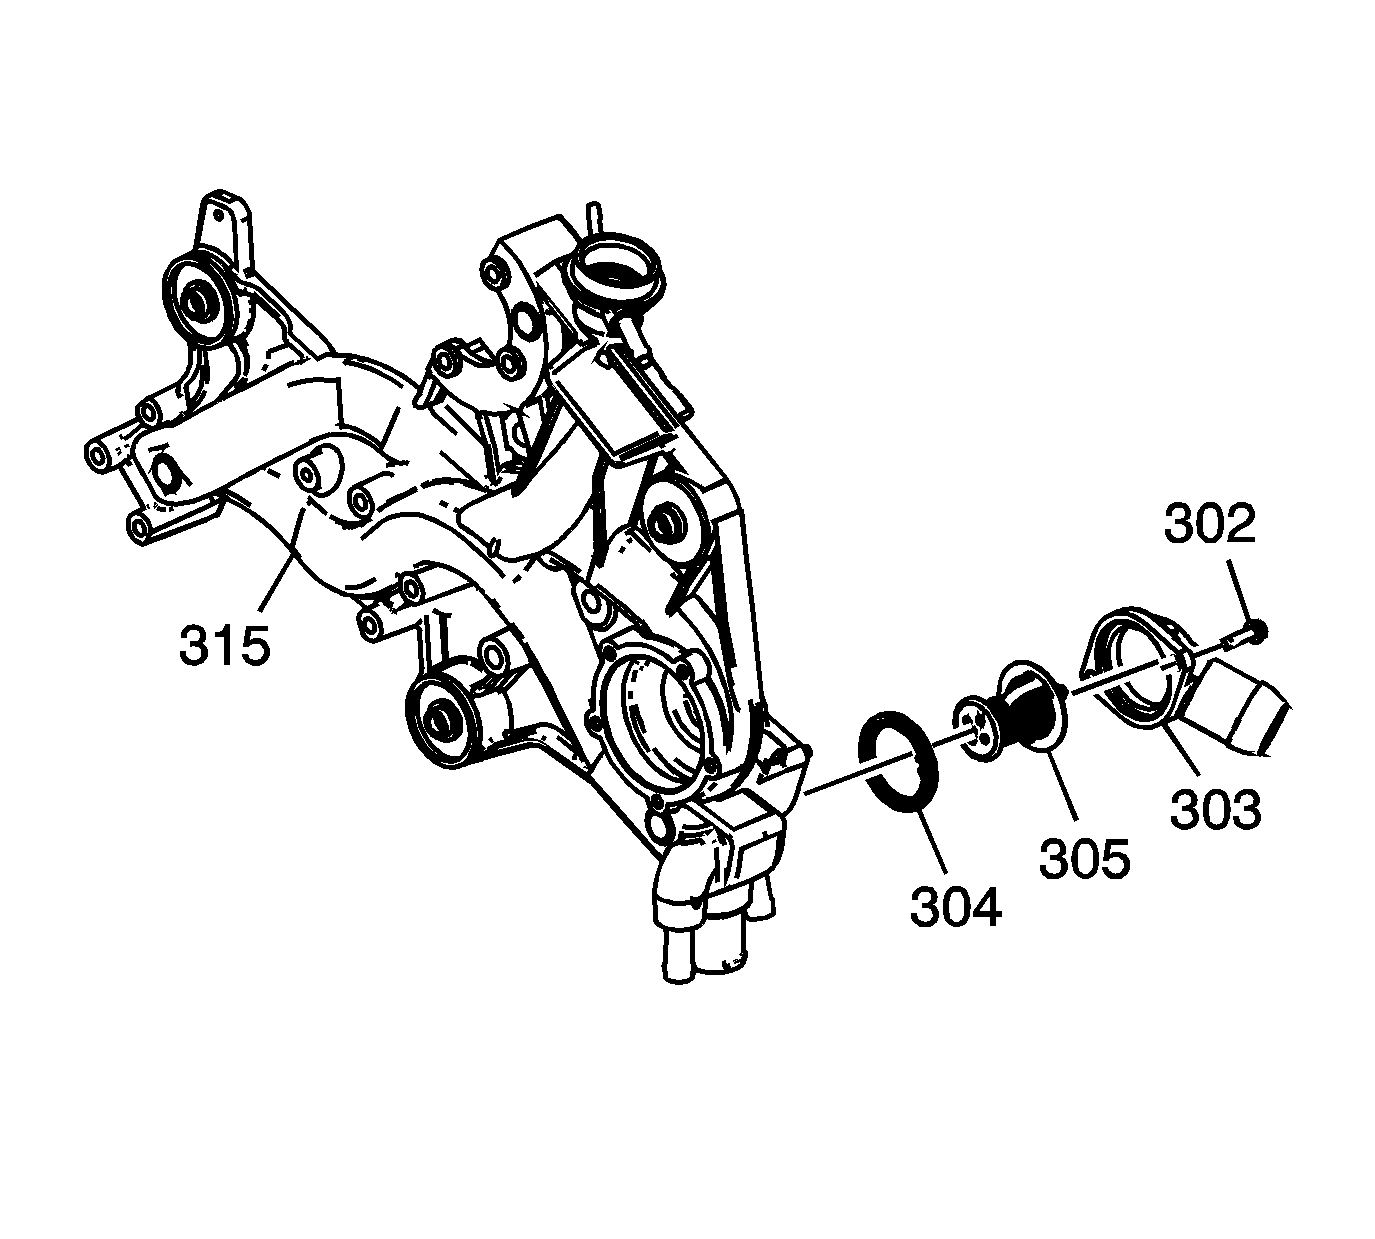
- Remove the water outlet housing bolts (302).
- Remove the water outlet housing (303) and O-ring seal (304).
- Remove the thermostat (305).
- Clean and inspect the water outlet housing O-ring seal mating surfaces.


Installation Procedure
Notice: DO NOT use cooling system seal tabs, or similar compounds, unless otherwise instructed. The use of cooling system seal tabs, or similar compounds, may restrict coolant flow through the passages of the cooling system or the engine components. Restricted coolant flow may cause engine overheating and/or damage to the cooling system or the engine components/assembly.
- Install the thermostat (305).
- Install the O-ring seal (304) and water outlet housing (303).
- Install the water outlet housing bolts (302).
- Install the radiator inlet hose to the water outlet housing.
- Use the J 38185 in order to reposition and install the hose clamp to the water outlet housing.
- Fill the cooling system. Refer to Cooling System Draining and Filling .
- Install the radiator inlet hose. Refer to Radiator Inlet Hose Replacement .
- Install the radiator air lower baffle and deflector. Refer to Radiator Air Lower Baffle and Deflector Replacement .

Notice: Use the correct fastener in the correct location. Replacement fasteners must be the correct part number for that application. Fasteners requiring replacement or fasteners requiring the use of thread locking compound or sealant are identified in the service procedure. Do not use paints, lubricants, or corrosion inhibitors on fasteners or fastener joint surfaces unless specified. These coatings affect fastener torque and joint clamping force and may damage the fastener. Use the correct tightening sequence and specifications when installing fasteners in order to avoid damage to parts and systems.
Tighten
Tighten the bolts to 15 N·m (11 lb ft).

Engine Coolant Thermostat Replacement RPOs L26/L32
Tools Required
J 38185 Hose Clamp Pliers
Removal Procedure
- Remove the fuel injector sight shield. Refer to Fuel Injector Sight Shield Replacement .
- Partially drain the cooling system. Refer to Cooling System Draining and Filling .
- Use the J 38185 in order to reposition the hose clamp from the water outlet housing.
- Remove the radiator inlet hose from the water outlet housing.
- Reposition the wiring harness from the water outlet housing stud.
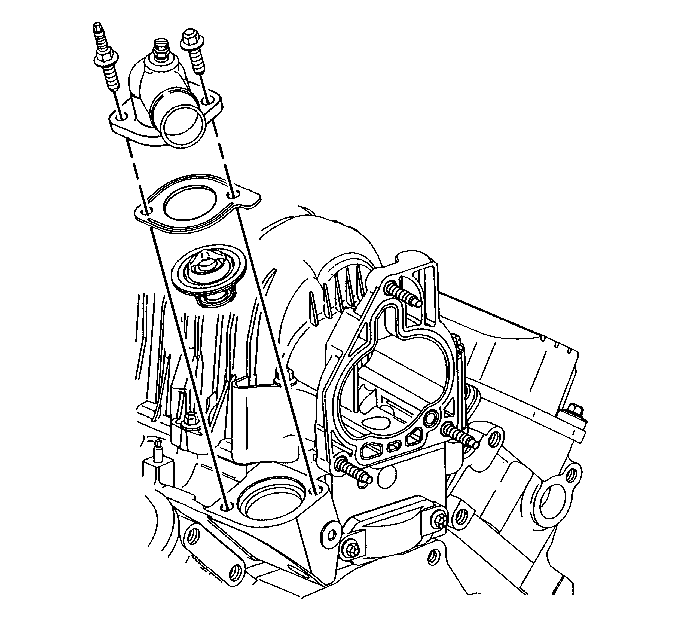
- Remove the water outlet housing bolt and the stud.
- Remove the water outlet housing and the gasket.
- Remove the thermostat.
- Clean and Inspect the water outlet housing gasket mating surfaces.


Installation Procedure
- Install the thermostat.
- Install the gasket and the water outlet housing.
- Install the water outlet housing bolt and the stud to the water outlet housing.
- Install the wiring harness to the water outlet housing stud.
- Install the radiator inlet hose to the water outlet housing.
- Use the J 38185 in order to reposition and install the hose clamp to the water outlet housing.
- Fill the cooling system. Refer to Cooling System Draining and Filling .
- Install the fuel injector sight shield. Refer to Fuel Injector Sight Shield Replacement .

Notice: Refer to Fastener Notice in the Preface section.
Tighten
Tighten the bolt and the stud to 27 N·m (20 lb ft).

