For 1990-2009 cars only
Tools Required
J 8062 Valve Spring Compressor - Head Off
- Clean the cylinder head valve spring shim area.
- Install the valves (228) into the proper location. Refer to Separating Parts .
- Install the valve stem oil seal (222).
- Install the valve spring (223).
- Install the valve spring cap (224).
- Compress the valve spring using the J 8062 .
- Install the valve stem keys.
- Measure the valve spring installed height using a ruler.
- Install the remaining valves, springs, and other components.
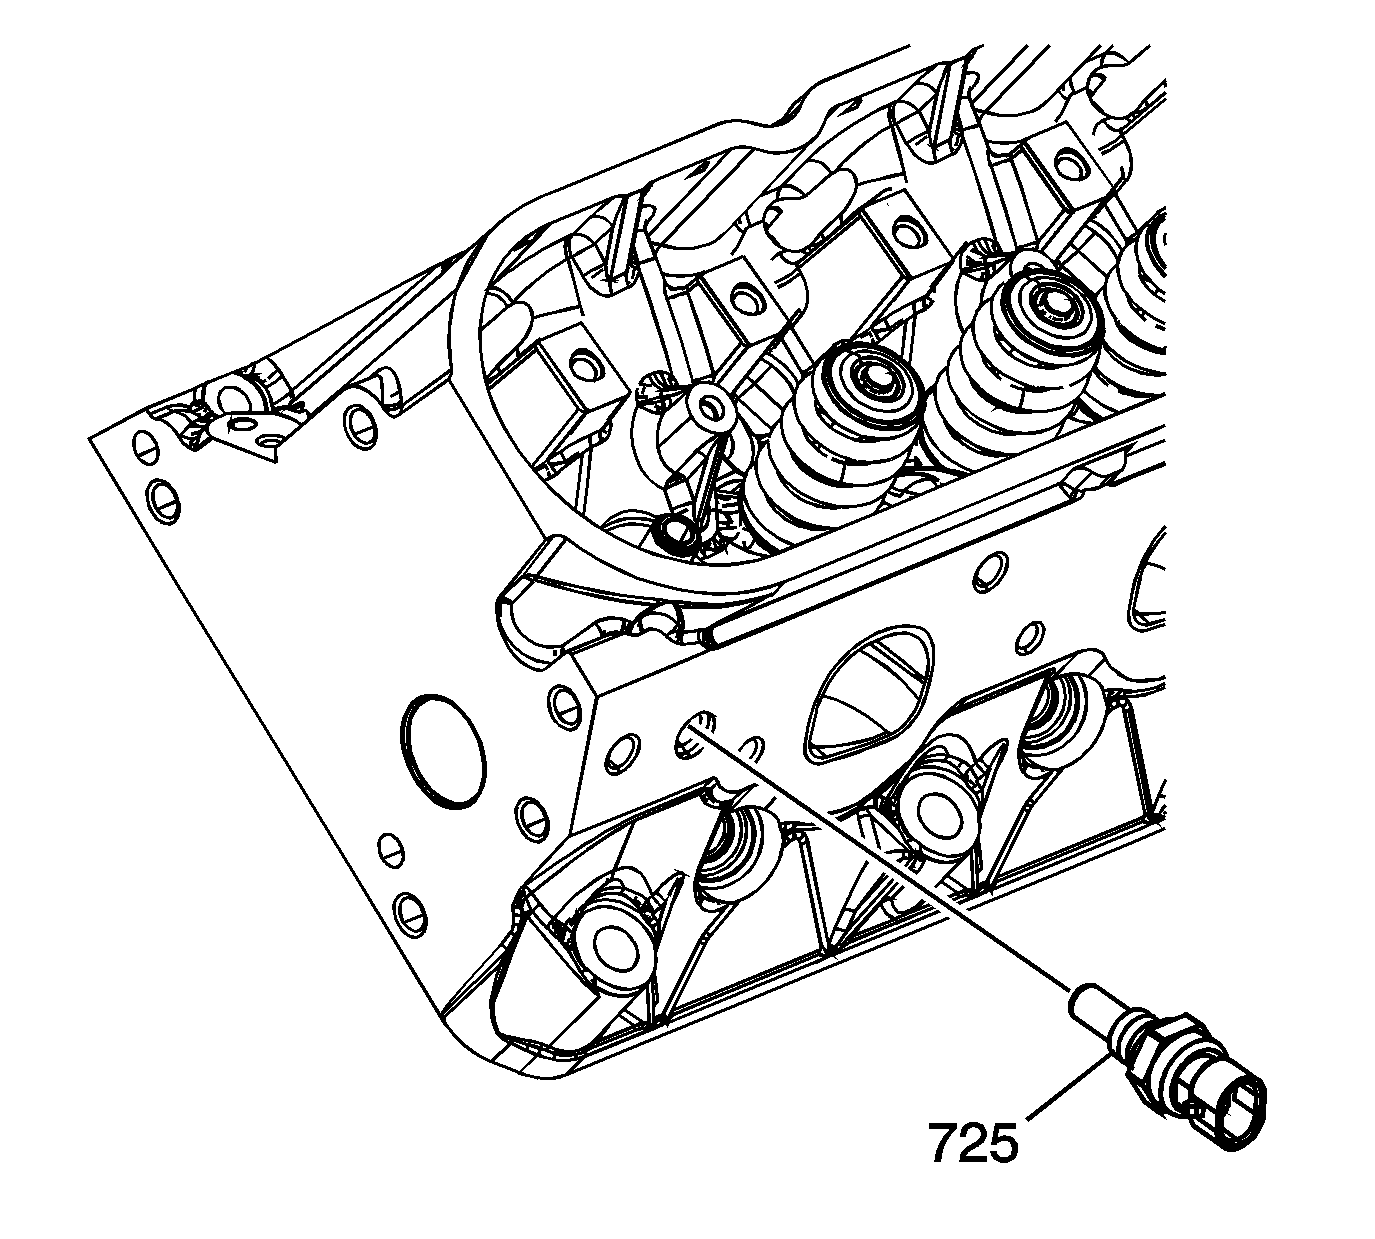
- Install sealant GM P/N 12346004 (Canadian P/N 10953480), or equivalent, to the threads of the coolant sensor.
- Install the coolant temperature sensor (725) into the left cylinder head.
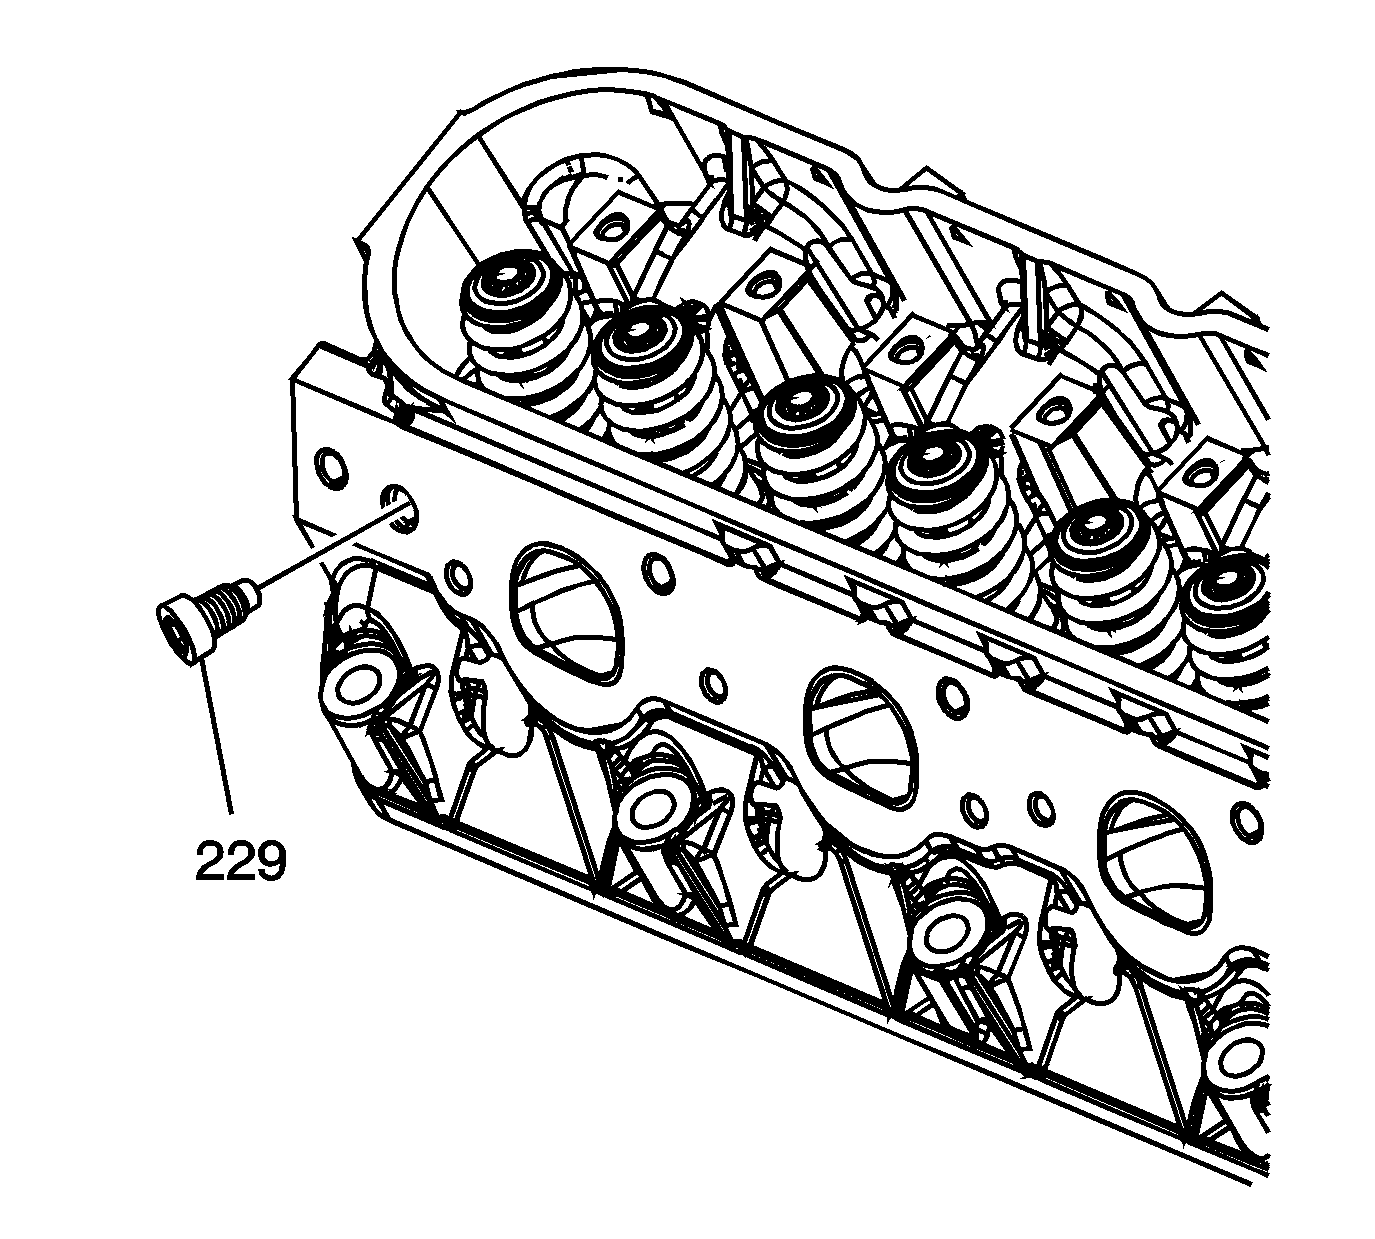
- Install threadlock GM P/N 12345382 (Canadian P/N 10953489), or equivalent, to the threads of the plug (229).
- Install the coolant plug to the right cylinder head.
- Apply threadlock GM P/N 12345382 (Canadian P/N 10953489), or equivalent, to the sides of the cylinder head core hole plugs (216).
- Install the core hole plugs into the cylinder head.
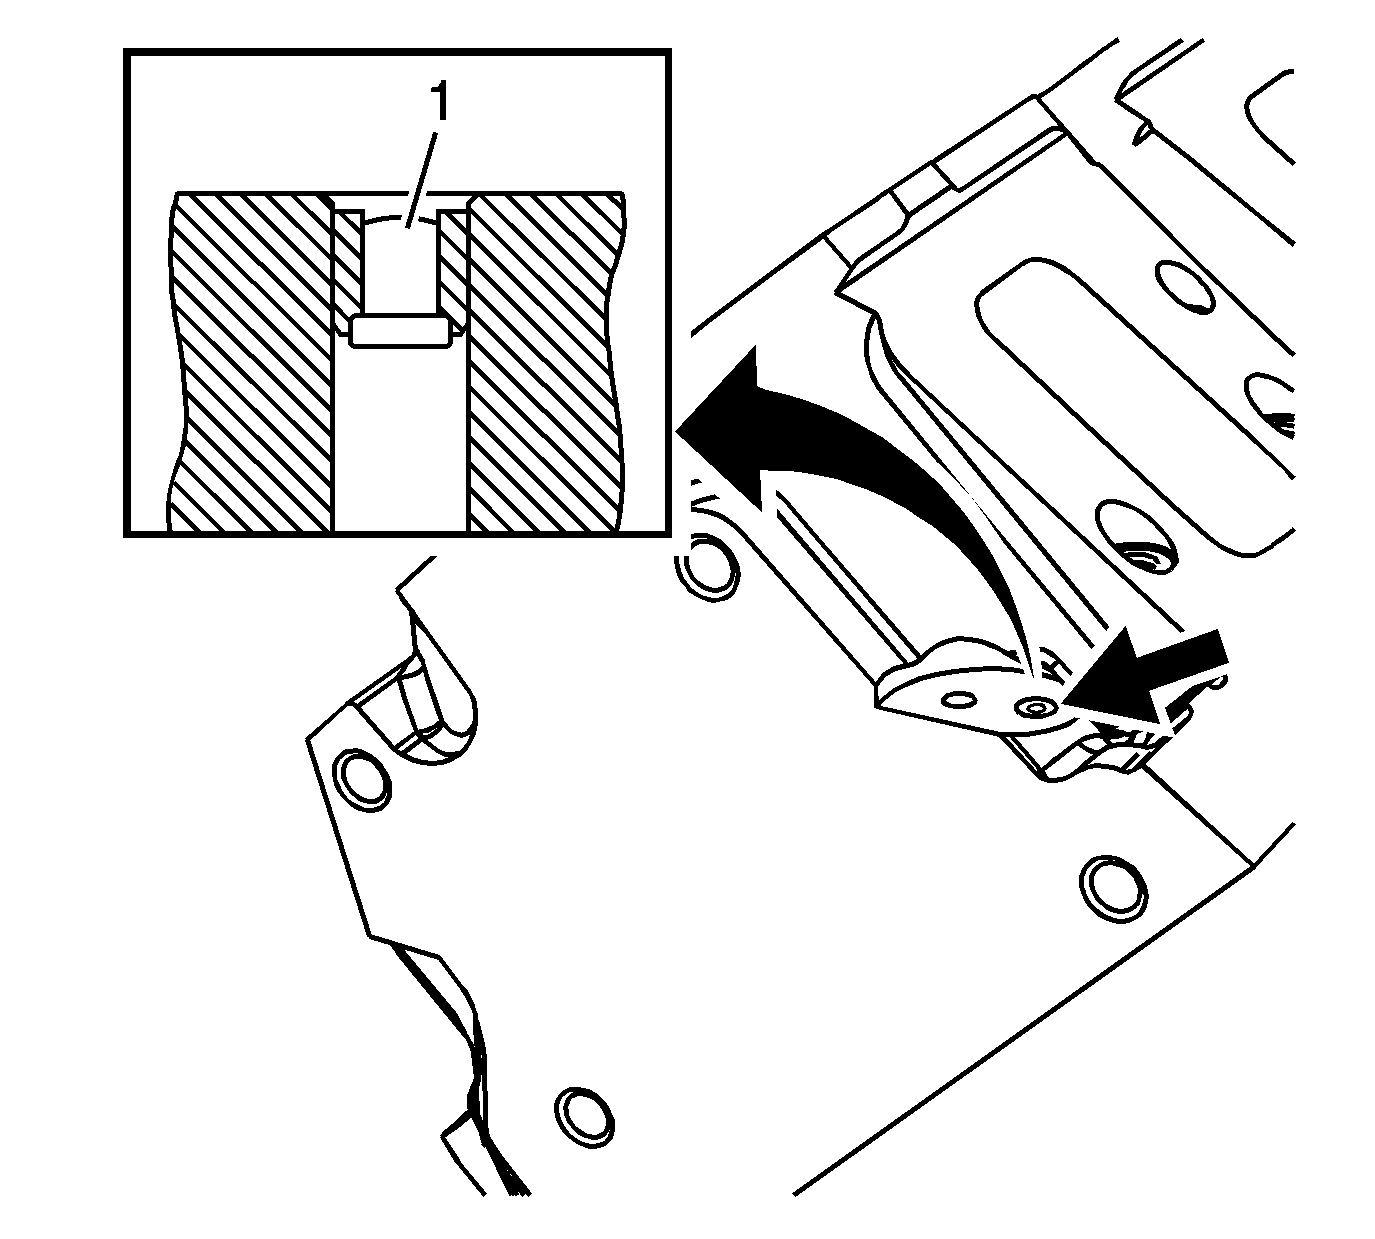
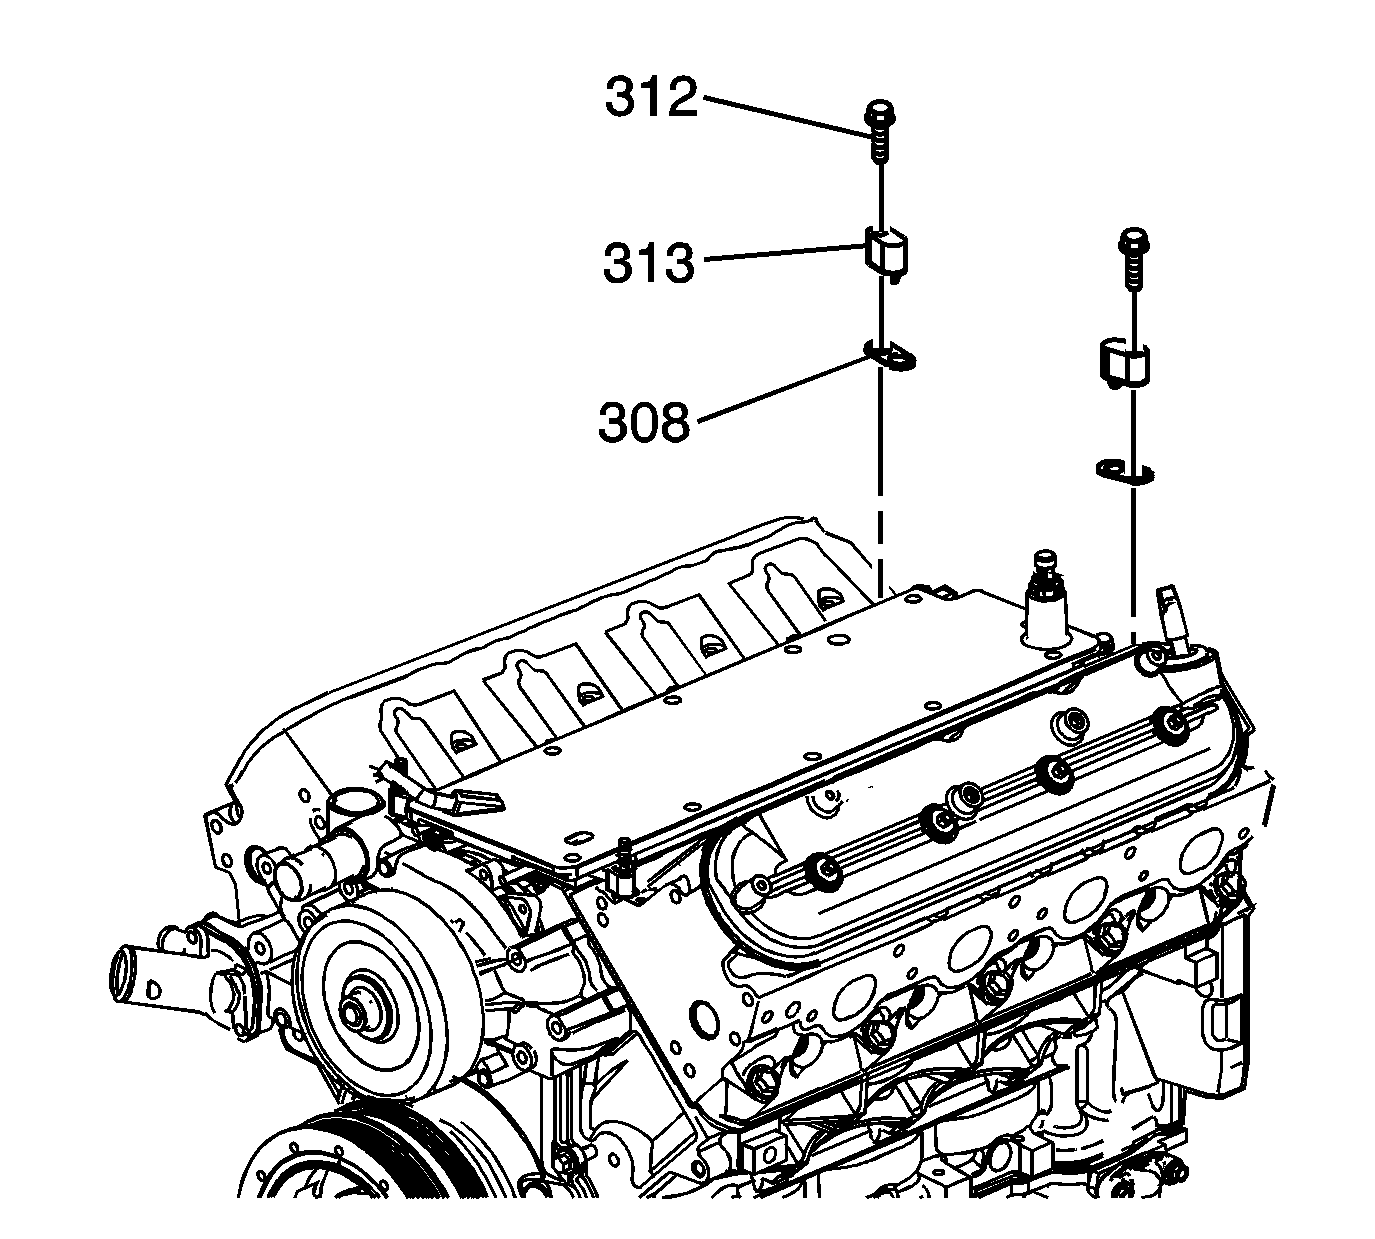
- Second design applications use a rivet-type plug at the top rear coolant passage of each cylinder head. If service of a leaking plug is required, it is necessary to remove the cylinder head from the engine to properly remove the plug.
- If plug removal is required, install a first design coolant air bleed cover and bolt to complete the repair.
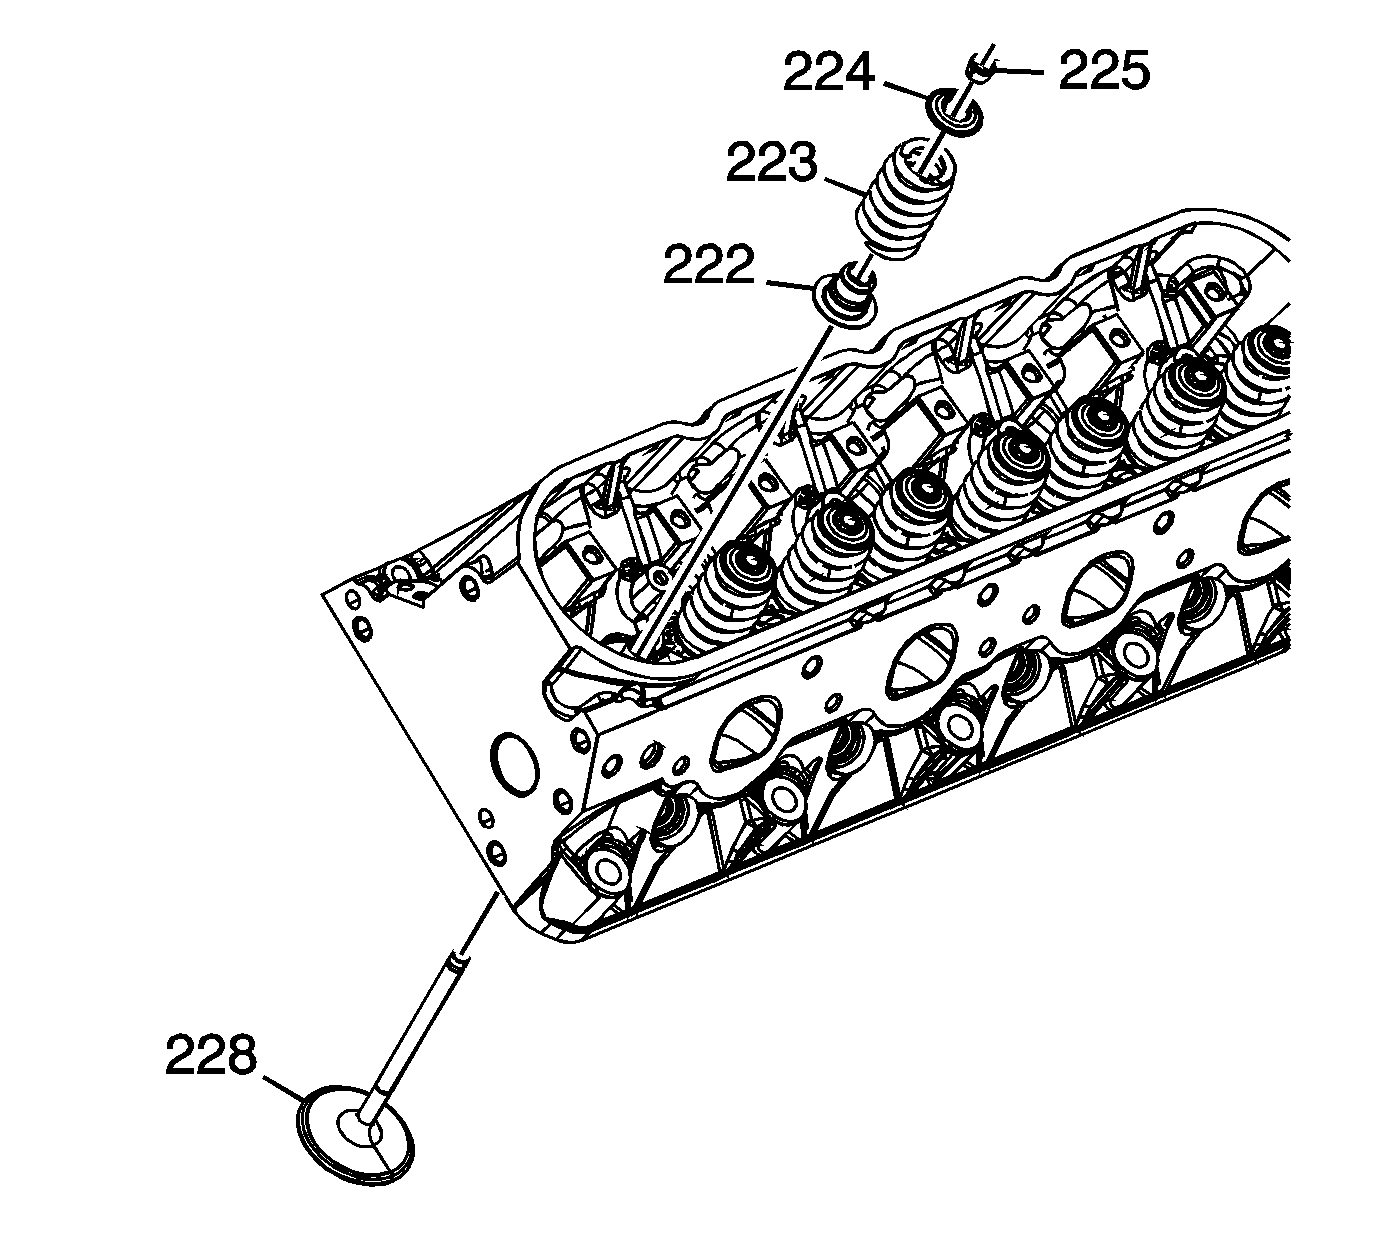
Important: When using the valves and related components again, install the parts to their original location.
Important: The valve stem oil seal alignment and position on the valve guide is critical.
An improperly installed valve stem oil seal may lead to excessive oil consumption, increased vehicle emissions, or component damage.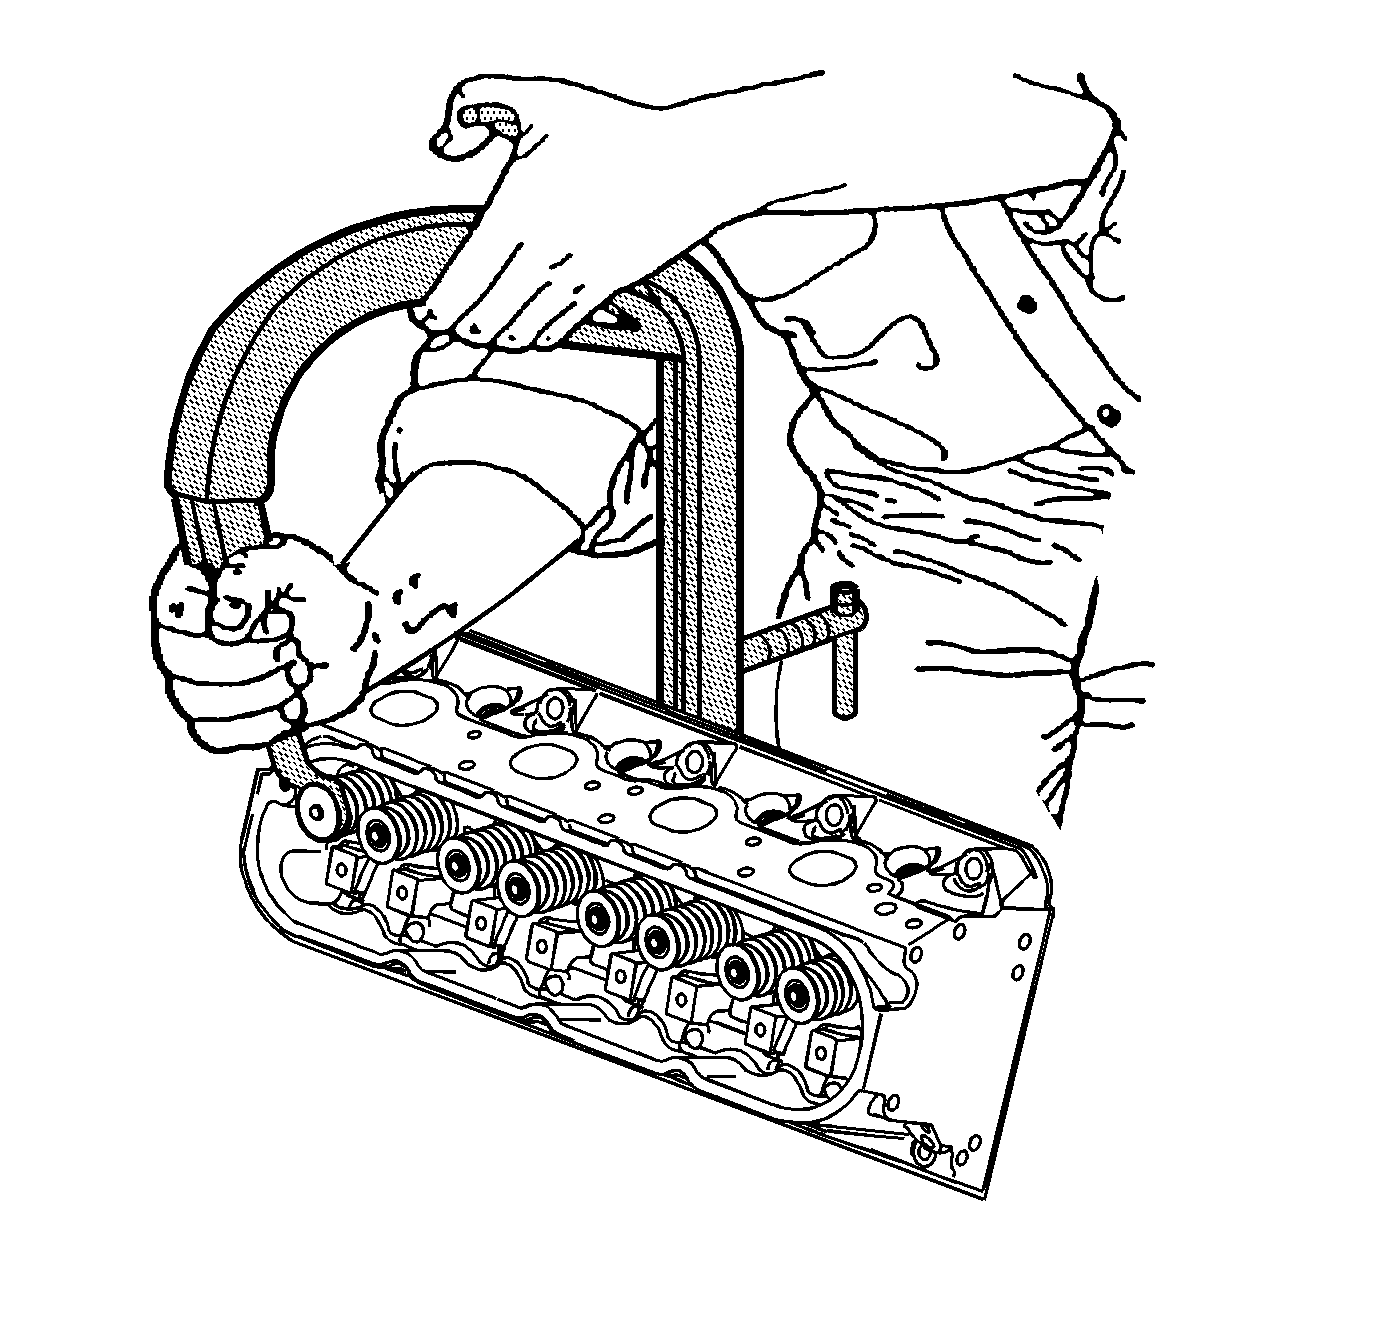
| 7.1. | Use grease to hold the keys in place and remove the J 8062 . |
| 7.2. | Ensure the keys seat properly in the groove of the valve stem. |
| 7.3. | Tap the end to the valve stem with a plastic faced hammer to seat the keys, if necessary. |
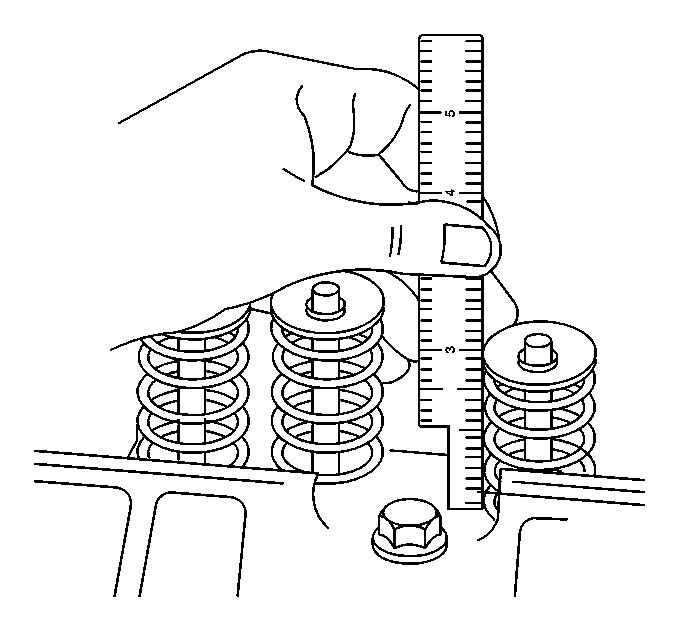
Measure from the base of the valve spring to the top of the valve spring.
Specification
| • | If the installed height exceeds 46.25 mm (1.82 in), install a valve spring shim of approximately 0.5 mm (0.02 in) thick. |
| • | Do not shim the valve spring to obtain less than the specified height. |
| Do not assemble the components without a spring shim on the cylinder head. |
Notice: Refer to Fastener Notice in the Preface section.
Tighten
Tighten the coolant temperature sensor to 20 N·m (15 lb ft).
Tighten
Tighten the coolant plug to 20 N·m (15 lb ft).
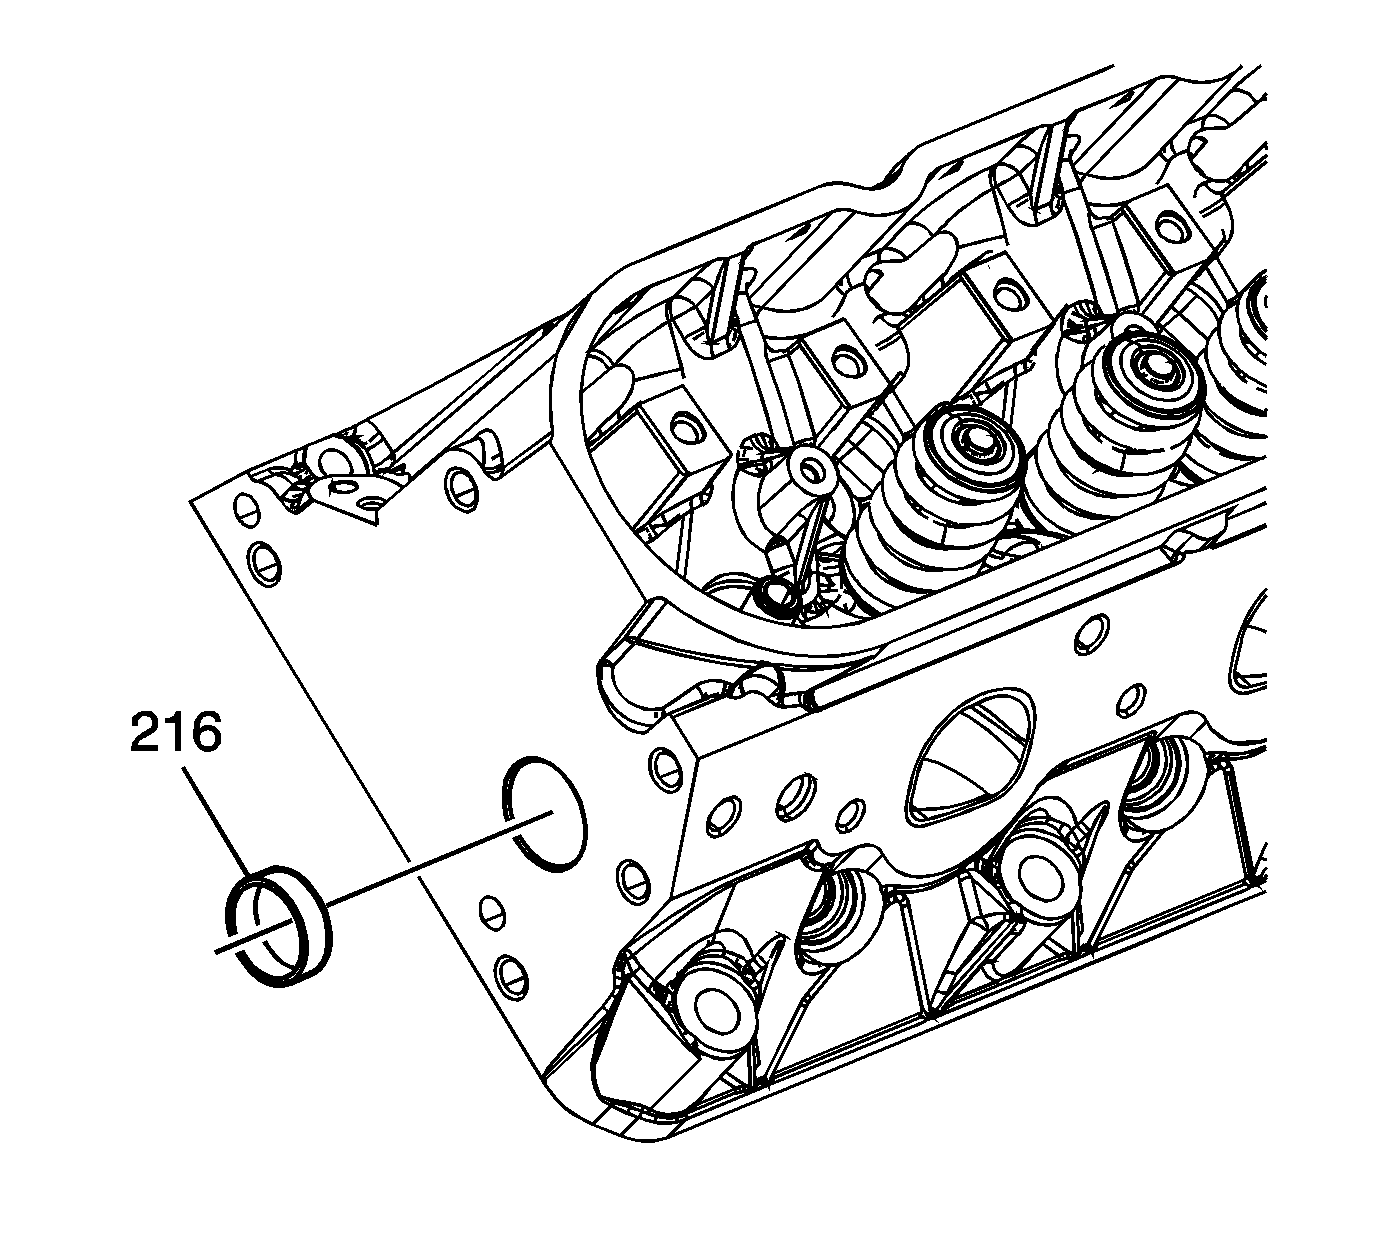
A properly installed plug should be installed 2.5 mm (0.1 in) below the end face of the head.
